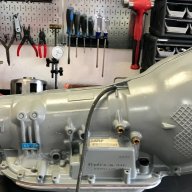
my last 6L80 post :(

Disclaimer: Links on this page pointing to Amazon, eBay and other sites may include affiliate code. If you click them and make a purchase, we may earn a small commission.

Just Fishing

Can't fix stupid
Joined
Aug 30, 2020
Posts
4,546
Reaction score
10,225
Location
Utah
Do you have any pics of this? Perhaps I’m misunderstanding but are you saying you put electrical tape on the inside diameter of a bushing?

Here we go,
I had to go out to my bushing set, i just happened to have a spare bushing + a few of the drivers that still had the electrical tape installed. :cool:

I hope this makes sense.
1688430359512.png


Tape used to make the bushing driver fit the bushing tighter, preventing it from deforming when driving in.

ETA: of course the tape does not stay with the bushing in any way.
 

Just Fishing

Can't fix stupid
Joined
Aug 30, 2020
Posts
4,546
Reaction score
10,225
Location
Utah
Not concerned about any of the above.

Only what you said about putting electrical tape on the bushings. Here's how im interpreting what you said:

You thought there was too much clearance between the Id of the bushing and OD of it's journal in whichever part the bushing was installed. So you elected to put electrical tape on the inner diameter of the bushing to reduce the clearance. And you installed these bushings with tape on them into the transmission.

Is that correct or no?

I suspect im simply misinterpreting what you're saying but want to be sure.

That makes it sound like I left the tape on the bushings? :roflbow:
I hope the image above makes sense.
also see this bushing in the background, it still has the tape on it.
1688431055200.png


Used a razor blade to perfectly trim this shit too, making sure this crap went in as square as possible.
 

Just Fishing

Can't fix stupid
Joined
Aug 30, 2020
Posts
4,546
Reaction score
10,225
Location
Utah
and the driving surface of the other bushing has 0 tape since that would mess with the driver and could mess with the mating of the two surfaces between the different bushing driver discs.

the overlap you see where it hangs off the end is due to me installing that tape perfectly with the taper on the bushing driver, so the two driver halfs are all nekid when they get it on. :boobs:
 
Last edited:

Just Fishing

Can't fix stupid
Joined
Aug 30, 2020
Posts
4,546
Reaction score
10,225
Location
Utah
Here is an example of a bushing that I used tape on during installation.

The rear case bushing, I also spent tons of time researching that silly oil feed hole.
Note the original blue marking of the pass through in the case.
1688431387759.png


Confusing as fk right there. :secret:
Oil feed hole in bushing suggests oil needs to pass through that right?

What I found = not at all.
Just generic stock that had the feed hole for another transmission, factory says it should not have a feed hole that matches up in the case since the oil feed comes from the output shaft.

I spent hours and hours confirming that shit.
conflicting info all over.

And I ended up installing the bushing in the exact same spot as the orignal bushing.
 

NickTransmissions

Sin City
Supporting Member
Joined
Mar 9, 2023
Posts
1,381
Reaction score
3,543
Location
The transmission bench
@Just Fishing

Here's what you wrote:

The best installed bushings were ones that I needed to make up some missing space for the inside of the bushing with electrical tape.

Here's how you could have wrote it that would have made it clearer:

The best installed bushings were ones that I needed to make up some missing space between the inside of the bushing and outside of the bushing driver with electrical tape.

Figured I was missing something as I was thinking that there was no way you could have thought it was a good idea to tape the inside of a bushing and install it like that but that's how it was written.

Nice work nonetheless!
 

Just Fishing

Can't fix stupid
Joined
Aug 30, 2020
Posts
4,546
Reaction score
10,225
Location
Utah
@Just Fishing

Here's what you wrote:

The best installed bushings were ones that I needed to make up some missing space for the inside of the bushing with electrical tape.

Here's how you could have wrote it that would have made it clearer:

The best installed bushings were ones that I needed to make up some missing space between the inside of the bushing and outside of the bushing driver with electrical tape.

Figured I was missing something as I was thinking that there was no way you could have thought it was a good idea to tape the inside of a bushing and install it like that but that's how it was written.

Nice work nonetheless!

Typical me right there. :favorites37:
 
Last edited:

Just Fishing

Can't fix stupid
Joined
Aug 30, 2020
Posts
4,546
Reaction score
10,225
Location
Utah
I'll also note that the bushings that have tape on them still, that tape has "changed" having transmission fluid on them.
it feels like that cheap crap you buy at the dollar store now, got all stiff *insert se xual reference here*.
 

Just Fishing

Can't fix stupid
Joined
Aug 30, 2020
Posts
4,546
Reaction score
10,225
Location
Utah
And thanks, I found the 6l80 to be an absolute pleasure to work on.
Part prices sucked, and getting the silly selective snap rings was a bit of a pita, a little more confusing than the pump rotor stuff that was pretty straightforward in comparison. ;)
 

NickTransmissions

Sin City
Supporting Member
Joined
Mar 9, 2023
Posts
1,381
Reaction score
3,543
Location
The transmission bench
And thanks, I found the 6l80 to be an absolute pleasure to work on.
Part prices sucked, and getting the silly selective snap rings was a bit of a pita, a little more confusing than the pump rotor stuff that was pretty straightforward in comparison. ;)
Yep, its definitely one of the easier units to work on, especially for technically inclined DYIers that are willing to make the investment in tools and time. In most cases, the tooling cost is equivalent to the rebuild labor cost so the tools pay for themselves immediately.

By doing this yourself, you've completely eliminated a huge dependency on an outside source in what is arguably the least transparent sub-sector in the auto repair space. That's peace of mind.
 

NickTransmissions

Sin City
Supporting Member
Joined
Mar 9, 2023
Posts
1,381
Reaction score
3,543
Location
The transmission bench
@Just Fishing - Here's another tid-bit you may not have known:

The 6L family as well as the Ford 6R family of transmissions are all direct decendents of the German ZF6HP26, which both GM and Ford came to production licensing agreements with ZF to produce for their respective intended car and truck/suv models/sub-models.

So now that you're familiar with the 6L, you'd have no problem rebuilding any Ford 6R (6R60,80,140) or ZF6 series transmission. There's still some differences but the case and subassembly architecture is largely the same.
 
Last edited:

alpha_omega

Full Access Member
Joined
Mar 15, 2017
Posts
987
Reaction score
1,739
Location
Michigan
@Just Fishing

Here's what you wrote:

The best installed bushings were ones that I needed to make up some missing space for the inside of the bushing with electrical tape.

Here's how you could have wrote it that would have made it clearer:

The best installed bushings were ones that I needed to make up some missing space between the inside of the bushing and outside of the bushing driver with electrical tape.

Figured I was missing something as I was thinking that there was no way you could have thought it was a good idea to tape the inside of a bushing and install it like that but that's how it was written.

Nice work nonetheless!
I thought the exact same thing when I read it. I was like, come on man…I know that YOU know better.
 

Just Fishing

Can't fix stupid
Joined
Aug 30, 2020
Posts
4,546
Reaction score
10,225
Location
Utah
I'll add one more little tidbit into my adventure with the 6l80 rebuild.
I ran into an issue that is somewhat well documented with rebuilders.
Apparently a batch of 6L90 1-2-3-4 drums went out with the 6L80 stickers.

That confused the hell out of me when trying to do endplay checks.
I couldn't get the stupid pump to seat!!

Then I remembered the note when watching the mass amount of youtube videos where one of the builders noted that as an "FYI" and to always compare the old part to the new one.

Sure enough, set the new drum next to the old one and I could see the height difference.
the 6l90 has an extra clutch plate or two, and the case is a little longer in that aspect.

In a way it sort of worked itself out,
I had issues with the selective snap rings, and the 2-6 clutch was out of spec.
And I couldn't source one that called out 2-6?!
and the instructions state that if the clutch clearances are wrong, then you assembled it incorrectly and to do it again. :bs:
I disassembled and reassembled several times, and it checked out! :chair:

So, I ended up using a snap ring from the 1-2-3-4 drum that fit perfectly (and with much better tension), that brought it right into the needed clearance spec.

doing a little mixing and matching I also got that 1-2-3-4 clutches nice and consistent with the rest of the build.


I also noted one youtube video where they ran into a broken wave plate in the 2-6, I had that in my transmission.
No symptoms that I noticed, but it looked like a ticking time bomb if those two broken pieces happened to bind up and fry the clutch.

Picture I posted in my build thread ( https://www.tahoeyukonforum.com/threads/just-fishings-09-tahoe-build-thread.125403/post-1666200 )

1688666428578.png
 

NickTransmissions

Sin City
Supporting Member
Joined
Mar 9, 2023
Posts
1,381
Reaction score
3,543
Location
The transmission bench
I'll add one more little tidbit into my adventure with the 6l80 rebuild.
I ran into an issue that is somewhat well documented with rebuilders.
Apparently a batch of 6L90 1-2-3-4 drums went out with the 6L80 stickers.
That's one of the reasons I always have the existing drum re-welded. I recall hearing that a while back from a builder buddy of mine but largely forgot about it until now.

Wonder if you initially mixed up the 2-6 clutch snap ring with another one as they will always yield .050" + or - .001 or so...otherwise, not sure why your 2-6 would have been out of spec unless the piston was too tall or short, new clutches and steels or you installed the belville return spring upside down.

Did you replace all the cushion and belville plates?
 
Last edited:

Just Fishing

Can't fix stupid
Joined
Aug 30, 2020
Posts
4,546
Reaction score
10,225
Location
Utah
That's one of the reasons I always have the existing drum re-welded. I recall hearing that a while back from a builder buddy of mine but largely forgot about it until now.

Wonder if you initially mixed up the 2-6 clutch snap ring with another one as they will always yield .050" + or - .001 or so...otherwise, not sure why your 2-6 would have been out of spec unless the piston was too tall or short, new clutches and steels or you installed the belville return spring upside down.

Did you replace all the cushion and belville plates?

I'm 100% sure I didn't mix them up, I processed each section one by one and kept very organized.

I even kept the plates and clutches in the correct order and the same direction as I worked.
I also don't know if that transmission had been torn down before or not, I assume not but it had a lot of owners before me. :secret:

As for the plates, I replaced everything in the 2-6 clutch since the broken part, but I had issues sourcing some things.
I did not touch the big heavy plates at the top.

That 2-6 clutch, I also put it back together with the original steels, installed things every possible direction in an attempt to get it to clearance correctly.
Super weird!

This was also a proactive rebuild, so nothing actually failed in that transmission.
Torn down just because I had a restricted cooler line and a questionable thrust bearing failure in part due to that restricted cooler.
 

NickTransmissions

Sin City
Supporting Member
Joined
Mar 9, 2023
Posts
1,381
Reaction score
3,543
Location
The transmission bench
I'm 100% sure I didn't mix them up, I processed each section one by one and kept very organized.

I even kept the plates and clutches in the correct order and the same direction as I worked.
I also don't know if that transmission had been torn down before or not, I assume not but it had a lot of owners before me. :secret:

As for the plates, I replaced everything in the 2-6 clutch since the broken part, but I had issues sourcing some things.
I did not touch the big heavy plates at the top.

That 2-6 clutch, I also put it back together with the original steels, installed things every possible direction in an attempt to get it to clearance correctly.
Super weird!

This was also a proactive rebuild, so nothing actually failed in that transmission.
Torn down just because I had a restricted cooler line and a questionable thrust bearing failure in part due to that restricted cooler.
Yea, odd...Not something I have encountered (yet) in the 6L transmissions.

Did you measure the thickness of the new frictions?
Perhaps one or two were out of spec (too thick or thin) but not easily noticeable by eye unless you're measuring each one or you happen to notice it when handling them.

Anyway, glad it worked out ok in the end.
 

Just Fishing

Can't fix stupid
Joined
Aug 30, 2020
Posts
4,546
Reaction score
10,225
Location
Utah
Yea, odd...Not something I have encountered (yet) in the 6L transmissions.

Did you measure the thickness of the new frictions?
Perhaps one or two were out of spec (too thick or thin) but not easily noticeable by eye unless you're measuring each one or you happen to notice it when handling them.

Anyway, glad it worked out ok in the end.

Yeah measured, scratched my head, and measured again.

Also, that 2-6 clutch,
It was off just a little.
Like if there was a thicker/selective steel or clutch, that would have fixed the clearance issue.
Just It's just odd.

Clearances were checked using a dial indicator, and compressed air as well, so maybe that was part of it.

One thing I didn't check was by reinstalling the old piston.
I did use aftermarkets (blue).

I don't recall if I measured those or not
 

NickTransmissions

Sin City
Supporting Member
Joined
Mar 9, 2023
Posts
1,381
Reaction score
3,543
Location
The transmission bench
Yeah measured, scratched my head, and measured again.

Also, that 2-6 clutch,
It was off just a little.
Like if there was a thicker/selective steel or clutch, that would have fixed the clearance issue.
Just It's just odd.

Clearances were checked using a dial indicator, and compressed air as well, so maybe that was part of it.

One thing I didn't check was by reinstalling the old piston.
I did use aftermarkets (blue).

I don't recall if I measured those or not
Now that you mention it, the aftermarket piston was probably the problem and what i initially thought. I use National brand pistons which the OEM manufacturer for all GM transmissions since at least the 90s when the bonded steel/rubber pistons first appeared in transmissions.

Nope, you're clearance check method is spot on. I also check clearances with an indicator and air (if you've watched any of my vids where i check clutch pack clearance, that's how I show folks how to do it). The most accurate method IMO.
 

Forum statistics

Threads
138,092
Posts
1,998,722
Members
103,016
Latest member
BadDaddy2003
Back
Top