Running wires to rear of 2013 Tahoe for dashcam

Disclaimer: Links on this page pointing to Amazon, eBay and other sites may include affiliate code. If you click them and make a purchase, we may earn a small commission.

BooBoo

TYF Newbie
Joined
Jun 13, 2021
Posts
24
Reaction score
8
I'm afraid that this may be a stupid question, but I have a new-to-me 2013 Tahoe LT and am afraid of causing damage to by not knowing what I'm doing...

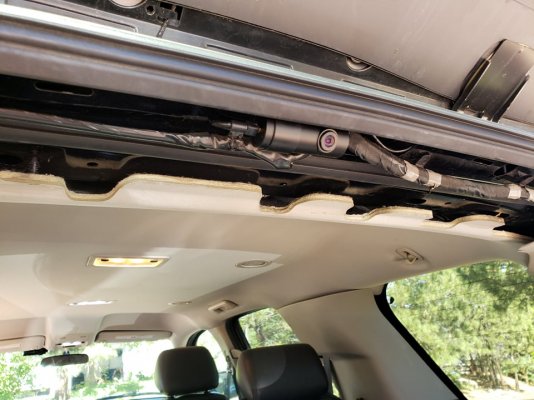
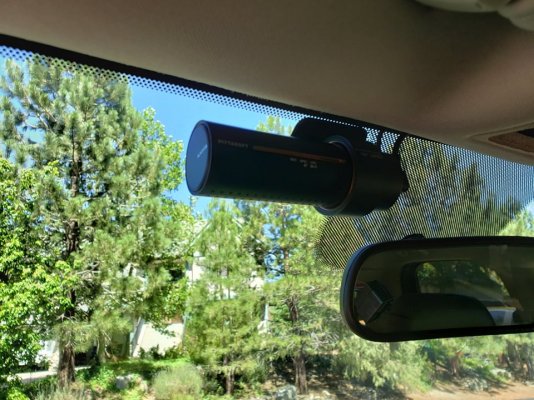
I'd like to run wires to the back window for a rear dashcam and assume that the headliner is the best way to get it there hidden. I have tentatively pried at the edges of the headliner, but it seems to be rock-solid and (again) I don't want to damage it by fumbling around.

I've googled this and found videos that assume you already know how to run the wiring, so I wonder if anybody might know the steps to get this done or a specific video that shows the process?

Thanks for any help!
 

Sparksalot

Elite Member
Joined
Sep 20, 2020
Posts
6,775
Reaction score
20,587
Location
Bastrop County, Texas
You have to remove the trim at the roof pillars to do it, then the headliner will drop readily.

id be tempted to route the wiring below the door sills on the driver side. Getting below the rear wheelwell trim is easy enough, plus you have the access point for the jack. You still end up pulling the D pillar trim, but it’s pretty simple.
 
Joined
Apr 11, 2018
Posts
7,124
Reaction score
14,376
Location
St. Louis
I have a dual camera dashcam that uses a thick usb cable for the rear camera. I ran mine on the passenger side because I've heard that it may interfere with the key fob/tpms receiver which is on drivers side in the rear wheel/hatch area.

I ran it from the front cam which is located behind the rear view mirror, up to the headliner behind the windshield which was easy to tuck into, down the A-pillar (make sure you run it BEHIND the airbag), down under the door sills and under the side panels where the carpet runs under them, into the back cargo area then back up the D-pillar and across the top trim piece.

The way my rear camera is, I would've needed a spacer to hang it down low enough to see out of the rear glass from that trim piece, so I ran the cable through the rubber boot that has the wires going to the hatch. From there I just filed a small half circle in the plastic trim for the cable to come out of and run to the camera which is mounted to the plastic window trim.

This way, there's no extra cord looped hanging down to take up slack when liftgate is opened and doesn't get in the way when the liftgate is up, it goes up with the lifgate. It only hangs down a bit into the opening when the glass is opened, but I hardly ever open it. Been installed like this for a bit over 2 years and never in the way and actually forget that it's there most of the time.

Pick with liftgate open.....

20190610_212042.jpg

Pic with just hatch glass open...

20190610_212149.jpg
 
Last edited:
OP
OP
BooBoo

BooBoo

TYF Newbie
Joined
Jun 13, 2021
Posts
24
Reaction score
8
You have to remove the trim at the roof pillars to do it, then the headliner will drop readily.

id be tempted to route the wiring below the door sills on the driver side. Getting below the rear wheelwell trim is easy enough, plus you have the access point for the jack. You still end up pulling the D pillar trim, but it’s pretty simple.
Thank you!
 
OP
OP
BooBoo

BooBoo

TYF Newbie
Joined
Jun 13, 2021
Posts
24
Reaction score
8
I have a dual camera dashcam that uses a thick usb cable for the rear camera. I ran mine on the passenger side because I've heard that it may interfere with the key fob/tpms receiver which is on drivers side in the rear wheel/hatch area.

I ran it from the front cam which is located behind the rear view mirror, up to the headliner behind the windshield which was easy to tuck into, down the A-pillar (make sure you run it BEHIND the airbag), down under the door sills and under the side panels where the carpet runs under them, into the back cargo area then back up the D-pillar and across the top trim piece.

The way my rear camera is, I would've needed a spacer to hang it down low enough to see out of the rear glass from that trim piece, so I ran the cable through the rubber boot that has the wires going to the hatch. From there I just filed a small half circle in the plastic trim for the cable to come out of and run to the camera which is mounted to the plastic window trim.

This way, there's no extra cord looped hanging down to take up slack when liftgate is opened and doesn't get in the way when the liftgate is up, it goes up with the lifgate. It only hangs down a bit into the opening when the glass is opened, but I hardly ever open it. Been installed like this for a bit over 2 years and never in the way and actually forget that it's there most of the time.

Pick with liftgate open.....

View attachment 346950

Pic with just hatch glass open...

View attachment 346951
Thank you, that's perfect. I'm still working on which Brand & Model to get - may I ask what you bought?
 
Joined
Apr 11, 2018
Posts
7,124
Reaction score
14,376
Location
St. Louis
Thank you, that's perfect. I'm still working on which Brand & Model to get - may I ask what you bought?
I have a Viofo A129 Duo. I've had it a couple of years and there's newer models out, like 4k ones now.

To run the cable the way I did, it was easier, but took more cable. My camera came with a 6m cable and I ended up buying the 8m cable they sell for the rear camera and I had a couple feet left over that I coiled up in the passenger side of the dash where the panel pops off by the door. I think if my Yukon wasn't the XL the standard cable would've worked
 
OP
OP
BooBoo

BooBoo

TYF Newbie
Joined
Jun 13, 2021
Posts
24
Reaction score
8
I have a Viofo A129 Duo. I've had it a couple of years and there's newer models out, like 4k ones now.

To run the cable the way I did, it was easier, but took more cable. My camera came with a 6m cable and I ended up buying the 8m cable they sell for the rear camera and I had a couple feet left over that I coiled up in the passenger side of the dash where the panel pops off by the door. I think if my Yukon wasn't the XL the standard cable would've worked
Thank you AGAIN! I was thinking about a few, but apparently with many you need an app and the app ratings are abysmal.
 

Shackman7878

Full Access Member
Joined
Oct 17, 2020
Posts
142
Reaction score
184
Location
San Bernardino
I am running the Blackvue DR900X-2CH, Ran the power wire to a fuse in the side dash fuse block the, Acc I had to run a wire from the engine bay fuse block to inside the dash make sure on the A pillar to run the wire behind the airbag. Ran the rear camera wire through the headliner easy to do when when you remove the dome lights I used romex ground wire with electrical tape. Only Hard part was running through the rubber boot on the deck lid.
 

Attachments

  • 200519658_339779070872188_705485309923694617_n.jpg
    200519658_339779070872188_705485309923694617_n.jpg
    103.4 KB · Views: 39
  • 207166331_337811404508598_2752512464638550631_n.jpg
    207166331_337811404508598_2752512464638550631_n.jpg
    149.7 KB · Views: 46
Joined
Apr 11, 2018
Posts
7,124
Reaction score
14,376
Location
St. Louis
Speaking of constant power, accessory power, retained accessory power (Rap), and ground, all that can be found in the upfitter box under the dash to the left of the brake pedal. It's about a 4"x4" box with a black plastic cover over it held on with a Christmas tree style panel fastener in the middle.

There's a Pic floating around here somewhere that shows what connectors/pins do what.

EDIT: here's a link to a thread on this forum with some pics of the upfitter box

 
Last edited:
OP
OP
BooBoo

BooBoo

TYF Newbie
Joined
Jun 13, 2021
Posts
24
Reaction score
8
I am running the Blackvue DR900X-2CH, Ran the power wire to a fuse in the side dash fuse block the, Acc I had to run a wire from the engine bay fuse block to inside the dash make sure on the A pillar to run the wire behind the airbag. Ran the rear camera wire through the headliner easy to do when when you remove the dome lights I used romex ground wire with electrical tape. Only Hard part was running through the rubber boot on the deck lid.
Thank you for the information! We just got home from a week seaside, celebrating our anniversary. (Towing our camper with the Tahoe for the first time.) I saw your post, but didn't have my password to log in and reply to it.
 

Doubeleive

Wes
Supporting Member
Joined
Nov 7, 2017
Posts
30,570
Reaction score
48,056
Location
Stockton, Ca.
it would be easier to just run it under the kick panels along the bottom edge by the door (either side), the kick panels just pry off, at the pillar sections all you have to do it tuck it under the edge until you get all the way to the rear then you only have to remove one pillar panel to go up. but to each there own....
 
OP
OP
BooBoo

BooBoo

TYF Newbie
Joined
Jun 13, 2021
Posts
24
Reaction score
8
it would be easier to just run it under the kick panels along the bottom edge by the door (either side), the kick panels just pry off, at the pillar sections all you have to do it tuck it under the edge until you get all the way to the rear then you only have to remove one pillar panel to go up. but to each there own....
Thanks very much! I know that this is a "preschool" post when so many of you are getting into such intense repairs and upgrades. Maybe if I had this Tahoe FROM 2013 I would be less worried about screwing something up. This is new-to-me and I'm still in the honeymoon stage. :)
 

Doubeleive

Wes
Supporting Member
Joined
Nov 7, 2017
Posts
30,570
Reaction score
48,056
Location
Stockton, Ca.
Thanks very much! I know that this is a "preschool" post when so many of you are getting into such intense repairs and upgrades. Maybe if I had this Tahoe FROM 2013 I would be less worried about screwing something up. This is new-to-me and I'm still in the honeymoon stage. :)
if you are unfamiliar with these vehicles I would recommend watching a few youtube video's on various things, like "how to" repair the rear ac, how to fix the seat belt, how to wire a amplifier, just various things and throw tahoe, yukon, suburban in the search mix. this will give you a pretty good visual of what you want to accomplish. most of the inside paneling just pops off but you have to be careful it will break if pulled in the wrong way. harbor freight sells a variety pack of plastic trim tools, using those prevents scratching stuff up a lot of video's you will see people using screw drivers as pry tools I wouldn't recommend doing that they leave marks.
 
OP
OP
BooBoo

BooBoo

TYF Newbie
Joined
Jun 13, 2021
Posts
24
Reaction score
8
Thank you, yes. My last vehicle was a Tacoma that I drove for 17 years - so much has changed since then! I've attended YouTube University for a lot of things, but in this case, my concern about HOW to get the wiring to the back is apparently so basic that I haven't been able to find the specific steps in any of the videos that I've seen.

Thanks again.
 

Forum statistics

Threads
137,803
Posts
1,992,539
Members
102,792
Latest member
Hodmjstone
Back
Top