You are using an out of date browser. It may not display this or other websites correctly.
You should upgrade or use an alternative browser.
You should upgrade or use an alternative browser.
Vacuum Lines
- Thread starter project96
- Start date
Disclaimer: Links on this page pointing to Amazon, eBay and other sites may include affiliate code. If you click them and make a purchase, we may earn a small commission.
blueflamed03
Supporting Member

need more, or something specific?
blueflamed03
Supporting Member
you bet man!
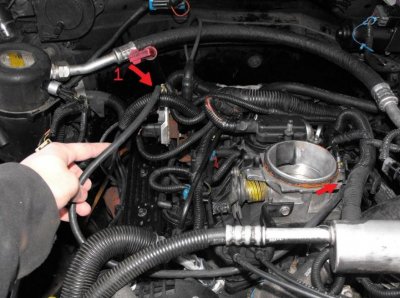
Hey I need a bit more help with these vacuum lines but I figured the only way anyone will understand what I need is if I take some pictures so I made a little list of which vacuum lines need to be sorted out still...
I need to figure out where lines number 1, 5, 6 & 7 go. Also need to check if I have the rest of the lines in the correct spot. The diagram above helped but mine seems to have extra lines??
Lines 2,3 & 4 I have looked at another truck to make sure that's where they go but the truck is unaccessible now so I can't go look at it again.
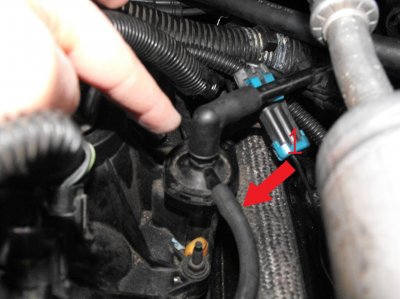
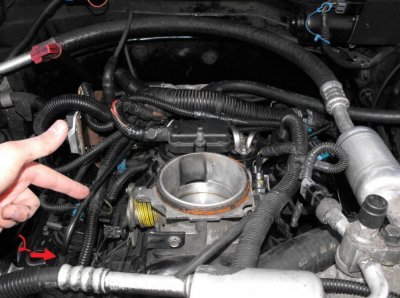
This line starts here
Goes around the throttle body
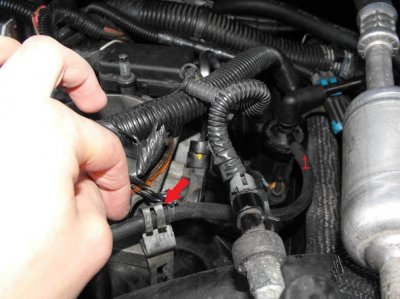
And ends up on this side leading to nowhere...I have looked around for the length of the line and tried to find a spot for it but can't find anything.
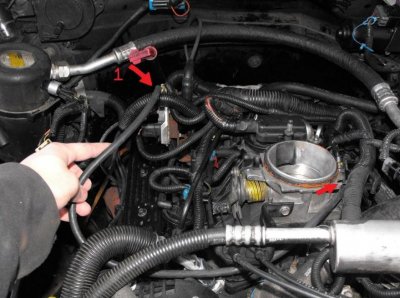
Number 2 goes around the back of the manifold
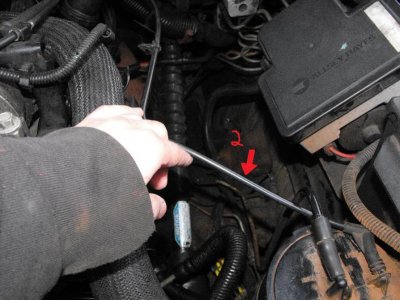
I need to figure out where lines number 1, 5, 6 & 7 go. Also need to check if I have the rest of the lines in the correct spot. The diagram above helped but mine seems to have extra lines??
Lines 2,3 & 4 I have looked at another truck to make sure that's where they go but the truck is unaccessible now so I can't go look at it again.
This line starts here

Goes around the throttle body

And ends up on this side leading to nowhere...I have looked around for the length of the line and tried to find a spot for it but can't find anything.

Number 2 goes around the back of the manifold


Last edited:
And I have it plugged into this, Line 3 seems to just be a vent..
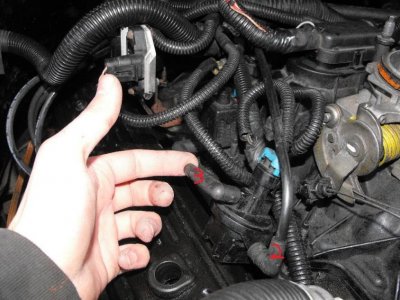
4 goes into the other thingy..I'm guessing these are the Evap switches and valves from the diagram
These two lines had nothing on them from when I had the truck this is right below the A/C dryer on the passenger side firewall, don't know what it is and where the lines go either.
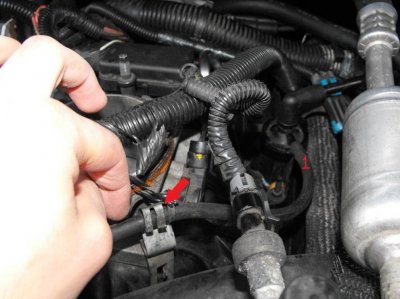
The last line I need is from the heater valve, not sure but I think it goes into either 5 or 6. This is what I need help on!!!
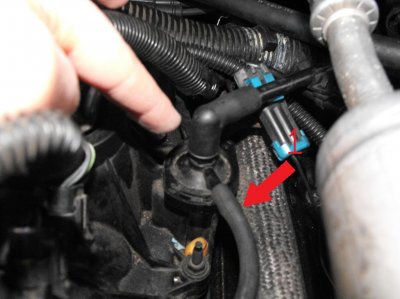
Somebody please help!! This will surely help somebody else in the future. Thanks!

4 goes into the other thingy..I'm guessing these are the Evap switches and valves from the diagram

These two lines had nothing on them from when I had the truck this is right below the A/C dryer on the passenger side firewall, don't know what it is and where the lines go either.

The last line I need is from the heater valve, not sure but I think it goes into either 5 or 6. This is what I need help on!!!

Somebody please help!! This will surely help somebody else in the future. Thanks!
badtothe bone
Full Access Member
If you go to the parts counter of most any GM dealer, they can print up a picture of the diagram out of their parts book that shows where all the lines goes better then just someone telling you.
The trick is to take the lines off one at a time and put a piece of masking tape on them and then to number or mark every line before you just start ripping and tearing.
Go to Advance Auto Parts and buy a Haynes manual, they also give the exact same advice.
Two things to remember, most of the time, the truck will still limp - even if the lines are not connected or connected properly. The other thing to remember is that the lines are a specific length and so they will only reach so far - and so you can pretty much guess where they go.
Next time - take the pictures before you start the job and not after you mess everything up.

Well when I bought the truck the top end of the motor was already apart so I pretty much did have to guess where everything went and half of the lines are missing I don't know what the guy did with them. But I have most of it down just a few lines and odd ends left that's all. I bought a haynes manual but it doesn't say shit about anything.
LiftedTahoe847
Banned
- Joined
- Dec 1, 2010
- Posts
- 30
- Reaction score
- 0
man i sure could use some direction on where to put the other end from the heater control valve too.
anyone?????
---------- Post added at 03:17 PM ---------- Previous post was at 03:13 PM ----------
i have a haynes manual and cant find it in there anywhere
anyone?????
---------- Post added at 03:17 PM ---------- Previous post was at 03:13 PM ----------
i have a haynes manual and cant find it in there anywhere
Similar threads
- Replies
- 0
- Views
- 133
- Replies
- 4
- Views
- 247
