DIY Dash Replacement

Disclaimer: Links on this page pointing to Amazon, eBay and other sites may include affiliate code. If you click them and make a purchase, we may earn a small commission.

Baysidebum

TYF Newbie
Joined
Aug 4, 2013
Posts
9
Reaction score
1
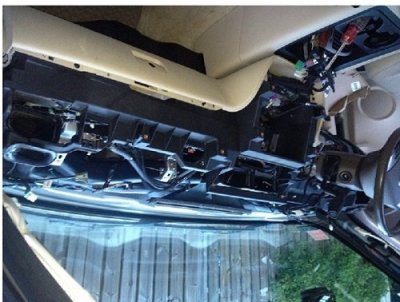
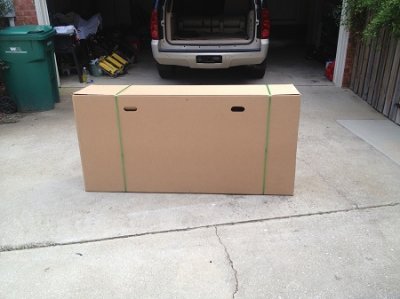
Well, I've been lurking for awhile and finally registered. After trying to ignore it for a year, I finally ordered a replacement dash from my local dealer. Took about an hour to take the old one out and about two hours to put the new one in (taking my time). Tedious, but easy job with just a few tools. After taking it out, I know that a surface repair would not have lasted. the cracks went all the way down to the mounting bolts. I have to imagine over-torqued bolts could have been partially to blame. The new one looks great - no more rattling and squeaking, and luckily, everything still works! While I didn't take many pics, I can put together a simple how-to list. But, if I could do it - you can. All the wiring is easy to undo/reconnect properly and many of the screws are the same size - no worries.
 
OP
OP
B

Baysidebum

TYF Newbie
Joined
Aug 4, 2013
Posts
9
Reaction score
1
Pics

I don't have step-by-step pics, but will put together a step-by-step list this weekend. I also used a couple youtube videos on replacing stereos and instrument clusters to figure out how to remove some of the trim.
I followed others' advice and bought a cheap plastic auto interior trim tool kit (pry tools) at Harbor Freight - that was invaluable and I was able to remove all of the trim with no breaking/marking. The only other tools were 7 and 10mm sockets and a short Phillips screw driver (for the screws holding the instrument panel trim in). Lots of parts, but it is very doable. The box the new dash comes in is pretty big, so I'd recommend picking it up before you pull the dash apart.
I had knocked my dash dimmer switch with my knee some time ago and had the a/c controls with the labeling rubbed off, so I replaced those while I had everything apart. I also replaced the ambient light sensor for the headlights (in the upper dash panel), which took about two seconds. My old one was not working properly and my lights usually turned on even when it was bright outside - works like it should now. I ordered AC/Delco parts for those via Amazon. It took me about an hour to pull the old one out and about 2 hours to put the new one in. It is amazing how quiet it seems now - no more rattling/squeaking dash.
I attached a few pics to show before/after.
 

Attachments

  • IMG_0167c.jpg
    IMG_0167c.jpg
    52.8 KB · Views: 370
  • IMG_0171a.jpg
    IMG_0171a.jpg
    75.6 KB · Views: 356
  • IMG_0174a.jpg
    IMG_0174a.jpg
    81.3 KB · Views: 381
  • IMG_0176a.jpg
    IMG_0176a.jpg
    59.1 KB · Views: 345
Last edited:
OP
OP
B

Baysidebum

TYF Newbie
Joined
Aug 4, 2013
Posts
9
Reaction score
1
The dash was $438 at the dealer. The HVAC Control Panel was $131 and the Headlamp/Indicator Lamp Assembly was $30. I bought the light sensor at the dealer for just over $40.
The dash panel can be bought at gmpartsdirect and prob other parts providers, but I decided to order from the dealer and picked it up the next day.
 
Last edited:
OP
OP
B

Baysidebum

TYF Newbie
Joined
Aug 4, 2013
Posts
9
Reaction score
1
I put together some instructions from memory -

Having done only my own dash replacement, I am certainly not the expert - there are plenty of forum members that have replaced tens of these. Therefore, feel free to add/correct whatever is needed. I have no unfounded pride in having this perfect. I would obviously not recommend anyone doing this that does not have basic skills or is wary of working with their airbag and other systems. It is your personal choice to tackle this. Stay organized, have a large and clean area to set parts aside - and take your time - and this is certainly a DIY project for us backyard mechanics. I wish I had taken pics as I went along - but I was unfortunately focused on getting it done and didn't think of that. Hopefully someone else can take pics as they do theirs. I did not search for any torque specs, but I was careful to not (hopefully) over-tighten anything.
 

Attachments

  • DIY Dash Install Instruction.txt
    15.2 KB · Views: 256
Last edited:

Freedom Motorsports

Full Access Member
Joined
Jul 16, 2011
Posts
933
Reaction score
20
Looks great! Welcome to the Forum. If we can help with anything in the future or information now please visit our website or pm us personally. We would love to help with all your current and future needs.
 

TahoeTX

Member
Joined
Nov 4, 2010
Posts
68
Reaction score
10
Location
Austin, TX
Do you have buy the HVAC and Headlamp panels in order to replace the dash or did you just want to replace those too?
 
OP
OP
B

Baysidebum

TYF Newbie
Joined
Aug 4, 2013
Posts
9
Reaction score
1
Thanks for the welcome Chris!

TahoeTX - I only replaced those modules because I wanted to. You really only need to purchase/replace the dash panel.
 

Forum statistics

Threads
129,819
Posts
1,821,831
Members
93,164
Latest member
Chevelle ss
Top