2007 Yukon Denali Build (This got outta hand really quick...)

Disclaimer: Links on this page pointing to Amazon, eBay and other sites may include affiliate code. If you click them and make a purchase, we may earn a small commission.

OP
OP
67RS427

67RS427

Full Access Member
Joined
Apr 5, 2017
Posts
595
Reaction score
1,217
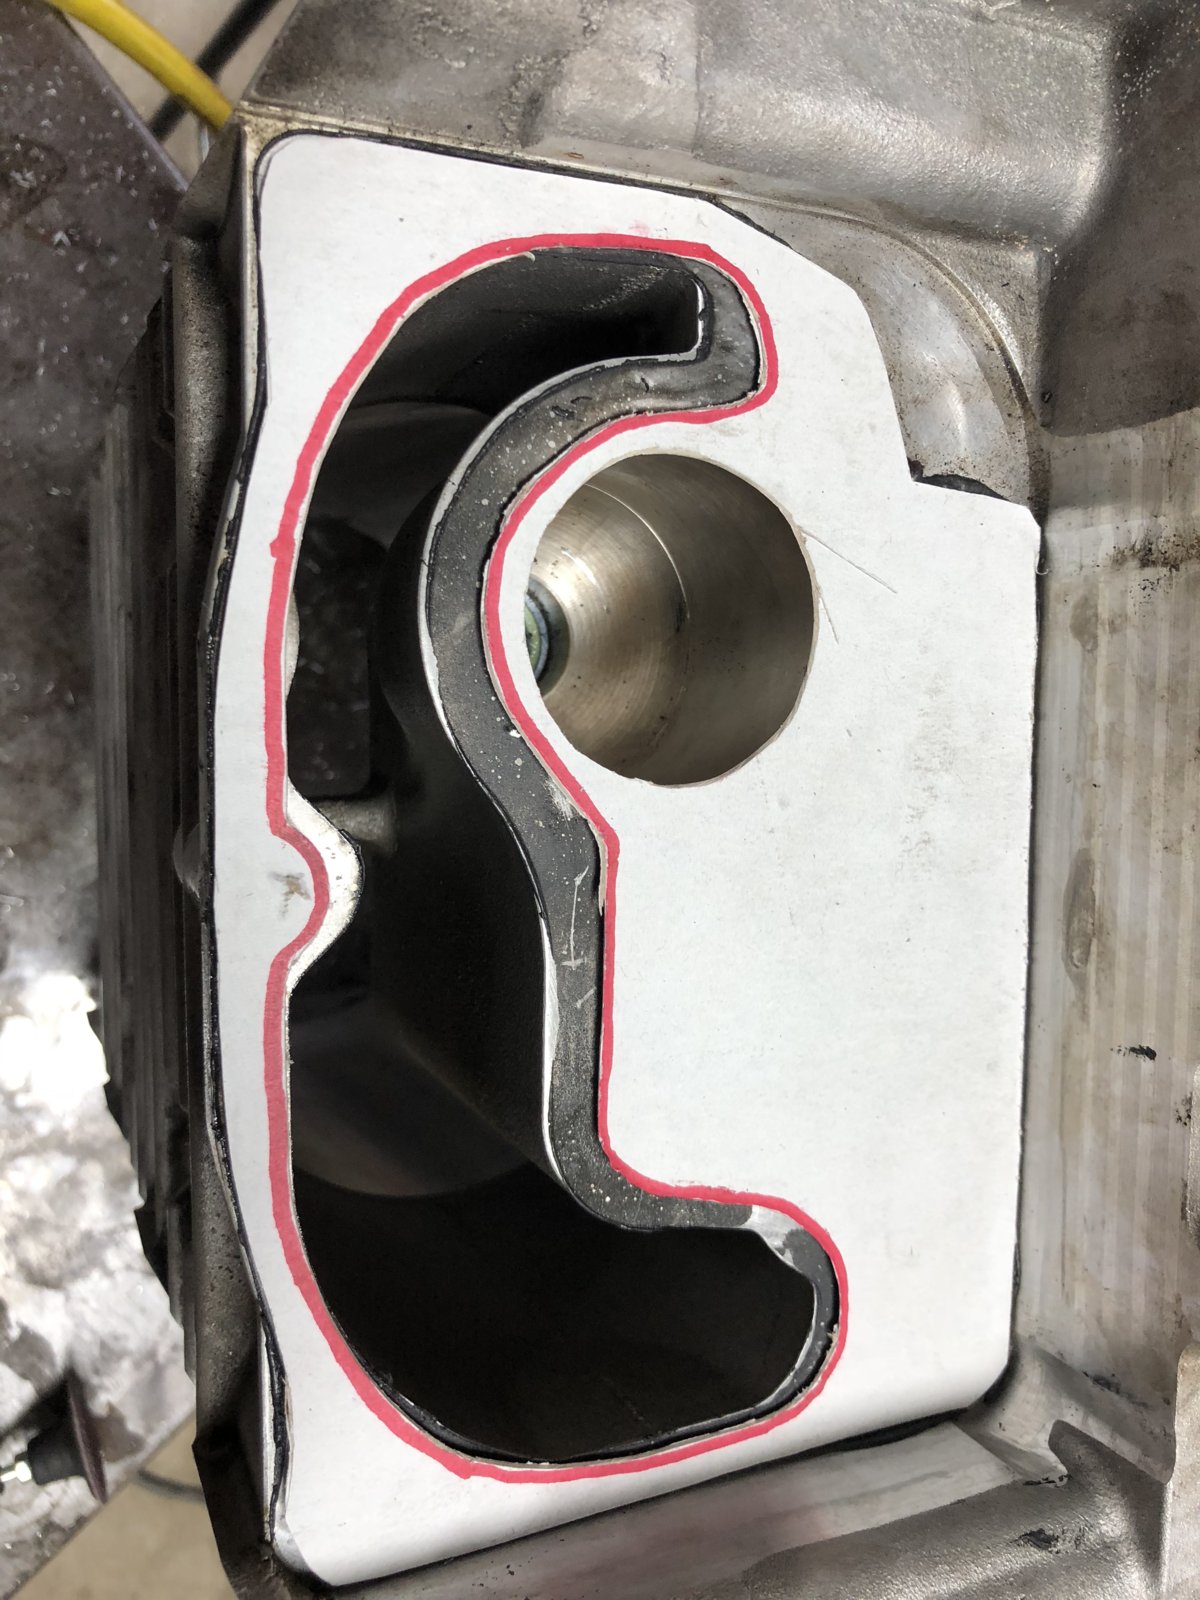
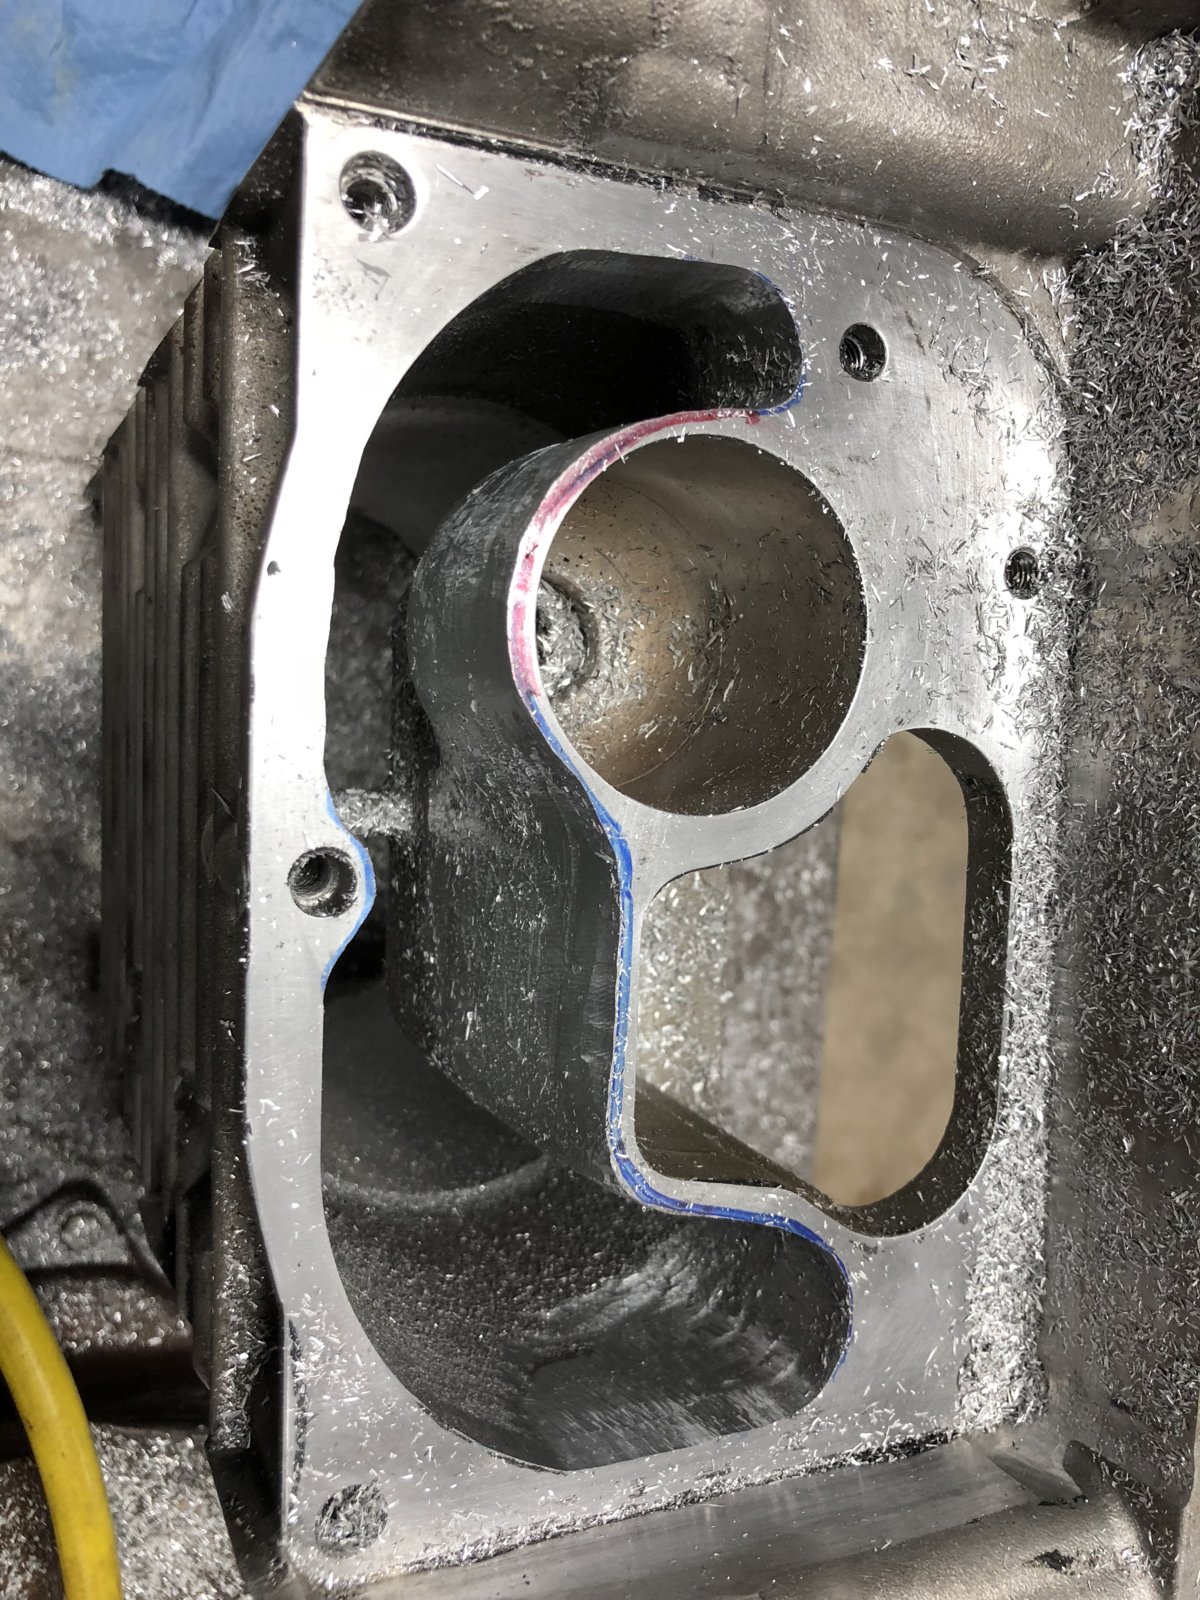
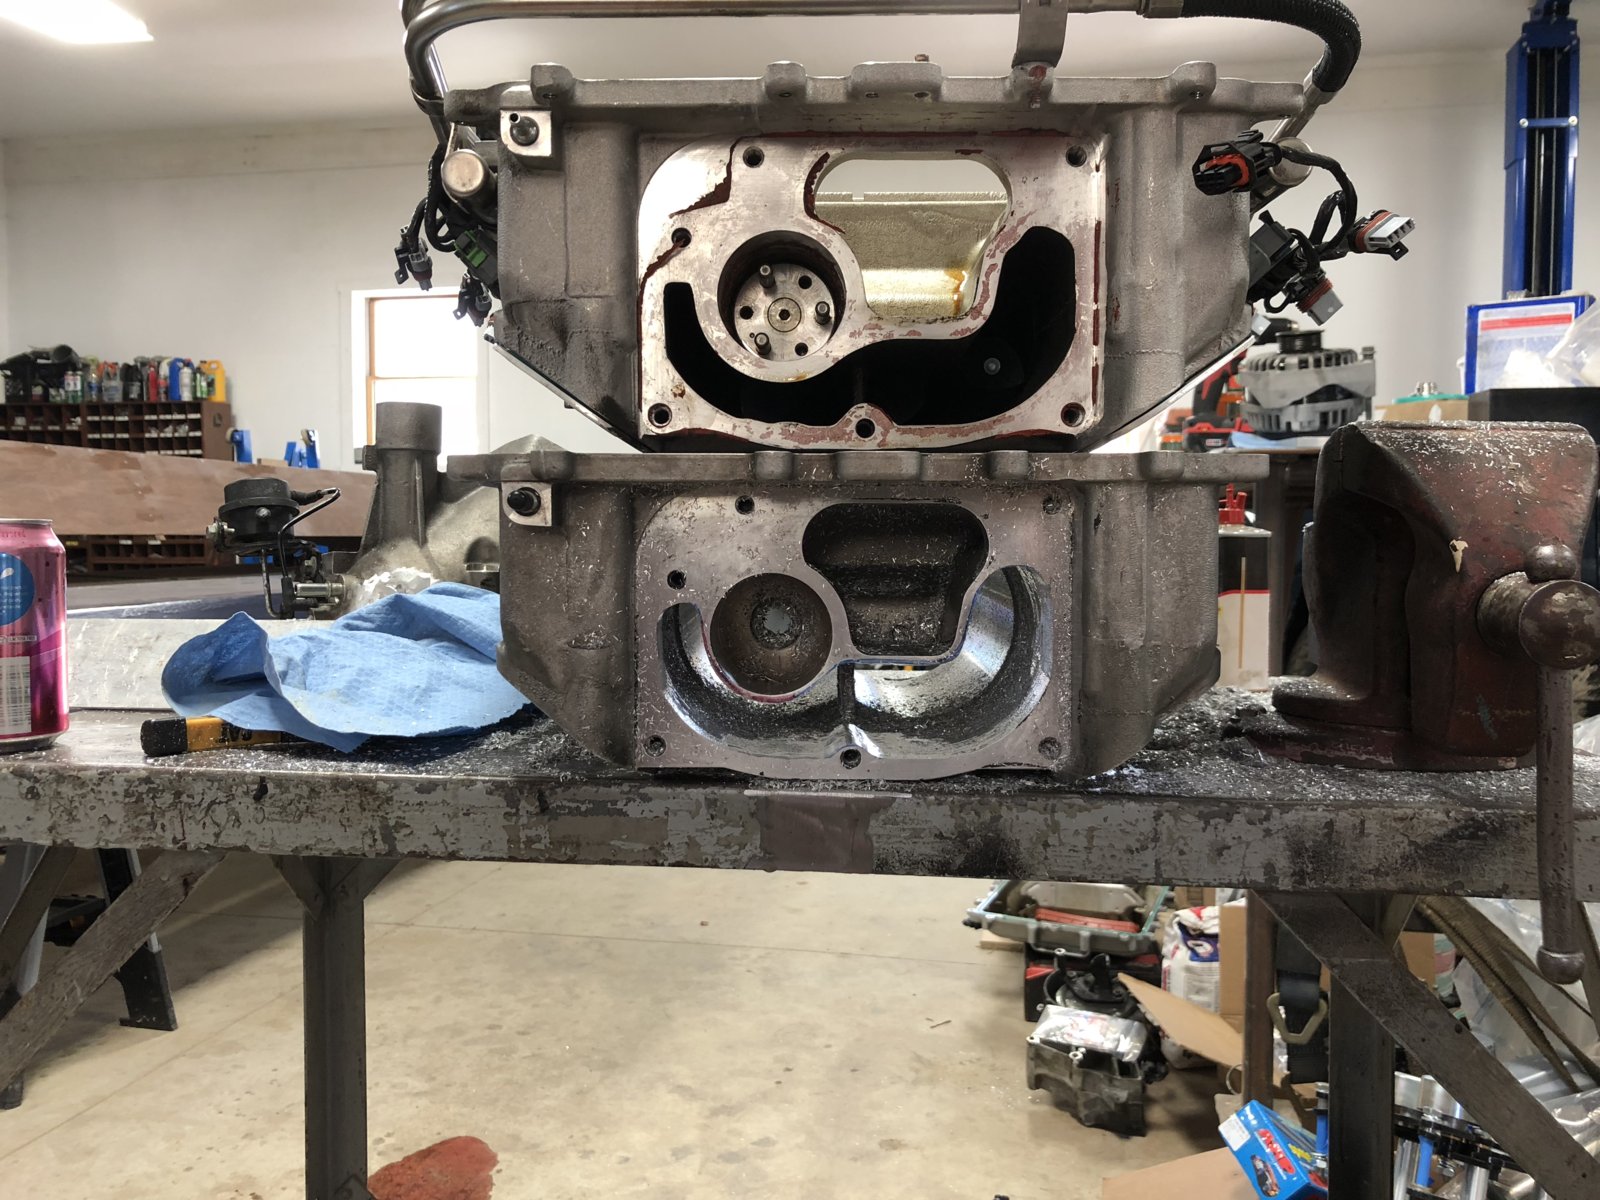
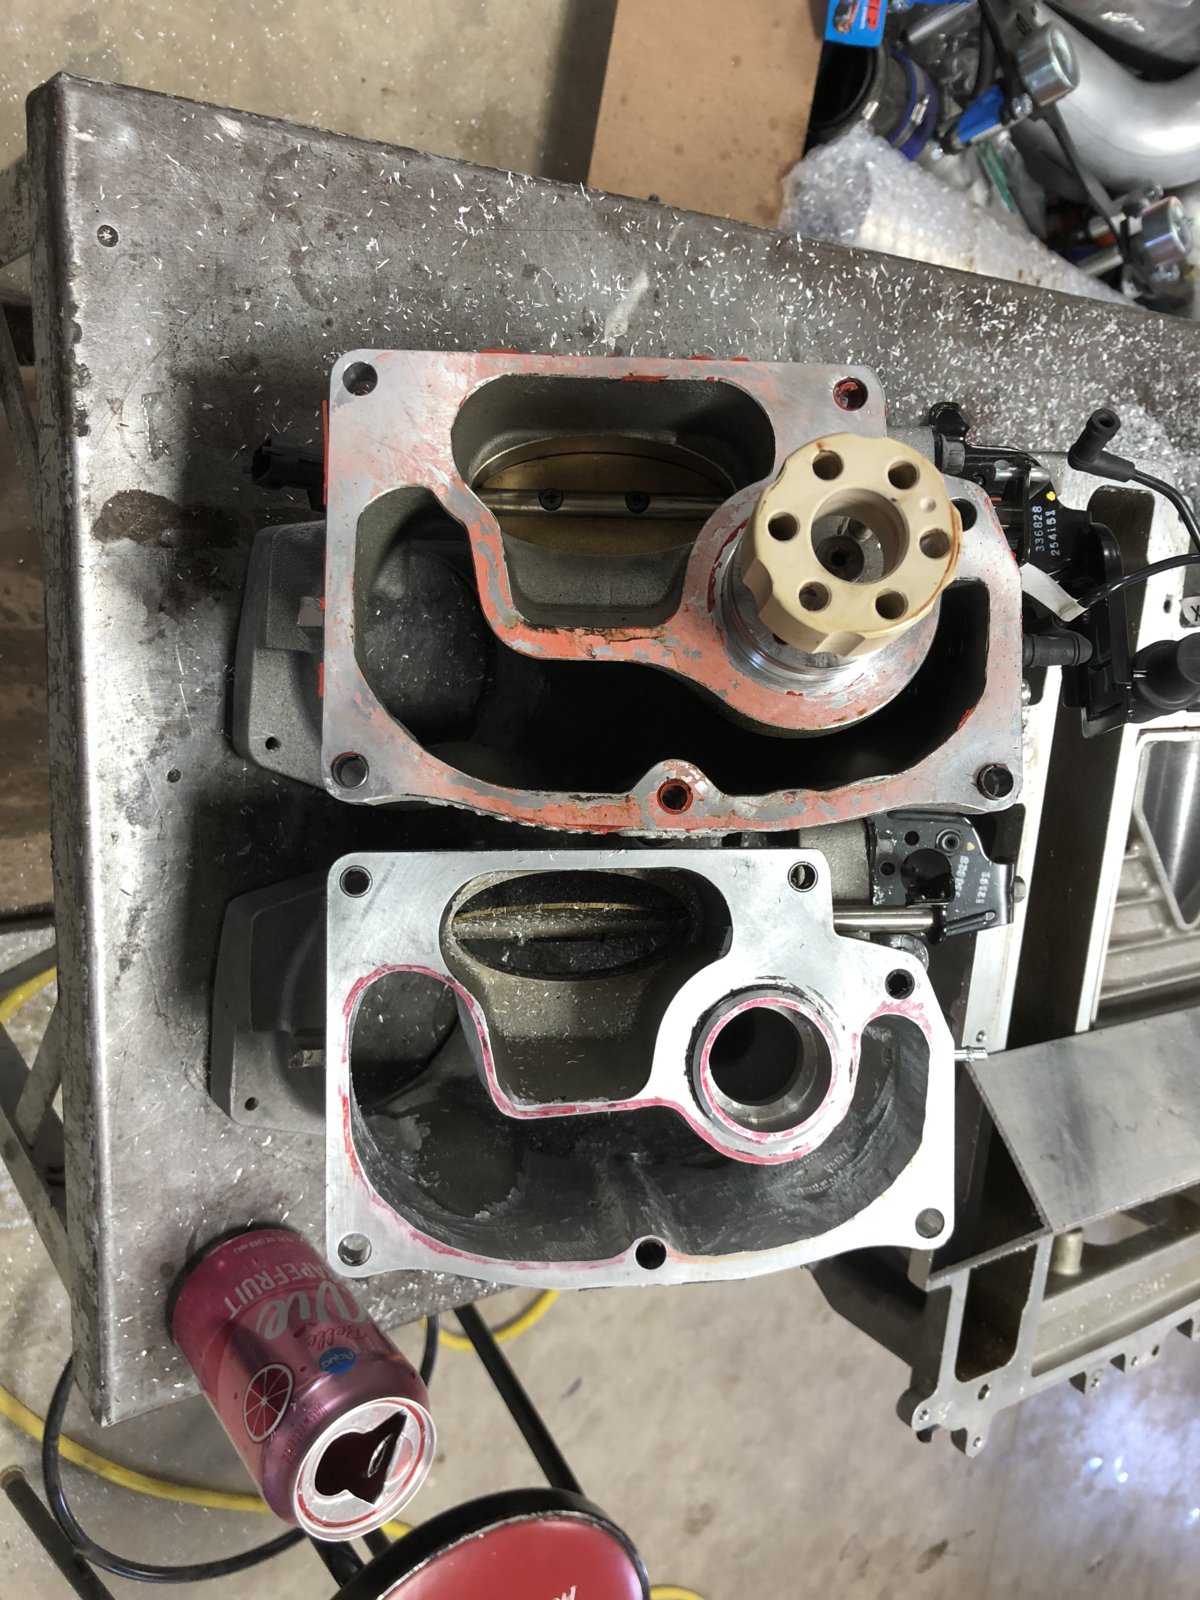
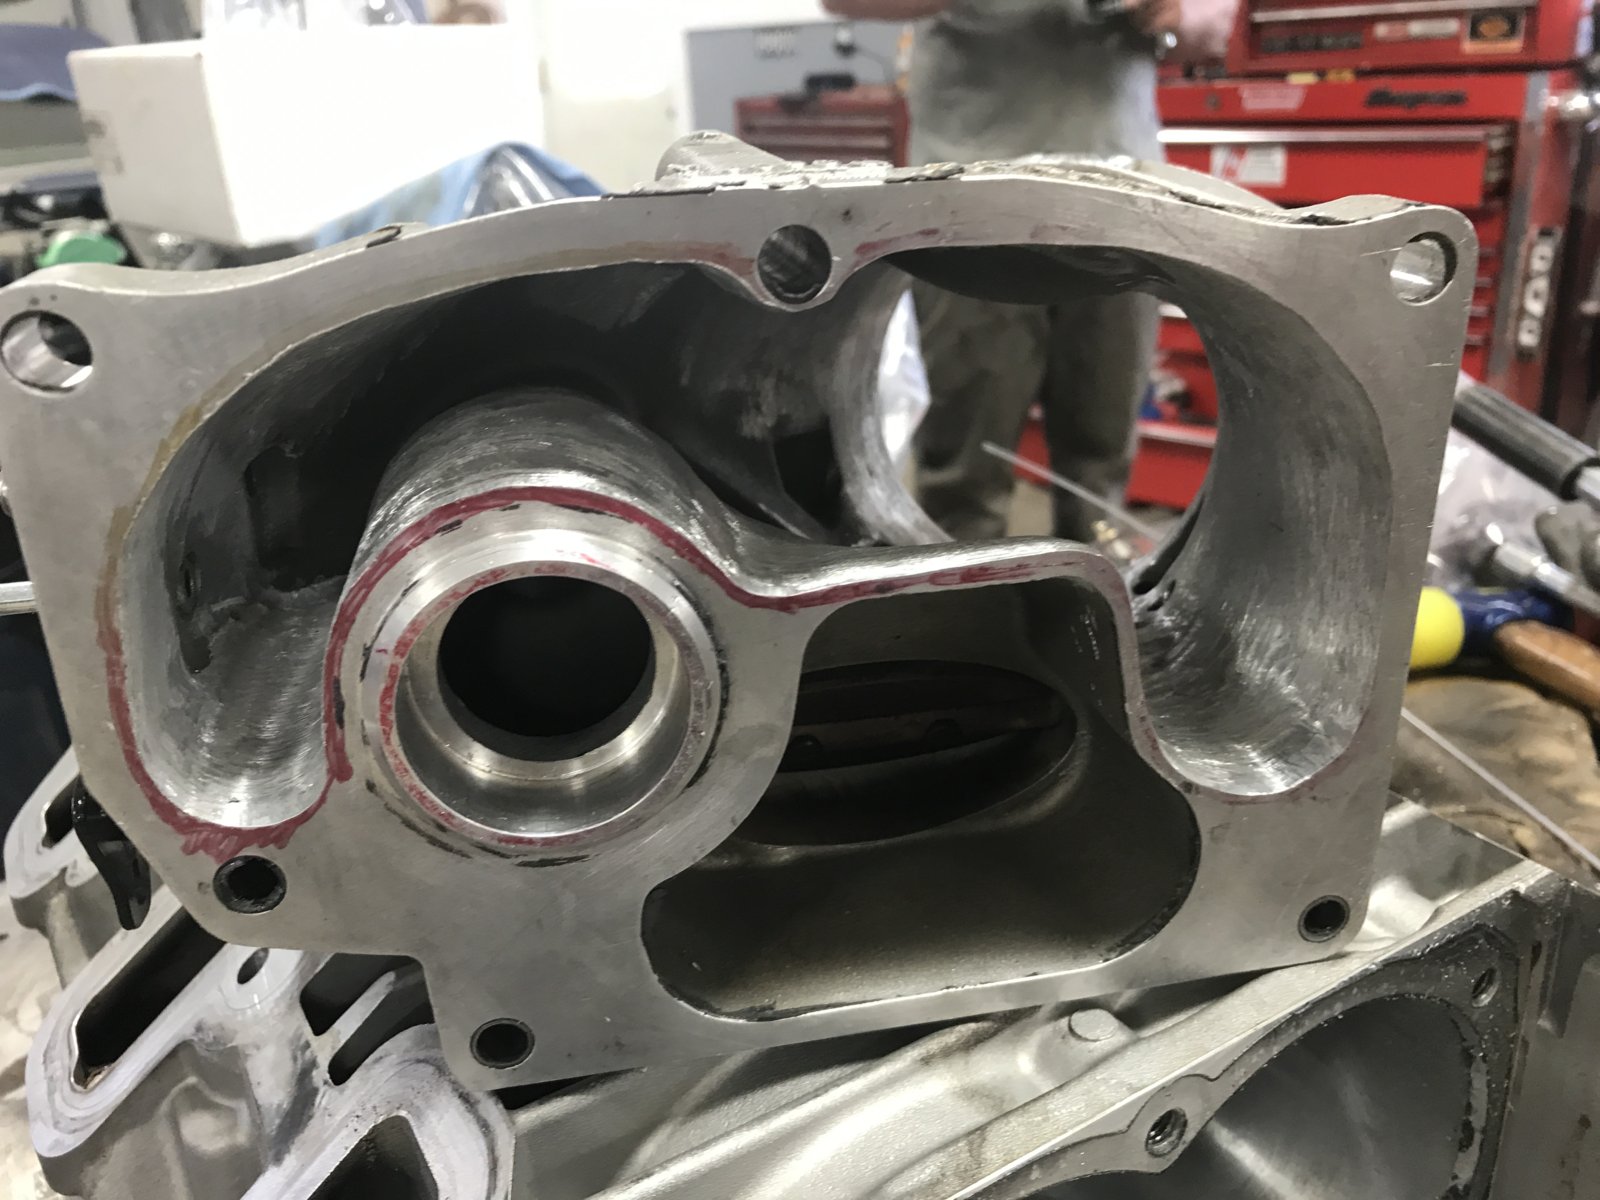
More snout/blower porting... a few pics of stock blower and my ported blower.

IMG_2838.JPG
IMG_2613.jpeg
IMG_2883.JPG
IMG_2615.jpeg
IMG_2921.JPG
 
OP
OP
67RS427

67RS427

Full Access Member
Joined
Apr 5, 2017
Posts
595
Reaction score
1,217
More porting, Brick reinforcement and AN Lid fittings... Swapped the -12AN black fittings out for blue ones you will see in later pictures.


IMG_2841.JPG
IMG_2617.jpeg
IMG_2890.JPG


Also, abrasive heaven lol... Don't see too many places like this that carry so much inventory. Was very distracted in this store :)
IMG_2888.JPG
IMG_2889.JPG
 
OP
OP
67RS427

67RS427

Full Access Member
Joined
Apr 5, 2017
Posts
595
Reaction score
1,217
Finally got my own HP Tuners cable (3 days before they stopped selling them for the newer unit) Glad I got it when I did since Pro features aren't available on the new one yet... More blower porting pics:

IMG_2909.JPG
IMG_2919.JPG
IMG_2921.JPG
IMG_2927.JPG
IMG_2931.JPG
 
OP
OP
67RS427

67RS427

Full Access Member
Joined
Apr 5, 2017
Posts
595
Reaction score
1,217
So this is where things started going sideways... I was finished porting the blower, pressed on new Weapon X hub and 2.5" pulley, completely rebuilt blower with new bearings and fresh oil, reinforced the intercooler brick, assembled the entire motor and reinstalled the entire powertrain (Front diff was out and rebuilt, Transmission was out and rebuilt again due to a bad 3-5-R clutch pack, Transmission reinstalled with the new Circle D triple disc torque convertor, TCI Flex plate and new custom driveshafts installed with the original transfer case)... All that work didn't take too long believe it or not. My issue was with my new 8 Rib LSSimple accessory drive kit. It should have been a direct bolt on and I was truly impressed with he way it LOOKED. It should have bolted on in 15 minutes but it's function however was terrible. I can't recommend anyone uses the LSSimple kits. They had a bad batch of laser cut plates in my case and shipped me a system that they knew was bad but tried to salvage. He elongated holes and used washers/spacers instead of solid mounts. It was terrible and out of alignment from every aspect. It wouldn't track a belt properly even during cranking. I wasted over 6 days trying to make this kit work. I had access to a Bridgeport and a lathe and still couldn't get belts to track properly even after machining new spacers and tweaking things. Murphy @ LSSimple was very apologetic and refunding my money without even asking for the kit back (which is garbage!). That 6 days cost me weeks in the long run.


Looks pretty but doesn't fit or work for shit... Bracket was contacting bottom of snout, had to take out 1/4" of material on the bracket just to start test fitting this turd:
IMG_2552.JPG

IMG_2951.JPG

IMG_2950.JPG


Idlers not lining up at all, the alternator and tension on the opposite side were also canted back in different directions... Still couldn't get it right even after taking the spacers down in the lathe.

IMG_2946.JPG


Luckily I found a guy locally in Michigan that is very big in the LS Swap stuff... Here is a pic of one of his garages, lets just say he has a few blowers laying around if anyone needs parts ;-)

IMG_3107.jpg


He hooked me up with a Holley alternator/power steering mount kit and I used an LSA Water pump and factory LSA accessory drive parts for everything else. Came out a hell of a lot nicer in the end and I know I'm running something factory proven and the blower is on it's own 8 Rib belt. Only thing left to do is relocate my factory A/C compressor backwards 1.5" on the LSA A/C bracket so I don't have to cobble together custom LSA to truck A/C lines and electrical. Pics of that to come in the next few days.
 
Last edited:
OP
OP
67RS427

67RS427

Full Access Member
Joined
Apr 5, 2017
Posts
595
Reaction score
1,217
More blower pics:

IMG_2923.jpg
IMG_2885.jpg
IMG_2837.jpg


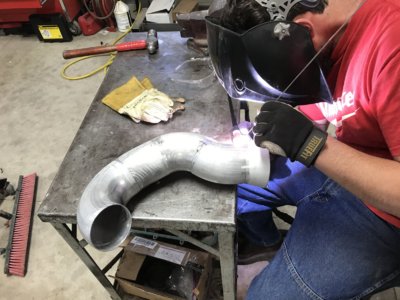
Starting to fab up an intake... Originally I was going to relocate the intake to the drivers side and use 5" tube. Unfortunately, the truck fan shroud is freaking HUGE and the bend would have been ridiculous and there just simply isn't a lot of air flow on the side. I opted to keep my passenger side air box ($300+ AirAid) and run my 6" filter to a 5" MAF tube and downsized to a 4" bend into the 4.25" NW TB. Came out really nice in my opinion. (added a new Ice box in the drivers side and relocated the heat exchanger pump as well)

IMG_2957.JPG


IMG_2959.JPG
 
OP
OP
67RS427

67RS427

Full Access Member
Joined
Apr 5, 2017
Posts
595
Reaction score
1,217
Pics of intake with the ****** LSSimple accessory drive (Before I knew I was really having issues)

IMG_3020.jpg
IMG_3022.jpg
IMG_3023.jpg
IMG_3025.jpg
IMG_3026.jpg
 
OP
OP
67RS427

67RS427

Full Access Member
Joined
Apr 5, 2017
Posts
595
Reaction score
1,217
Sorry, didn't take a lot of pictures when I did the fuel system. I was rushing to get it done and thought I was gonna be driving this thing. Did I mention Murphy @ LSSimple really screwed me?

Walbro 450 fuel pump upgrade (Dropped in a factory replacement bucket). Added a -6 Bulkhead for the new feed and used the old 3/8" feed as my return. Ran Blue Russell Push-Lok hose for both feed and return...

Also some pictures of the new hear exchanger install... Stole this from my 1967 Camaro Twin Turbo parts rack. Spent a few days making a nice solid mount for it and left room for the dual 7" fans behind it. Also decided to ditch the factory transmission cooler and installed the TruCool I had laying around. Will probably have pics of that somewhere later.

IMG_3027.jpg
IMG_3032.jpg


Pretty disappointed with the Kooks Y Pipe Cats... They were pretty much torched already with only 3k miles or so. I decided to gut them... Came out really nice, can't tell it was even done from under the truck.

IMG_3034.JPG
IMG_3035.JPG
IMG_3036.JPG
 
OP
OP
67RS427

67RS427

Full Access Member
Joined
Apr 5, 2017
Posts
595
Reaction score
1,217
Ended up doing a coil relocation bracket and using some blue Taylor spark plug wires (will post more pics later). Some more pics of the heat exchanger mount (1/4" steel and some square tube)

IMG_3042.jpg
IMG_3064.jpg
IMG_3068.jpg
IMG_3073.jpg
 
OP
OP
67RS427

67RS427

Full Access Member
Joined
Apr 5, 2017
Posts
595
Reaction score
1,217
Another view of the heat exchanger mount... Angle was kind of a pain to get but the extra time made it come out nice.

IMG_3075.jpg


NEW LSA/Holley Accessory Drive Kit, LSA Water pump and Corvette PS Pump:
IMG_3074.jpg


Accidentally welded the MAF bung on backward so that cost me a bunch of time...
IMG_3102.jpg


Skipping forward a bit, this is with the new boost referenced regulator installed, ice box and new accessory drive...
IMG_3105.jpg


Heat exchanger mount painted and finalized:
IMG_3116.jpg
 
OP
OP
67RS427

67RS427

Full Access Member
Joined
Apr 5, 2017
Posts
595
Reaction score
1,217
Cleaned up the engine bay a bit, much more to come...

IMG_3119.jpg
IMG_3120.jpg


IMG_3121.jpg


Fuel filter and Russel check valve installed... Still getting rail pressure loss with the valve when sitting overnight. Seems worse with the check valve actually, need to investigate but it shouldn't cause any start up issues

IMG_3124.jpg


IMG_3127.jpg
 
Last edited:
OP
OP
67RS427

67RS427

Full Access Member
Joined
Apr 5, 2017
Posts
595
Reaction score
1,217
A little more clean up

IMG_3127.jpg


Welded the power steering reservoir bracket and bolted it to a block welded to the ice box... Custom PS lines (high pressure is Russell Stainless PS hose with SwageLok fittings, hope it doesn't leak lol)
IMG_3128.jpg


IMG_3133.jpg


IMG_3136.jpg


IMG_3136.jpg


New belts installed... 8 rib for blower, 6 rib for PS and alternator and a separate 4 rib for A/C just like the LSA

IMG_3149.jpg
 
OP
OP
67RS427

67RS427

Full Access Member
Joined
Apr 5, 2017
Posts
595
Reaction score
1,217
Some different angles, more clean up... Re-routed the Alternator primary cable behind the intake along with a bunch of wires... Almost nothing running in front of the blower now. Starting to look good:

IMG_3150.jpg


IMG_3151.jpg


Blue billet clamps for the -12AN and black for the -6AN. Small things make such a big difference....
IMG_3152.jpg


IMG_3153.jpg


Had to get one more -12AN blue fitting for heat exchanger which came yesterday, will get pics with it all changed and cleaned up.
IMG_3154.jpg
 
OP
OP
67RS427

67RS427

Full Access Member
Joined
Apr 5, 2017
Posts
595
Reaction score
1,217
Decided I really like the blue push-lok line so I cut off the hard transmission cooler lines and ran -6AN all the way....

IMG_3155.jpg


IMG_3156.jpg


IMG_3158.jpg


IMG_3159.jpg


IMG_3160.jpg


Intake is not finished being painted, will probably ceramic coat it when I am all done...
 
Last edited:
OP
OP
67RS427

67RS427

Full Access Member
Joined
Apr 5, 2017
Posts
595
Reaction score
1,217
A few more pics... I got everything cleaned up and then went to start tuning and realized the wrong cam sprocket was installed. Somehow I got the wrong one and a 1 sensor sprocket was installed instead of a 4 sensor. After all of this cleaning up, filling of fluids and mock up, today I had to tear down the whole front of the motor and drain my coolant to pull the water pump, timing cover and replace the upper sprocket. I got everything torn down today (pulled damper and accessories) and will receive the new timing chain Tuesday. I missed the Friday 10pm order cutoff from summit racing by 3 minutes for Saturday delivery... Just my luck. Oh well, I will get the sprocket Tuesday and button this thing up finally and get it tuned and on the road this week. AWD burnouts coming soon as this beast will be making in excess of 850hp... Since I am tearing it down I decided to swap out my 5% overdrive damper ring with a 9.1" 10% overdrive. Should be making some really nice boost numbers and some crazy power....


IMG_3161.jpg


Got a HP Tuners (e-motion) nGauge... Excited to have this thing, it seems pretty damn nice and can display 6 PIDS at a time and log 16+. It can hold several different tunes, load stock or any others on the SDCard and read and reset codes. Should be nice to have to keep an eye on IAT, Oil PSI, AFR, Fuel Pressure and more... I will post better pics of install, this is the only one I have right now.

IMG_3162.jpg
IMG_3172.jpg
IMG_8797.JPG
 
OP
OP
67RS427

67RS427

Full Access Member
Joined
Apr 5, 2017
Posts
595
Reaction score
1,217
Wow, nice job. Looks to be a huge difference. What do you think will be the net hp difference with the port work?

Porting the blower alone is good for 30 - 50whp depending how crazy you get... Most of the gains are in the snout and opening up the intake/TB... I didn't bother porting the intake runners much as there is really little to gain. I would say I gained 35-40whp easily for the porting that I did and even more net because I upgraded to the 102mm TB and 5" MAF.
 

Forum statistics

Threads
138,039
Posts
1,997,650
Members
102,975
Latest member
jkhuntzinger

Latest posts

Back
Top