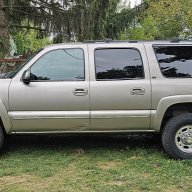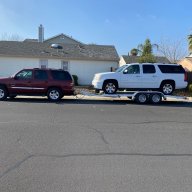
The Adventures of Sylvester, the 2018 Suburban 3500 HD and our 2017 Airstream 27FB

Disclaimer: Links on this page pointing to Amazon, eBay and other sites may include affiliate code. If you click them and make a purchase, we may earn a small commission.

SpareParts

Elite Member
Supporting Member
Joined
Sep 17, 2023
Posts
2,112
Reaction score
4,802
Location
North Idaho
I have a 200Ah LiFePo4 setup with a 20A dc-dc charger and a 2000w inverter. Renogy charger and inverter.
You are going to love the LiFePo4 setup! So much better than wet batteries!
With my 200AH i run a small fridge/freezer, Lights, TV, Keurig, Phone chargers, Charge the chain saw battery.
After 3 days, it'll be down to about 30% remaining.
I only have enough room to add a 100W solar panel to my van but will be adding it next spring.

1 thing i would do different though is the DC-DC charger. 20A charge takes forever to put any real noticeable charge back in the batteries even when highway driving.
Knowing what i know now, i would get a minimum 50A DC-DC charger and bigger alternator to handle the load.
 
OP
OP
Geotrash

Geotrash

Dave
Supporting Member
Joined
Feb 16, 2018
Posts
7,849
Reaction score
20,428
Location
Richmond, VA
I have a 200Ah LiFePo4 setup with a 20A dc-dc charger and a 2000w inverter. Renogy charger and inverter.
You are going to love the LiFePo4 setup! So much better than wet batteries!
With my 200AH i run a small fridge/freezer, Lights, TV, Keurig, Phone chargers, Charge the chain saw battery.
After 3 days, it'll be down to about 30% remaining.
I only have enough room to add a 100W solar panel to my van but will be adding it next spring.

1 thing i would do different though is the DC-DC charger. 20A charge takes forever to put any real noticeable charge back in the batteries even when highway driving.
Knowing what i know now, i would get a minimum 50A DC-DC charger and bigger alternator to handle the load.
That's super helpful insight - especially on the DC-to-DC charger. Thank you. This may be more info than you care to know, so I'm just laying it out here - more to memorialize it for myself and in case others see it and are also headed down the solar path.

I've been researching for weeks and laid out a design that will allow me to add components over time. The Airstream has a 1000w inverter that's wired to dedicated 120V outlets for the TVs and my CPAP machine by the bed, so I will hold off on the big 'whole Airstream' 3000w inverter/charger for now.

I'll put the 300A LiFePO4 battery in the front storage compartment, which is also accessible from under the bed and close to the 4AWG cables that run to the converter (midship on the drivers side), and the inverter (front on the pax side). That way I can just upgrade the factory converter/charger to a 60A drop-in unit that can charge the LifePO4 battery properly, for only $200.

I'll mount the wiring, breakers, and buss bars to the rear wall of the compartment. I'll use 4/0 wire between the battery, main breaker, and buss bars, and 4AWG or 6AWG for the various other circuits, depending on current flow. I'll also add a 50A Victron solar charge controller for now so it's there when I'm ready to install panels on the roof. Until then, I'll run my 100A portable panel through it. That will get us through the winter with just a small 2000w generator to run the coffee maker when we're boondocking.

Next summer, I'll add a 2nd battery, a Victron 3000W inverter/charger, and six 250w Rich Solar panels on the roof. Then I'll run the Romex to the main power center and back so I can use the factory circuit breakers and 120v wiring. I'll add the DC-to-DC charger at that time (50A, thanks!). My Suburban has dual batteries and a 220W alternator already, so I should be able to pull the full 50A from it.

Here's a pic of another guy's setup, and mine will be similar, except I'll have one big battery, plus the solar charge controller:

1759335055516.png


And the battery I went with:

1759335141144.png
 

SpareParts

Elite Member
Supporting Member
Joined
Sep 17, 2023
Posts
2,112
Reaction score
4,802
Location
North Idaho
I do not know how Victron operates but with my Renolgy charger i also added a switch that allows me to disconnect the DC-DC charger from the alternator when the van is not running.
If the charger is not disconnected, there is a possibility of draining the start battery.
I also notice if i have the front and rear ac on and the charger on, my voltage gauge slowly drop's, so the switch allows me to turn the charger on and off when driving.
My 145A alternator is not quite big enough.
 
OP
OP
Geotrash

Geotrash

Dave
Supporting Member
Joined
Feb 16, 2018
Posts
7,849
Reaction score
20,428
Location
Richmond, VA
The battery came yesterday. Jeebus it's a big one, but thankfully it only weighs about 55 lbs. A lead-acid battery capable of delivering a full 300 amp hours would be twice as big and weigh 4x as much. Also, 10' of 4/0 AWG pure copper wire cost me $90. It's insane how expensive everything has gotten.

IMG_4709.jpeg
 
Last edited:
OP
OP
Geotrash

Geotrash

Dave
Supporting Member
Joined
Feb 16, 2018
Posts
7,849
Reaction score
20,428
Location
Richmond, VA
Got the bed out and the compartment under it ready for wiring and swearing. Spent a good hour just sitting in there looking at the factory wiring, inverter, buss wires and junction box to make sure I understood every nuance. The factory positive buss bar is actually a set of 4 self-resetting breakers, which is cool but in all of my research I had never run across it so it hung me up a while while I sorted it out.

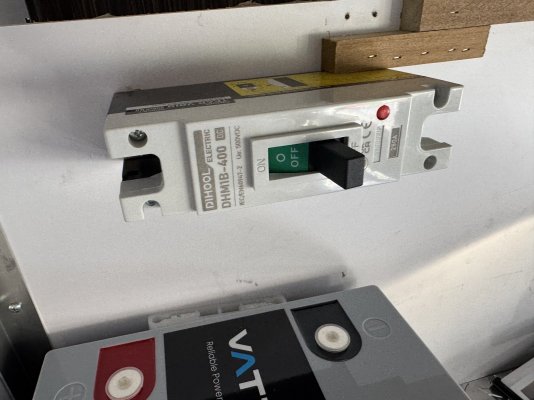
Got the battery in along with the Dihool breakers and about half of the wiring. The 4/0 copper lugs I had were too wide for the main breaker so I ordered 4 more in the right size.

Shockingly (har har), there is much debate online as to whether the main breaker (and all downstream breakers) in an RV should be on the positive or negative wire, with the only point of agreement being that it needs to be as close to the battery as possible. Even ChatGPT was confused. So I just installed the main battery disconnect/breaker to the negative side because I know what happens when a positive wire gets shorted to ground when the negative battery terminal is still connected. And I suspect y’all do too.

I’ll install the downstream breakers on the positive wires to stay consistent with the existing Airstream DC wiring. I should be able to finish the rest of phase 1 of this long term project tomorrow, and load test everything.

IMG_4729.jpeg

IMG_4728.jpeg
IMG_4722.jpeg

IMG_4724.jpeg

IMG_4727.jpeg

IMG_4730.jpeg
 

Attachments

  • IMG_4730.jpeg
    IMG_4730.jpeg
    252.3 KB · Views: 30
Last edited:

pwtr02ss

Full Access Member
Joined
Apr 1, 2013
Posts
14,172
Reaction score
33,171
Location
Tennessee
Got the bed out and the compartment under it ready for wiring and swearing. Spent a good hour just sitting in there looking at the factory wiring, inverter, buss wires and junction box to make sure I understood every nuance. The factory positive buss bar is actually a set of 4 self-resetting breakers, which is cool but in all of my research I had never run across it so it hung me up a while while I sorted it out.

Got the battery in along with the Dihool breakers and about half of the wiring. The 4/0 copper lugs I had were too wide for the main breaker so I ordered 4 more in the right size.

Shockingly (har har), there is much debate online as to whether the main breaker (and all downstream breakers) in an RV should be on the positive or negative wire, with the only point of agreement being that it needs to be as close to the battery as possible. Even ChatGPT was confused. So I just installed the main battery disconnect/breaker to the negative side because I know what happens when a positive wire gets shorted to ground when the negative battery terminal is still connected. And I suspect y’all do too.

I’ll install the downstream breakers on the positive wires to stay consistent with the existing Airstream DC wiring. I should be able to finish the rest of phase 1 of this long term project tomorrow, and load test everything.

View attachment 469157
View attachment 469158View attachment 469159
View attachment 469163
View attachment 469162
View attachment 469161

Looking good so far! Its nice they give you plenty of room to work with.
 

89Suburban

Bull in the china shop
Space X Supporting Member
Joined
Jan 10, 2013
Posts
18,031
Reaction score
51,352
Location
SE PA
Is wifey freaking about about you tinkering on the new RV yet? :anitoof:
 
OP
OP
Geotrash

Geotrash

Dave
Supporting Member
Joined
Feb 16, 2018
Posts
7,849
Reaction score
20,428
Location
Richmond, VA
Got a little more progress done this week. Got the new converter installed and it was only delivering about 2/3 the amps that it should be to the battery, but I found the bottleneck. The factory positive bus bar was getting hot to the touch with only 30A running through it. So I bypassed it and ran heavier 6 gauge wire through a 50A breaker. Voila! And everything is staying cool.

Installed a Victron DC to DC charger to get 18 amps to the battery from the Suburban while protecting against reverse current flow. We are ready to button it up and go camping!

IMG_4750.jpeg

IMG_4765.jpeg
 
OP
OP
Geotrash

Geotrash

Dave
Supporting Member
Joined
Feb 16, 2018
Posts
7,849
Reaction score
20,428
Location
Richmond, VA
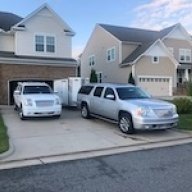
I’m nothing if not OCD, so I’ve had it sitting in front of the house while I researched, purchased and installed storage solutions for the whole camper. I can’t stand it when there are things that don’t have a ‘place’ where they belong because it causes clutter.

IMG_4799.jpeg


After that, I installed a airstream-specific hitch on the back end, to accept a bike rack.

IMG_4845.jpeg

IMG_4846.jpeg
 
OP
OP
Geotrash

Geotrash

Dave
Supporting Member
Joined
Feb 16, 2018
Posts
7,849
Reaction score
20,428
Location
Richmond, VA
Final mod for the fall is a 3” lift kit on the Airstream. We like to boondock off the beaten path, so this will keep us from dragging our ass on the way in or out.

I didn’t feel like tackling this one so I farmed it out to a local guy who specializes in Airstreams. Cost me 1200 beans for the labor, but it’s done right. As part of that, he set up my hitch for the lift and he’s a master. The Suburban 3500 rides even better now with the Airstream behind us.

Off to the OBX with it on Tuesday for the Thanksgiving holiday.

IMG_5019.jpeg


IMG_5113.jpeg
 

Bigburb3500

Full Access Member
Joined
Jun 7, 2024
Posts
854
Reaction score
1,340
Final mod for the fall is a 3” lift kit on the Airstream. We like to boondock off the beaten path, so this will keep us from dragging our ass on the way in or out.

I didn’t feel like tackling this one so I farmed it out to a local guy who specializes in Airstreams. Cost me 1200 beans for the labor, but it’s done right. As part of that, he set up my hitch for the lift and he’s a master. The Suburban 3500 rides even better now with the Airstream behind us.

Off to the OBX with it on Tuesday for the Thanksgiving holiday.

View attachment 472638

View attachment 472639
Should have great weather from what we are seeing. We will be leaving NC this weekend/early next week for Erie area to see the family for Thanksgiving. Safe travels!
 
OP
OP
Geotrash

Geotrash

Dave
Supporting Member
Joined
Feb 16, 2018
Posts
7,849
Reaction score
20,428
Location
Richmond, VA
Should have great weather from what we are seeing. We will be leaving NC this weekend/early next week for Erie area to see the family for Thanksgiving. Safe travels!
Gonna be cold for a couple days but we’ll manage. I know Erie very well - lots of friends and family near there. Safe travels to you also!
 

Forum statistics

Threads
138,036
Posts
1,997,569
Members
102,974
Latest member
kikeap

Latest posts

Back
Top