For the most part LS heads are very good quality, you find that most (even higher mileage units) do not require a valve job. If you are swapping on a used set, and want to save some $$$ at the machine shop, here is an alternative for you. I hope this gives you an understanding of valve sealing, and saves you some money.
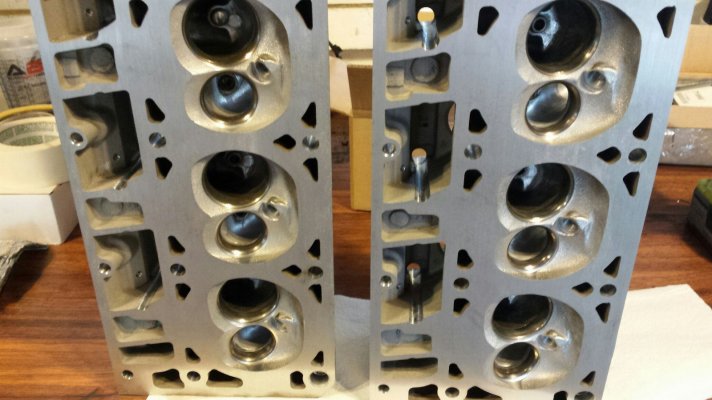
These heads were taken to a machine shop. They were cleaned and milled lightly but no other work was performed. The bill was around $80.
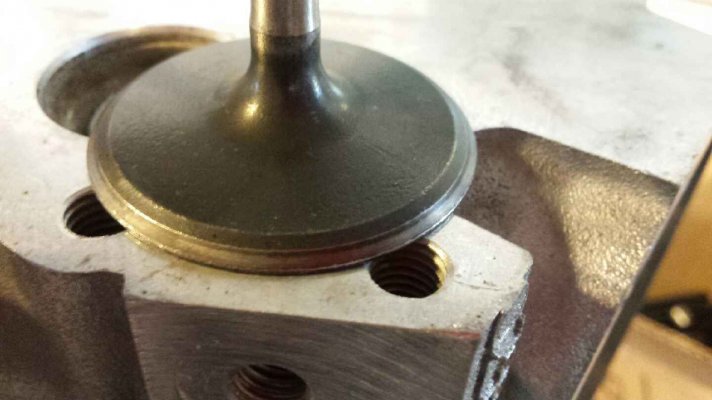
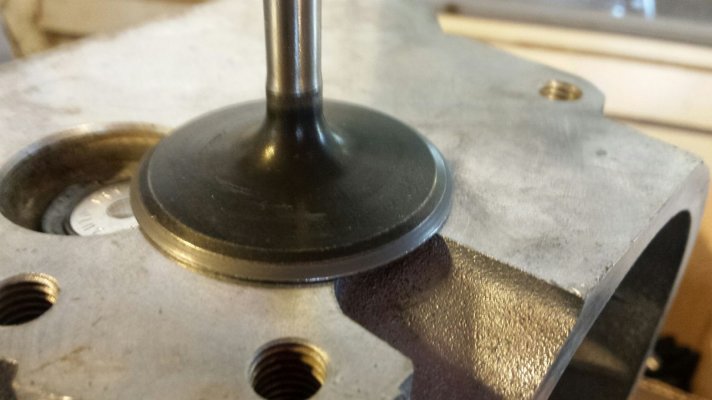
Here's an intake valve. Notice the silver streak around the lower edge. That's where it seals to the valve seat in the head. We are gonna freshen that surface and hopefully widen it some for a better seal.
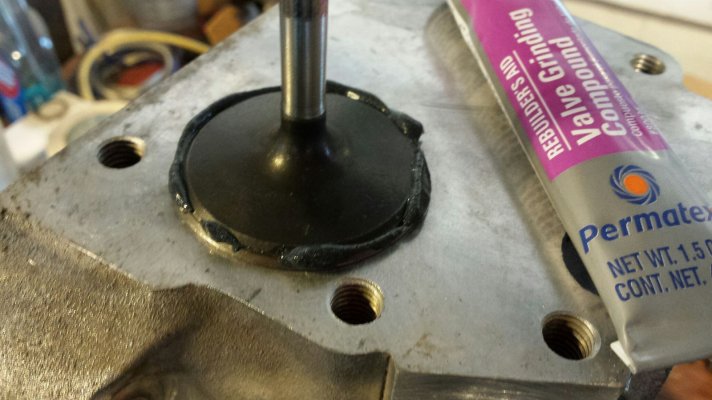
Take your compound, and spread it like so. Doesn't have to be perfect.
Stick it into its hole and clamp your drill onto the stem so you can use the drill to spin the valve in the head.
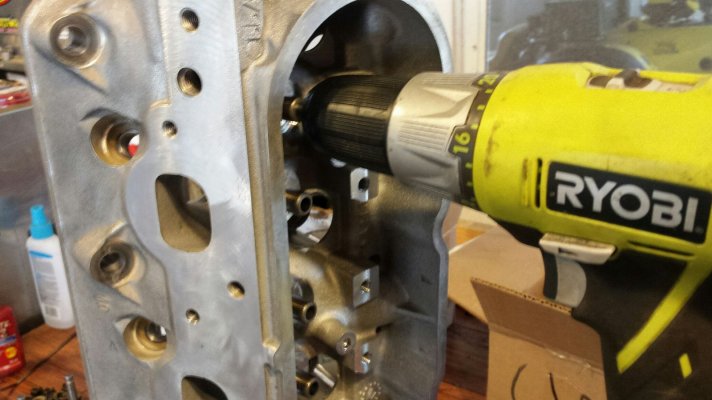
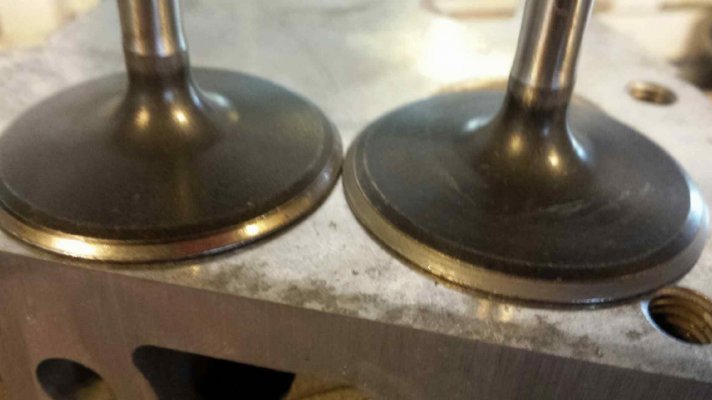
Use the slow speed setting on your drill, and move it in and out (on and off the seat). Wow what a difference 20 seconds makes.
Comparison.
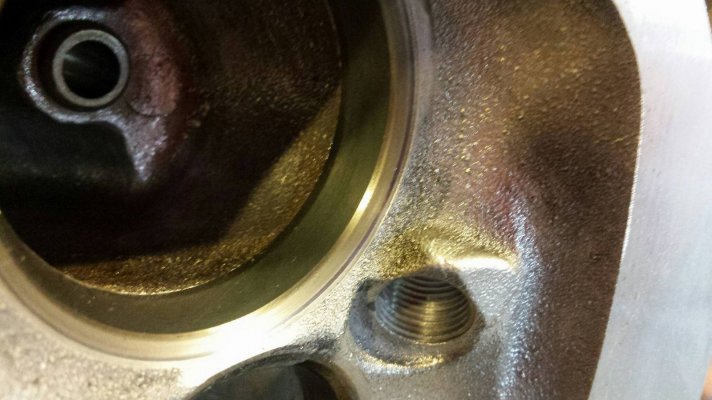
The sealing surface in the head.
Exhaust valve comparison. A little pitting on them is normal and nothing to worry about. Once i mate a valve to a hole, it stays there. I dont move it around once its been ground in. Also make sure you wipe as much of the compound off the head and valve as you can when youre done and hit the valve stem with some wd40 to help it slide in the valve guide easier.
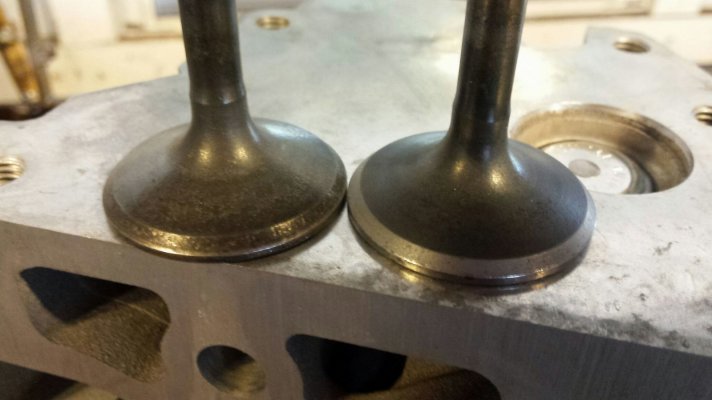
Thats it, repeat the procedure for all 16 valves, makes sure you have a nice even band around each valve and you're good. If one looks off or not even all the way around check the valve and see if its bent slightly. Any questions just ask.
These heads were taken to a machine shop. They were cleaned and milled lightly but no other work was performed. The bill was around $80.

Here's an intake valve. Notice the silver streak around the lower edge. That's where it seals to the valve seat in the head. We are gonna freshen that surface and hopefully widen it some for a better seal.

Take your compound, and spread it like so. Doesn't have to be perfect.

Stick it into its hole and clamp your drill onto the stem so you can use the drill to spin the valve in the head.

Use the slow speed setting on your drill, and move it in and out (on and off the seat). Wow what a difference 20 seconds makes.

Comparison.

The sealing surface in the head.

Exhaust valve comparison. A little pitting on them is normal and nothing to worry about. Once i mate a valve to a hole, it stays there. I dont move it around once its been ground in. Also make sure you wipe as much of the compound off the head and valve as you can when youre done and hit the valve stem with some wd40 to help it slide in the valve guide easier.

Thats it, repeat the procedure for all 16 valves, makes sure you have a nice even band around each valve and you're good. If one looks off or not even all the way around check the valve and see if its bent slightly. Any questions just ask.
