KMeloney
Full Access Member
- Joined
- May 2, 2009
- Posts
- 3,475
- Reaction score
- 719
...How did you go about aligning the new lettering?
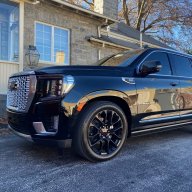
I'm considering pulling my "Denali" lettering from my doors (for a "clean" look). But, in the event that I want to replace the lettering at some later time, I'm wondering how one would go about getting the lettering in the same from-the-factory location.
I see where people have put painter's tape around their existing lettering before removing it, and assume that that's their guide for the new lettering. But if I ever do put lettering back on the doors, I will be working with a clean canvas.
To be clear, one side's lettering on my truck isn't on the same "level" as the other side's to begin with. I think it needs to be run parallel with the door's lower crease that the lettering sits just above -- and one side's lettering doesn't. With that crease as my guide, I'd think that it'd be a matter of getting the height off that crease correct, as well as getting the distance in from the door's leading edge correct, too. Otherwise, do the new letters come with any kind of guide or template?
I'm considering pulling my "Denali" lettering from my doors (for a "clean" look). But, in the event that I want to replace the lettering at some later time, I'm wondering how one would go about getting the lettering in the same from-the-factory location.
I see where people have put painter's tape around their existing lettering before removing it, and assume that that's their guide for the new lettering. But if I ever do put lettering back on the doors, I will be working with a clean canvas.
To be clear, one side's lettering on my truck isn't on the same "level" as the other side's to begin with. I think it needs to be run parallel with the door's lower crease that the lettering sits just above -- and one side's lettering doesn't. With that crease as my guide, I'd think that it'd be a matter of getting the height off that crease correct, as well as getting the distance in from the door's leading edge correct, too. Otherwise, do the new letters come with any kind of guide or template?