OP
OP
Fender emblem needs a bit of work

Disclaimer: Links on this page pointing to Amazon, eBay and other sites may include affiliate code. If you click them and make a purchase, we may earn a small commission.
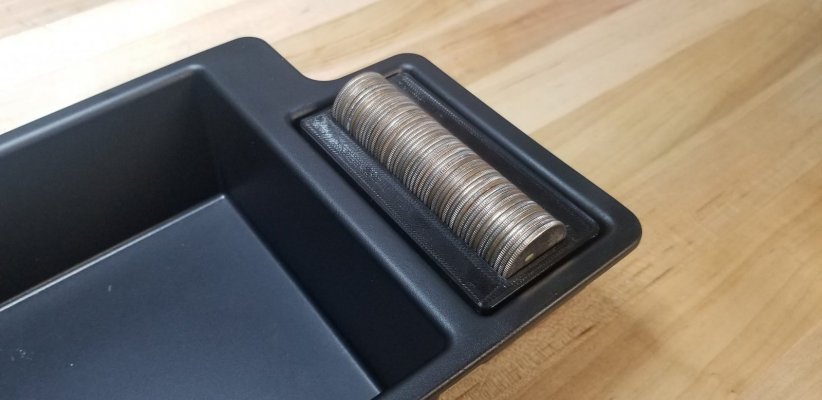
I dont have the safe feature, mind snapping a pic for reference?GM really didn't think things through when they made the center console safe. It's just an open box with no dividing compartments, whatsoever. And the sliding tray has to be removed each time I access the safe, because you can't lift open the safe door without hitting it on the tray. If someone (wink-wink) made a 3 or 4 way divider that fits inside the safe (1 divider for coins), it would eliminate the need for that top sliding tray.
Will do... I'll have it for you during daylight.I dont have the safe feature, mind snapping a pic for reference?
That looks pretty good. I’ve given up on the armrest charger possibility, as the hole isn’t wide enough for an iPhone 13 Pro Max in a case.
I’m going to do an attempt to sketch what I was thinking for the wireless charger bin. I have no CAD skills. Think something like a fully enclosed baby crib with legs on each end, so the phone goes on the wireless mat, this “baby crib” goes over the phone and is supported on the ends by legs slightly longer than the phone thickness. See sketch.
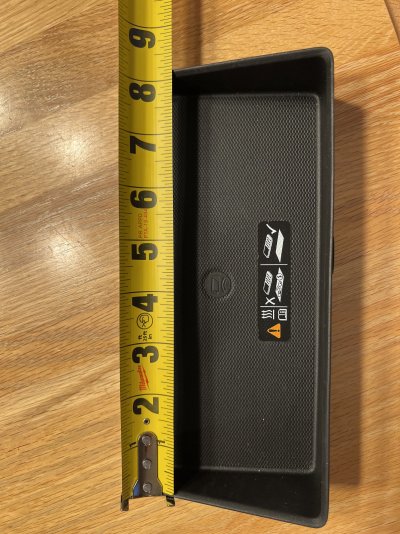
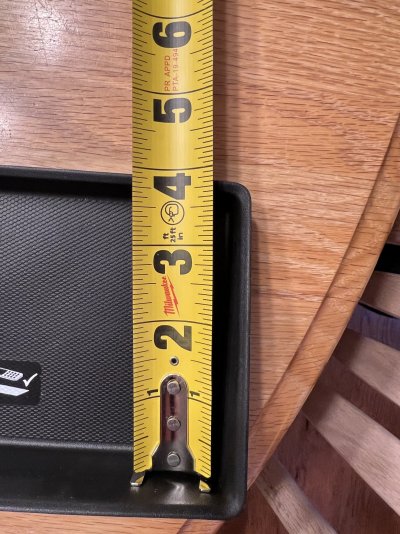
Yes, that is kind of what I was thinking...unless you have a better idea.So to use the wifi charging pad, you would need to remove the "baby crib" feature, place the phone on mat, and then return the baby crib? I wonder if your "mat" area is the same size as to the AT4. That rubber mat just pops right out. Maybe remove it, place a ruler next to it (width and depth) to show the size reference.
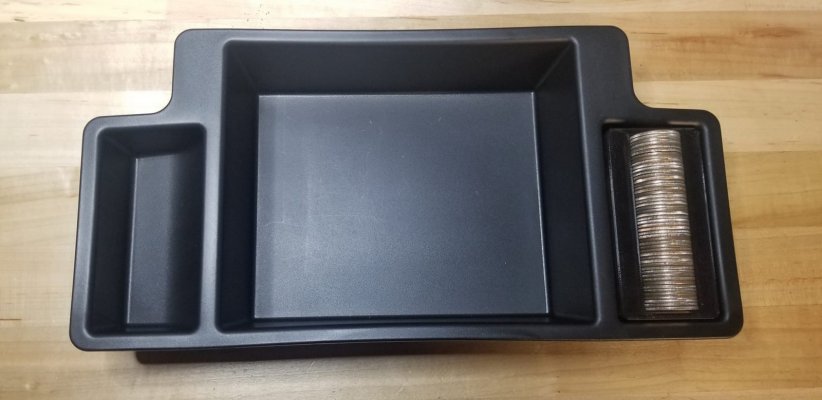
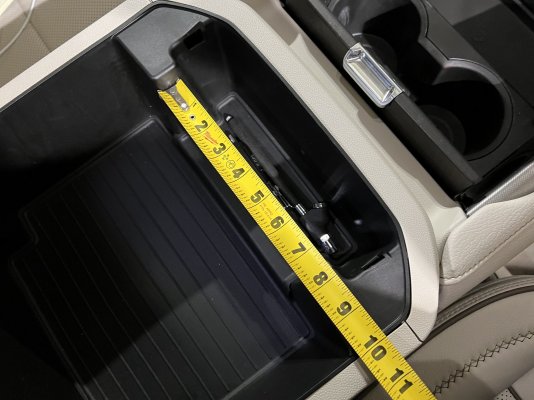
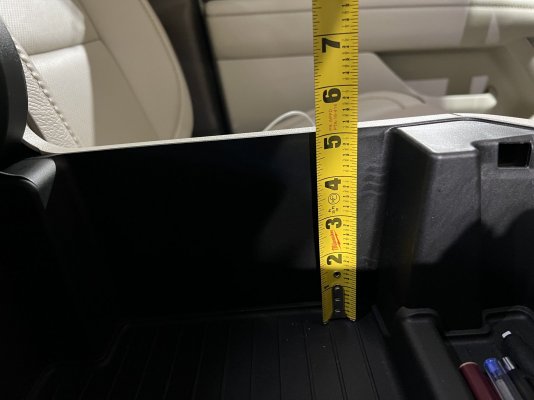
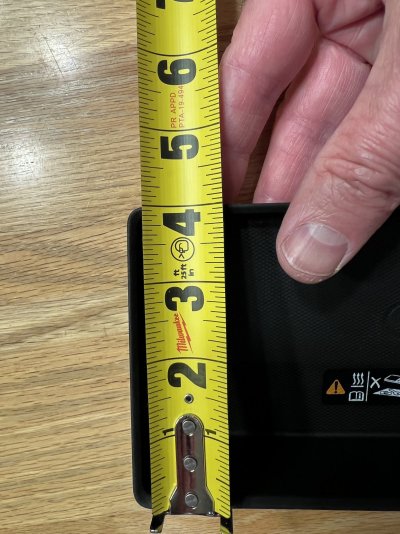
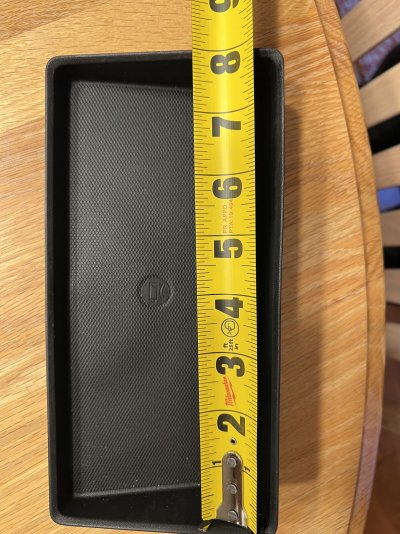
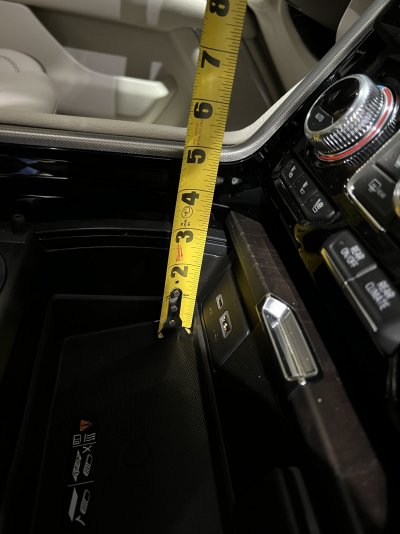
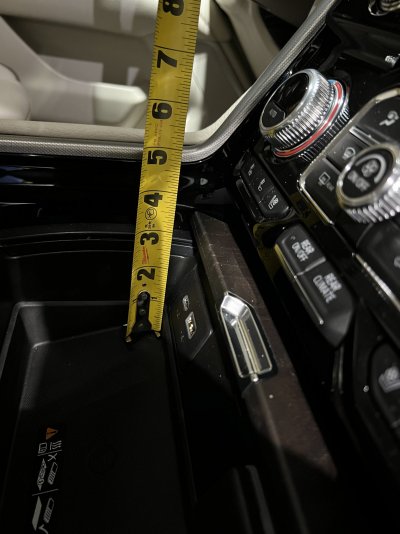
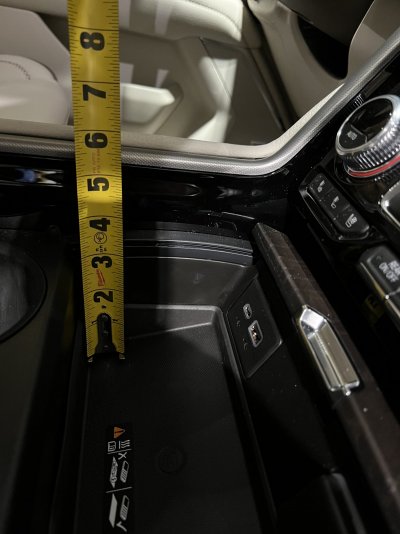
Here’s some pics of the sliding center console
Correct...actually, it is because it is the sliding console, not just Denali...my gut says any sliding console has no USB.The Denali doesnt have any USB/USB-C when you open up the arm rest?
Any specific configuration as far as "bin" layout is concerned?Here’s some pics of the sliding center console
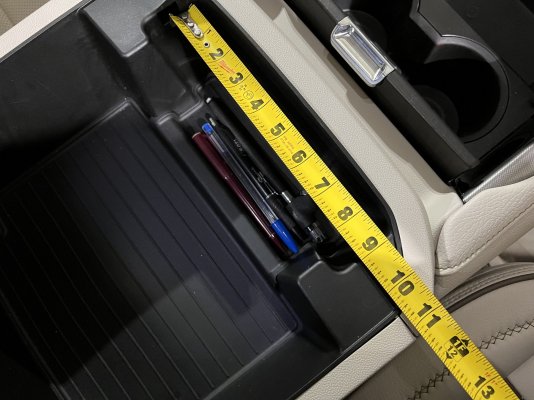
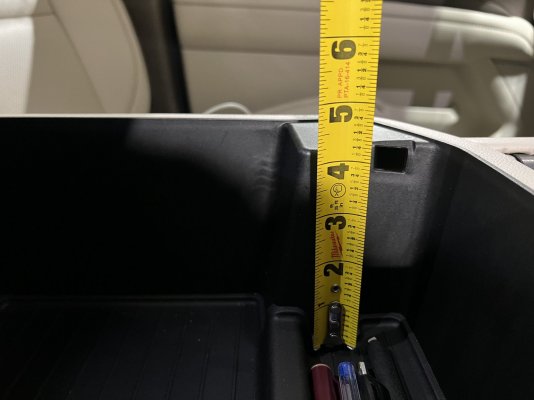
What is the depth?Here’s some pics of the sliding center console
Any specific configuration as far as "bin" layout is concerned?
What is the depth?
So to use the wifi charging pad...
Qi is the standard implemented in the Yukon.Before you market these things, just know that WiFi charging, at least in this aspect, hasn't been invented yet.
It's wireless charging, done via electromagnetic inductance. It just means the phone is charged without plugging a wire into it. It's not being charged via radio waves.
Before you market these things, just know that WiFi charging, at least in this aspect, hasn't been invented yet.
It's wireless charging, done via electromagnetic inductance. It just means the phone is charged without plugging a wire into it. It's not being charged via radio waves.

Talk about a brain fart!!! LOL (all fixed)