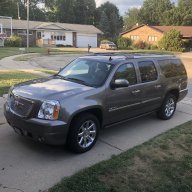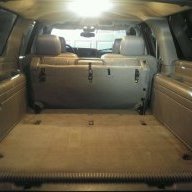
2006 GMC Yukon XL air lift install

Disclaimer: Links on this page pointing to Amazon, eBay and other sites may include affiliate code. If you click them and make a purchase, we may earn a small commission.

Woodblocker55

Full Access Member
Joined
Apr 13, 2019
Posts
673
Reaction score
422
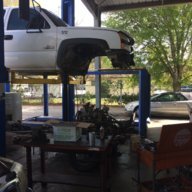
I was wondering last summer the air lift ( rear air bags ) kit included heat shields now it does not .. do I need the heat shields or are they not needed ? I did order the 2 brass stems to keep air separate between the two airbags I wanting zero sway .
So it does make sense hooked together all air would go to the other side . I'm canceling that out .
Any info be great .

Sent from my LGL84VL using Tapatalk
 
OP
OP
Woodblocker55

Woodblocker55

Full Access Member
Joined
Apr 13, 2019
Posts
673
Reaction score
422
I will have a look when I install them see how close to exhaust they get ..[emoji106]

Sent from my LGL84VL using Tapatalk
 
OP
OP
Woodblocker55

Woodblocker55

Full Access Member
Joined
Apr 13, 2019
Posts
673
Reaction score
422
I have airlifts on my 2006 xl Denali. The passenger side bag is pretty close to the exhaust. We installed it on mine. Keeps the airlines protected as well.
Would it be possible get a picture where you put heat shield .. because exhaust be same and yours worked out . I seen it's close to exhaust on passager side. Less mine the exhaust is altered from stock . I was reading the top hole where stem goes up needs to be a inch hole by stem . That should be tricky to do ..


Sent from my LGL84VL using Tapatalk

 

adventurenali92

Full Access Member
Joined
Feb 16, 2015
Posts
7,737
Reaction score
9,212
Location
Big Bear Lake, ca
Would it be possible get a picture where you put heat shield .. because exhaust be same and yours worked out . I seen it's close to exhaust on passager side. Less mine the exhaust is altered from stock . I was reading the top hole where stem goes up needs to be a inch hole by stem . That should be tricky to do ..


Sent from my LGL84VL using Tapatalk
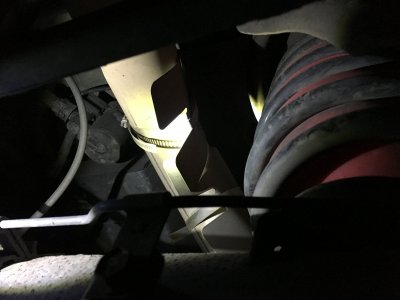
I’ll grab a shot for you when I head down to the truck to leave for work in a few.
 

adventurenali92

Full Access Member
Joined
Feb 16, 2015
Posts
7,737
Reaction score
9,212
Location
Big Bear Lake, ca
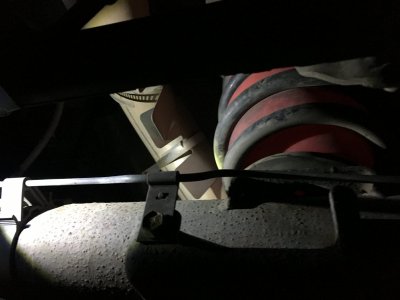
It’s an odd angle to get up in there and take pictures of the heat shields... lol

DD0389A7-C39E-4A9D-8F57-0AA5F519B40C.jpeg 0315AAFB-0E5B-4CE1-B6A2-F7A7FBE7A9A2.jpeg
 
OP
OP
Woodblocker55

Woodblocker55

Full Access Member
Joined
Apr 13, 2019
Posts
673
Reaction score
422
I do appreciate it ! That's great ! I get the idea now
It's keeping the direct heat from air line on top also nice . Might get in to putting them in tomorrow or this week . Will post some pictures [emoji106] you'll see more Minnesota rust though. Yours looks in great shape. [emoji106] Did you plumb your lines together or keep them separate? I'm still pondering where I can put the air Chuck's . I'm thinking on the trailer plugin
Because by gas cap I can see me scratch paint up with the dang air line.

Sent from my LGL84VL using Tapatalk
 

adventurenali92

Full Access Member
Joined
Feb 16, 2015
Posts
7,737
Reaction score
9,212
Location
Big Bear Lake, ca
I do appreciate it ! That's great ! I get the idea now
It's keeping the direct heat from air line on top also nice . Might get in to putting them in tomorrow or this week . Will post some pictures [emoji106] you'll see more Minnesota rust though. Yours looks in great shape. [emoji106] Did you plumb your lines together or keep them separate? I'm still pondering where I can put the air Chuck's . I'm thinking on the trailer plugin
Because by gas cap I can see me scratch paint up with the dang air line.

Sent from my LGL84VL using Tapatalk
Haha yeah being in SoCal we don’t get much rust! Although I live in the mountains and they’ve started using a mildly salty “de-icing solution” on the roads. Which irritates the heck out of me. So now after every snow when it warms up enough to wash my truck I make sure to thoroughly rinse the under carriage off at the self car wash with hot water high pressure system.
I had the airlines plumbed together as I didn’t want to separate valves to have to fill. I put the valve next to the gas cap where the hole was already there for the one gas cap plastic retaining line, since mine no longer has that. It was a perfect spot to put the valve to me becuase it’s out of sight. I just open the door, take the gas cap off and then the valve cover off and fill the bags. It’s easy and I’ve never scratched paint with my compressor line.
 
OP
OP
Woodblocker55

Woodblocker55

Full Access Member
Joined
Apr 13, 2019
Posts
673
Reaction score
422
Here's a Minnesota deal that's nasty also. We get all winter road salt and chemical .. Then in summer they put a chemical on gravel roads that is like calcium chloride for dust . And it rusts stuff also . So here you can't wash our rigs enough [emoji849] along with tons of road repairs from the -33.5f ground frost buckling roads. Here's a example town 30 miles away there sewer pipes 8 ft in ground froze solid 2 years ago .
Yes cold penetrating eight feet in ground is a big deal. [emoji849][emoji15]

Guys in Canada even have Wilder stories. [emoji849]

Sent from my LGL84VL using Tapatalk
 

Mooseman93

Member
Joined
Dec 30, 2012
Posts
37
Reaction score
54
It’s an odd angle to get up in there and take pictures of the heat shields... lol

View attachment 232921 View attachment 232922
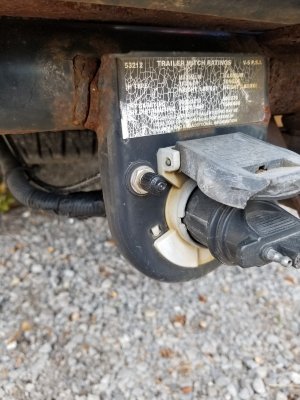
I put the Tee on my airbags, and ran the line back to the trailer lights plug. Drilled a hole just left of the cover hinge for the filler valve. Also, the instructions said to run the lines out the top of the spring holder, but I ran mine out the bottom. It was much easier to get to and doesn't seem to pose any issues. I've had them on about a year now and they've made a world of difference since I deleted the worn out auto ride shocks. Roll them up like a hot dog bun, zip tie them tight, shove them into the springs and then cut the zip ties to release them. Not a bad job at all. Then route the lines, put on the heat shield and you're done.

20191021_112533.jpg
 

wjburken

Elite Member
Supporting Member
Joined
Dec 26, 2017
Posts
10,315
Reaction score
29,545
Location
Eastern Iowa
I put the Tee on my airbags, and ran the line back to the trailer lights plug. Drilled a hole just left of the cover hinge for the filler valve. Also, the instructions said to run the lines out the top of the spring holder, but I ran mine out the bottom. It was much easier to get to and doesn't seem to pose any issues. I've had them on about a year now and they've made a world of difference since I deleted the worn out auto ride shocks. Roll them up like a hot dog bun, zip tie them tight, shove them into the springs and then cut the zip ties to release them. Not a bad job at all. Then route the lines, put on the heat shield and you're done.

View attachment 233012

I would never advise teeing the two sides together as it will have the ability to produce some unintended sway as air can be pushed out of one airbag and into the other depending on how the vehicle is loaded. Kind of like having a pipe with a balloon on both ends. If I squeeze one, it will provide little to no resistance as the air will go to the balloon on the other end of the pipe.

As for running the air lines out the top of the bag, that has to due with the fact that the top spring holder is anchored to the frame and doesn't move in relation to the rest of the body where as the bottom of the spring is what is going up and down and will be flexing your airlines all the time. I hope you have enough air line to handle situations where your axle is at full drop in relation to your body.

I like how you mounted your fill valve. Very clean and accessible. It would be very easy to add another fill valve on the other side of the plug so you can have your air bags be independent of each other.
 

Forum statistics

Threads
138,148
Posts
2,000,542
Members
103,075
Latest member
BlacktopBandit76
Back
Top