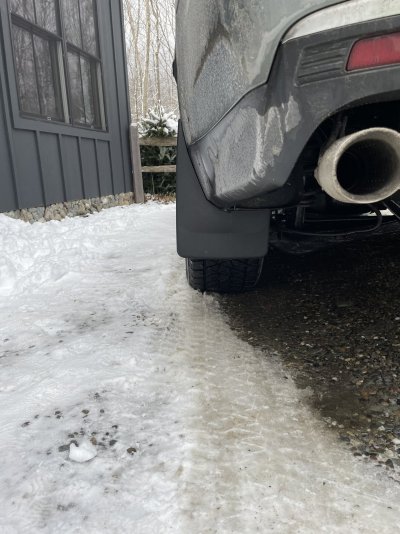
I'm not sure why Tahoe mudflaps are damn near impossible to find a picture of them actually on the vehicle. But here they are, on a 23 z71 the fit and texture finish is a great match for the stock plastic on the bottom. I would recommend these to anyone looking for a set of mudflaps

You are using an out of date browser. It may not display this or other websites correctly.
You should upgrade or use an alternative browser.
You should upgrade or use an alternative browser.
Weathertec Mudflaps Installed!
- Thread starter JamesZ71
- Start date
Disclaimer: Links on this page pointing to Amazon, eBay and other sites may include affiliate code. If you click them and make a purchase, we may earn a small commission.

- Joined
- Aug 2, 2018
- Posts
- 10,522
- Reaction score
- 15,270
Thank you for posting the results of your mud flap addition.
Did you have to do any drilling to attach them?
Did you have to do any drilling to attach them?

Nice! Thanks for sharing. 
- Joined
- Aug 2, 2018
- Posts
- 10,522
- Reaction score
- 15,270
Thank you for your reply. Much appreciated.No drilling or anything required, also included with the mudflaps is the small torx bit for taking the screws out and in. All that's needed is a small ratchet and bit driver. Entire install was done in 15 minutes
NothEastTahoe
Member
- Joined
- Jul 13, 2023
- Posts
- 72
- Reaction score
- 71
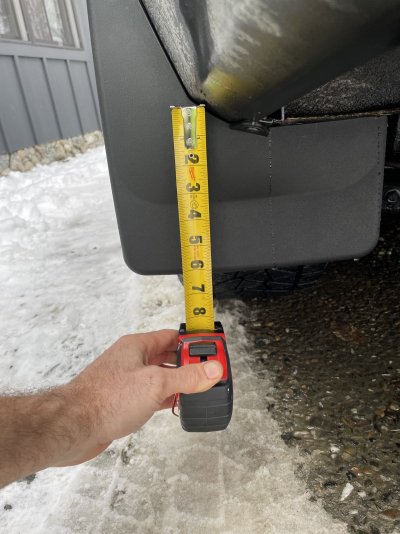
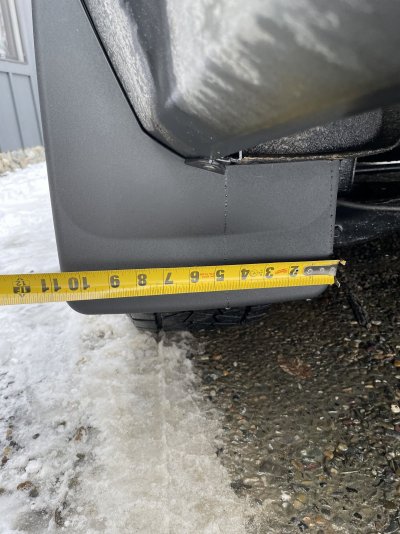
Thanks for this post, just ordered some, might add a few photos after they come in. What a pain trying to find any photos, or even information about how big they are.
I Drove home behind my wife today and the amount of road spray these vehicles put out is insane, all over the car. Even if you don't care about the people behind you, care about yourselves and put a set of mud flaps on is my recommendation.
I Drove home behind my wife today and the amount of road spray these vehicles put out is insane, all over the car. Even if you don't care about the people behind you, care about yourselves and put a set of mud flaps on is my recommendation.
NothEastTahoe
Member
- Joined
- Jul 13, 2023
- Posts
- 72
- Reaction score
- 71
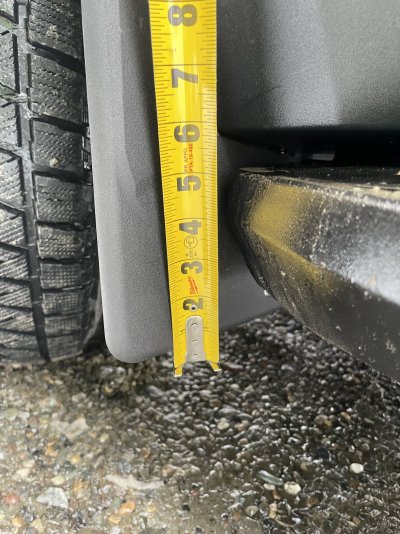
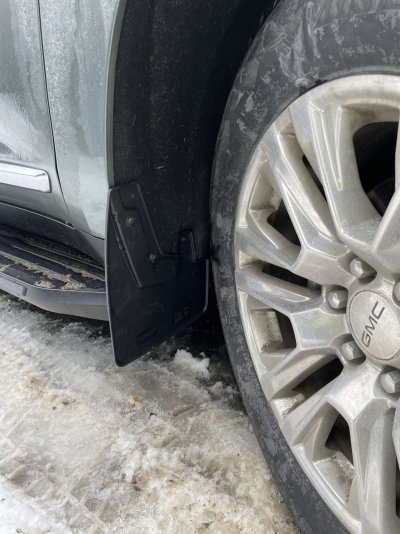
Here to post some more photos.
Installation was easy, and they have better coverage than I had hoped for, but I won't say its the same as a gatorback set.
The front one is a little shorter, but should still cut down a bit of spray. When installing the front, you'll want to turn your wheels.
If you have a powered 1/4 inch driver you will be happy happy, mine isn't so it was a manual ratchet. Not too bad though.
Installation was easy, and they have better coverage than I had hoped for, but I won't say its the same as a gatorback set.
The front one is a little shorter, but should still cut down a bit of spray. When installing the front, you'll want to turn your wheels.
If you have a powered 1/4 inch driver you will be happy happy, mine isn't so it was a manual ratchet. Not too bad though.
Attachments
KMeloney
Full Access Member
- Joined
- May 2, 2009
- Posts
- 3,476
- Reaction score
- 721
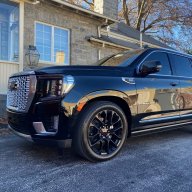
Good stuff. Thanks -- but let's see some shots of the entire rig!
KMeloney
Full Access Member
- Joined
- May 2, 2009
- Posts
- 3,476
- Reaction score
- 721
Haven't gotten a clear response to this question yet... but do the supplied stick-on paint protection strips that come with these get applied to the INNER lip of the wheel well, or on the OUTER edge of the wheel well/fender? In my mind, you can make the case for it going on either surface. I'm thinking it should go on the outside (where any paint wear would be most visible if you removed the flaps later on), but who knows?
Haven't gotten a clear response to this question yet... but do the supplied stick-on paint protection strips that come with these get applied to the INNER lip of the wheel well, or on the OUTER edge of the wheel well/fender? In my mind, you can make the case for it going on either surface. I'm thinking it should go on the outside (where any paint wear would be most visible if you removed the flaps later on), but who knows?
Here.
Attachments
KMeloney
Full Access Member
- Joined
- May 2, 2009
- Posts
- 3,476
- Reaction score
- 721
Here.
Thank you!
KMeloney
Full Access Member
- Joined
- May 2, 2009
- Posts
- 3,476
- Reaction score
- 721
Finally put mine on yesterday:
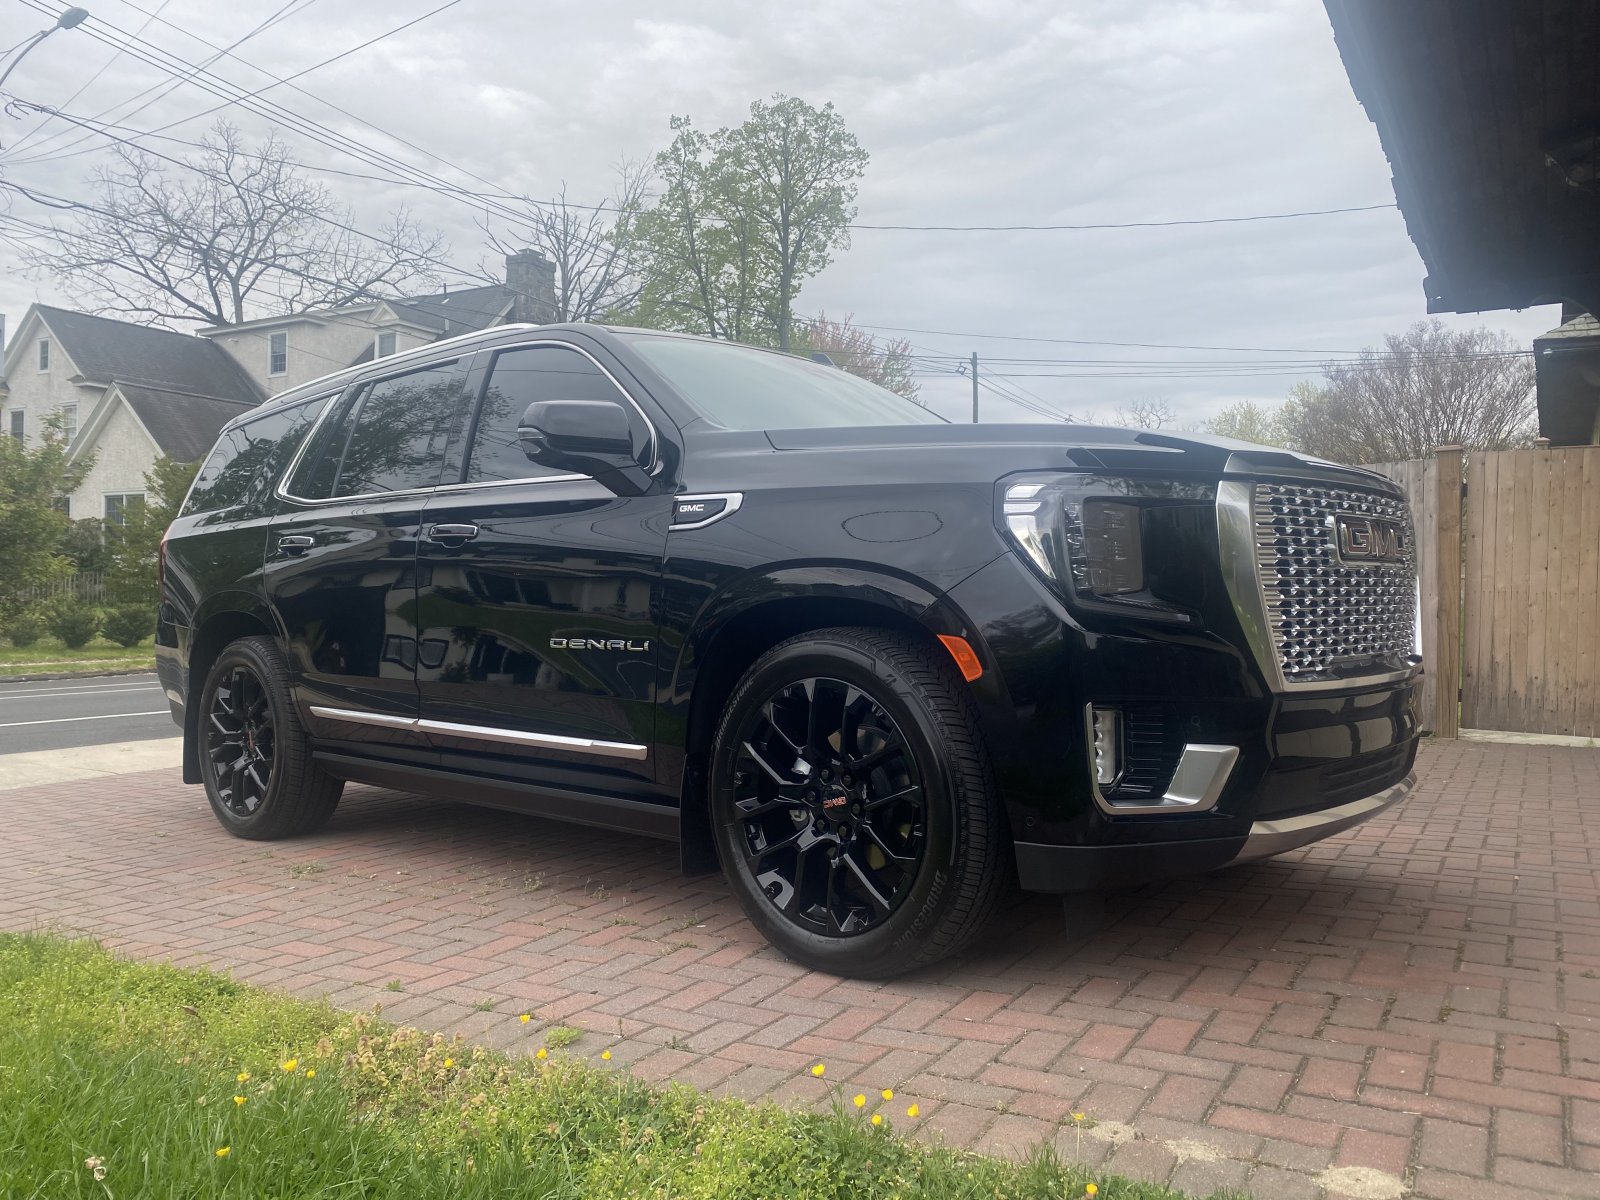
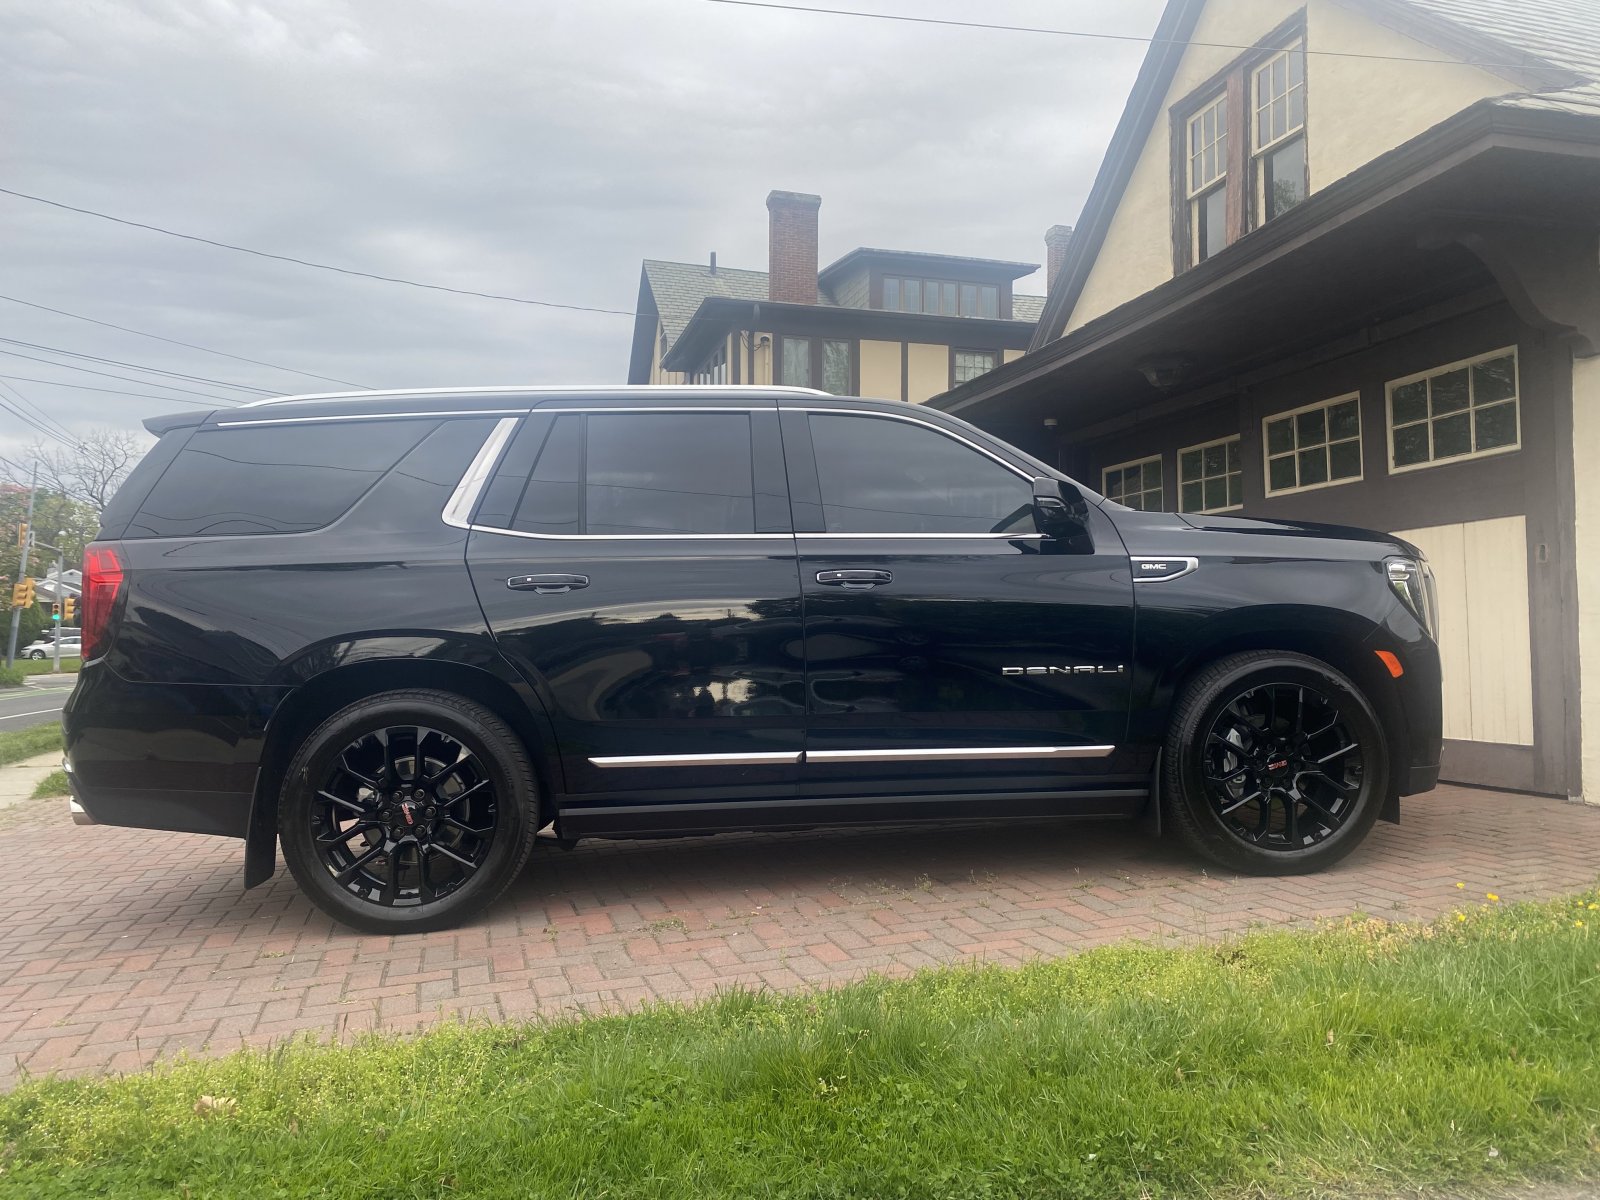
I think the truck looks great with them (need some better pics to show them off better — but the fact that they don’t jump out at you/look OEM is one thing that’s great about them).
I think the truck looks great with them (need some better pics to show them off better — but the fact that they don’t jump out at you/look OEM is one thing that’s great about them).
Looks awesome! Might put these in our new XL. They do look OEM… and very subtle. Easy install/any cutting required?Finally put mine on yesterday:
View attachment 427211View attachment 427212
I think the truck looks great with them (need some better pics to show them off better — but the fact that they don’t jump out at you/look OEM is one thing that’s great about them).
KMeloney
Full Access Member
- Joined
- May 2, 2009
- Posts
- 3,476
- Reaction score
- 721
Install takes takes no time. It’s just 3 screws per flaps. So, as fast as you can remove 3 screws, put the flaps in place, and screw the screws back in, that’s it. Oh— and you’ll have to start your truck and turn the wheels full-lock to get the most access to the front screws (I recommend doing that with the truck running so you don’t lock up the steering wheel).
It’s a little tight in there, but with a small ratchet it’s very easy and quick.
I think the Huskys and maybe others require drilling. There is absolutely no need for drilling for these flaps (and I don’t know why anyone would tolerate having to drill for any).
It’s a little tight in there, but with a small ratchet it’s very easy and quick.
I think the Huskys and maybe others require drilling. There is absolutely no need for drilling for these flaps (and I don’t know why anyone would tolerate having to drill for any).
KMeloney
Full Access Member
- Joined
- May 2, 2009
- Posts
- 3,476
- Reaction score
- 721
One more:
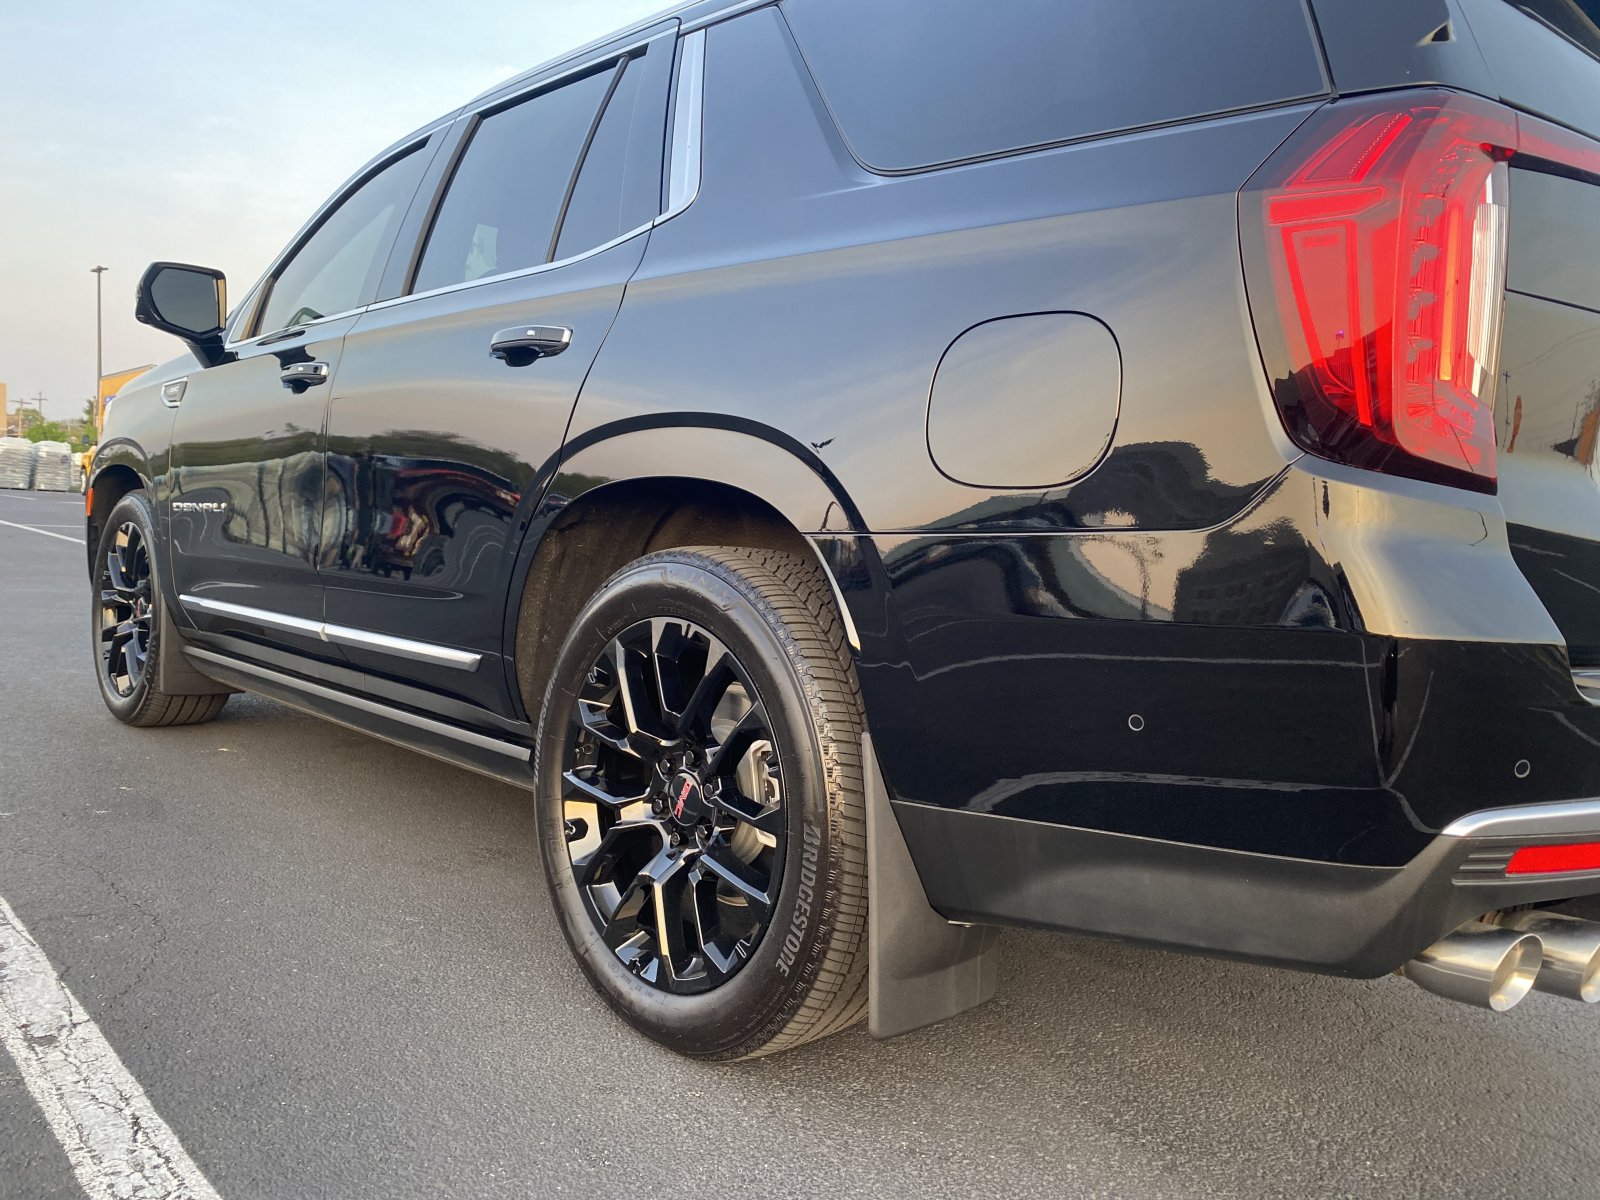
I really like the overall look with these things!
I really like the overall look with these things!
olyelr
Full Access Member
Im not typically a mudflap kind of guy, but have to agree, they look great. Almost like they should just come that way from the factory.
KMeloney
Full Access Member
- Joined
- May 2, 2009
- Posts
- 3,476
- Reaction score
- 721
I agree. I haven't figured out the best way to describe it, but I also think that they pull the truck closer to the ground (visually). I like the look.Im not typically a mudflap kind of guy, but have to agree, they look great. Almost like they should just come that way from the factory.
Similar threads

- Replies
- 2
- Views
- 506
- Replies
- 11
- Views
- 1K


- Replies
- 2
- Views
- 215


