Running amp wiring and RCA's

Disclaimer: Links on this page pointing to Amazon, eBay and other sites may include affiliate code. If you click them and make a purchase, we may earn a small commission.

Vette66

Full Access Member
Joined
Jul 11, 2013
Posts
196
Reaction score
9
Location
Fresno, Ca
Ok this is not the first time I have installed an amp. But it is the first time in a large vehicle. My question is what is the best way to run the wires? Up the middle, on the drivers side, or on passengers side? My amp will be semi permanent mount and my speakers will be removable for when I load the back up. So up the middle might be a pain if I disconnect everything. Let me know your input on this I will be attempting the install on Sat the 27th tomorrow.

Thanks in advanced for the input,

Chris
 

DCT

Full Access Member
Joined
Mar 27, 2012
Posts
351
Reaction score
4
I ran the power on the driver side and rca on the passenger side. I did this because those are the sides the connections are on the amps under the 2nd row. I didn't want the carpet sticking up the middle. Only the wire for the bass knob is in the middle because it is mounted behind the door in the center console.

I think running wire down the side is easier and cleaner. Especially if your going to use an amp on the door speakers. Removing the second row makes it easier.
 
OP
OP
Vette66

Vette66

Full Access Member
Joined
Jul 11, 2013
Posts
196
Reaction score
9
Location
Fresno, Ca
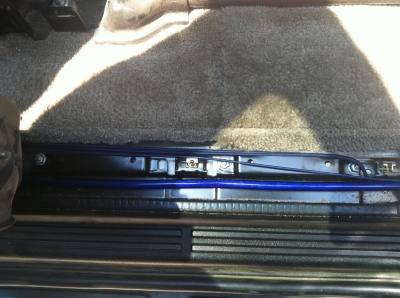
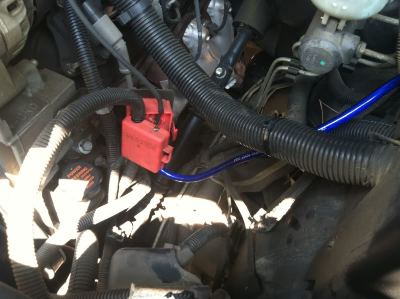
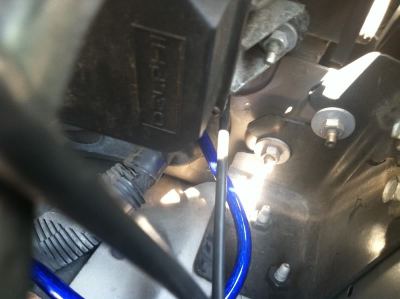
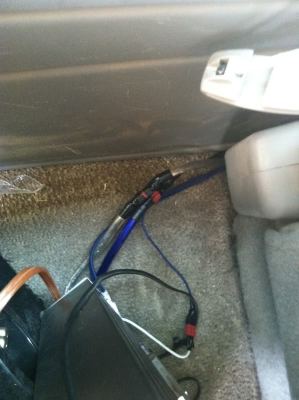
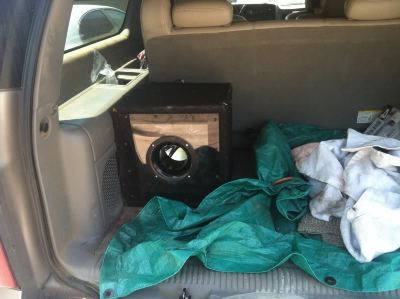
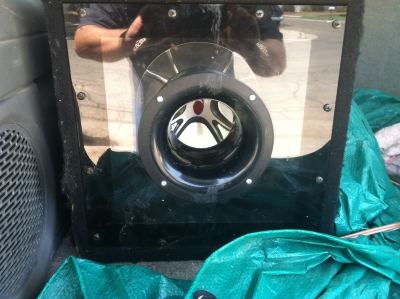
After not really seeing anybody post I just went at it. Pretty cool that there are conduit rails under the panels. I just ran power down one, rca and amp trigger down the other. No feedback issues either. I made the box and amp so it is removable using 80amp Deans connectors from Radio Controlled battery connectors. I can yank the whole thing in 1 min, works prefect.
Speaker is a single Kicker 12" in a rear sealed front open design, running a boss 1600 watt amp bridged. Sounds really good for stock system plus box. I am happy and I guess that all that matters. Will add some pics in a few.

---------- Post added at 01:49 PM ---------- Previous post was at 01:32 PM ----------

3776eb8d-9fda-4bf1-a996-d2fddfb39a0b_zps9e660c29.jpg

847DD3D1-1CEC-41EC-A245-DBE331F45D91-8592-00000611BC436FB0_zpsa65f0a8f.jpg

4C4AAA6D-DC7F-4017-9E3C-FA21F43F5E5A-8592-000006137640396F_zps211b6426.jpg

9C5B61CF-4C08-48E4-BE73-609D569B6725-8592-00000611E693A27F_zps909ebb18.jpg

C6871C93-D5BE-4634-AF3D-0A8EE9BDA562-8592-00000611EE504FC8_zps32ca5790.jpg

5-6 year old box but it works and I wont be worrying about beating it up cause its already there.
B5C4A108-14BF-4FE4-BECA-8C2317E8DDC8-8592-00000611CD6B9100_zpse15f2416.jpg

FD98CD73-FEFF-4B22-AA64-759A09BDF1AF-8592-00000611B48EA515_zpsb4b3119d.jpg
 
Last edited:

josueh95

Full Access Member
Joined
Jun 11, 2012
Posts
781
Reaction score
31
thats the way i have my setup ran, power on drivers side and remote cable and rcas on the other..where did you get your ground from? also do you have a fuse ran on your power cable if not i recomend you get one ASAP
 
OP
OP
Vette66

Vette66

Full Access Member
Joined
Jul 11, 2013
Posts
196
Reaction score
9
Location
Fresno, Ca
Ground was from the mount for the jack. Yes I have a fuse it's just out of frame in the second picture.
 

josueh95

Full Access Member
Joined
Jun 11, 2012
Posts
781
Reaction score
31
alright good jaja also a good idea would be to go back and with a wire brush remove the paint from the bolt so that you have metal to metal contact
 
OP
OP
Vette66

Vette66

Full Access Member
Joined
Jul 11, 2013
Posts
196
Reaction score
9
Location
Fresno, Ca
I did that also with my dremel and wire wheel bit. Removed the jack assembly cleaned off the paint and reattached.
 

Forum statistics

Threads
129,364
Posts
1,814,611
Members
92,519
Latest member
wyodave
Top