1992 short bed slow build up

Disclaimer: Links on this page pointing to Amazon, eBay and other sites may include affiliate code. If you click them and make a purchase, we may earn a small commission.

07Burb

GM fan for life
Staff member
Moderator Supporting Member Administrator
Joined
Jan 3, 2011
Posts
50,966
Reaction score
19,474
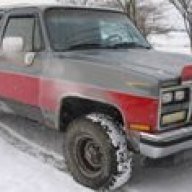
Had this truck for a couple months now but I guess I'll make a thread on it. You can also follow it on my Instagram for my twice a year posts on there :crazy:

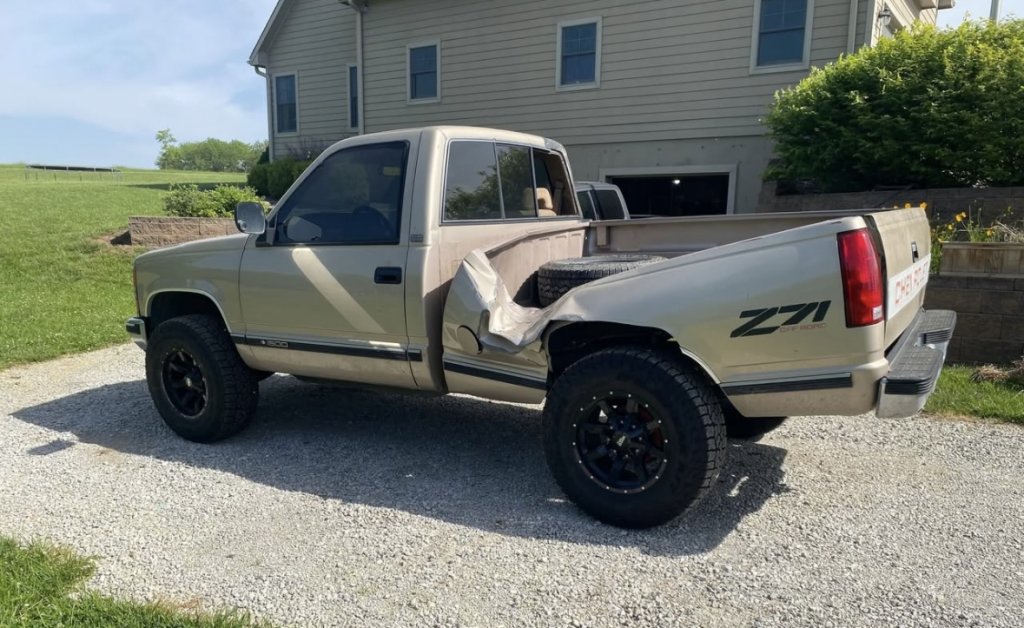
Short bed, small lift, 350, 5-speed, 4x4, rust free, 233,*** miles

Overall, truck is super clean but does need a thing or twelve. Radiator has a small leak in it and I’ll probably throw a tune up at it. Other than that the rest is cosmetic. I’ve tracked down some options for a replacement bed. Need to repair the cab and replace the rear window. Also plan to do some cosmetic clean up of the interior. Once I’ve got the exterior how I want it I’ll throw some paint at it. I’m thinking OEM dark green so I’ve always loved these trucks in that color.
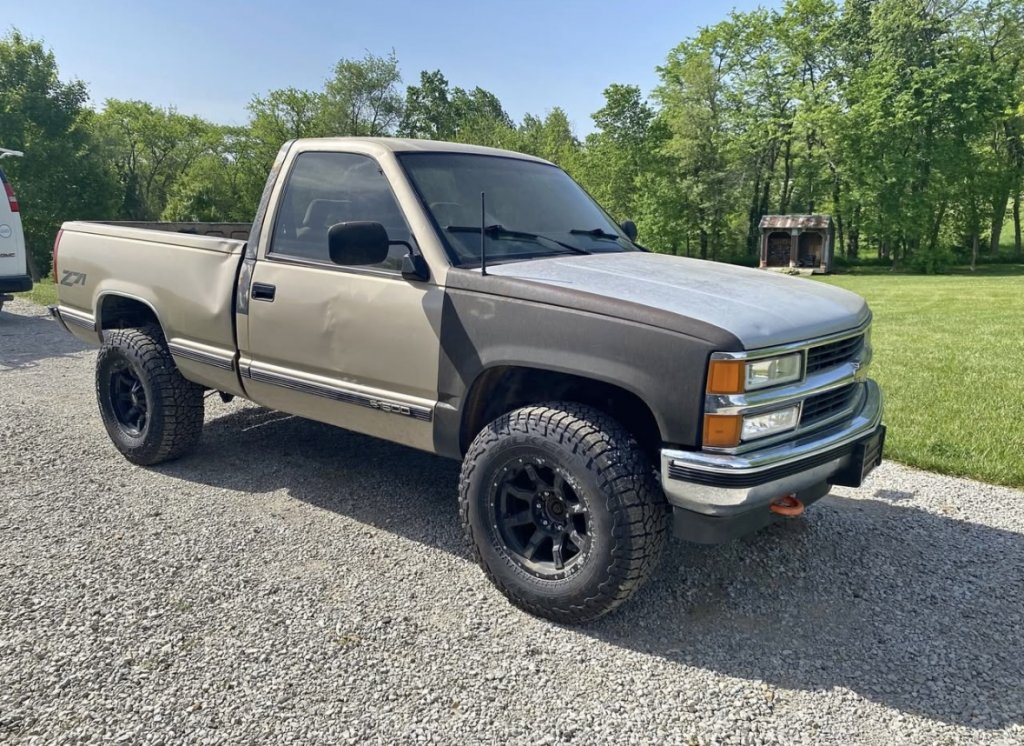
BEFOREPassFrt.jpeg

BEFOREDriveRear.jpeg

BEFOREInt.jpeg
 
OP
OP
07Burb

07Burb

GM fan for life
Staff member
Moderator Supporting Member Administrator
Joined
Jan 3, 2011
Posts
50,966
Reaction score
19,474
Took the bed off and recycled it. Got a whole $13 for 300 lbs of steel :whymewhyme: No idea how people make a living recycling scrap metal. Found out someone installed a fifth wheel at some point. No idea why you'd use a short wheel base, 1/2 ton truck to pull a gooseneck but I'm sure it was an adventure LOL

BedOff.jpeg


I cut the gooseneck off and gave the assembly to a buddy who's going to use it on his project.

GooseNeckRemoved.jpeg
 
OP
OP
07Burb

07Burb

GM fan for life
Staff member
Moderator Supporting Member Administrator
Joined
Jan 3, 2011
Posts
50,966
Reaction score
19,474
Went to work on the upper cab corner damage. Was a lot of work but ended up pretty decent. I still need to do final bodywork on it but I'll do that when I start prepping this thing for paint. I didn't realize it until I started fitting up the patch panel that this thing had a dent in the body line of the cab so I'll have to give that some attention. There rest of the body work in the area is just fine tuning.

BEFOREDamage1.jpeg


Window out in prep for corner work and new window install
RearWindowOut.jpeg


Started cutting out the damage
CabCornerProgress.jpeg


This is what I cut out :eek: Pretty wild LOL
LOL.jpeg


CabCornerProgress2.jpeg
 
OP
OP
07Burb

07Burb

GM fan for life
Staff member
Moderator Supporting Member Administrator
Joined
Jan 3, 2011
Posts
50,966
Reaction score
19,474
Got this from a GMT400 forum member

PatchPanel.jpeg

PatchPanelTrimmed.jpeg

PatchPanelTrimmedBack.jpeg


Right before I got it fully welded, phase 1 of bodywork and in primer.
CabCornerProgress3.jpeg


See the bodyline? I'll be giving that attention soon when I start bodywork on the truck in earnest.
CabCornerProgress4.jpeg
 
OP
OP
07Burb

07Burb

GM fan for life
Staff member
Moderator Supporting Member Administrator
Joined
Jan 3, 2011
Posts
50,966
Reaction score
19,474
New Window installed. Overpriced eBay unit as a good OEM unit hasn't been available in my area up to this point.
RearWindowInstall.jpeg


New to me bed put on. Not perfect but rust free and loads better than the destroyed one LOL

BedOn.jpeg


Refreshed front end and you can see the bulk of the damage that I need to repair at this point from this angle. We're getting there and I'm happy with the progress so far....
Damage.jpeg


Also acquired some different seats out of a 95-98 gmt400. I'll get pics of those as I start fitting them in...
 

89Suburban

Bull in the china shop
Space X Supporting Member
Joined
Jan 10, 2013
Posts
18,032
Reaction score
51,355
Location
SE PA
New Window installed. Overpriced eBay unit as a good OEM unit hasn't been available in my area up to this point.
View attachment 463130

New to me bed put on. Not perfect but rust free and loads better than the destroyed one LOL

View attachment 463131

Refreshed front end and you can see the bulk of the damage that I need to repair at this point from this angle. We're getting there and I'm happy with the progress so far....
View attachment 463132

Also acquired some different seats out of a 95-98 gmt400. I'll get pics of those as I start fitting them in...
Good job dawg.
 
OP
OP
07Burb

07Burb

GM fan for life
Staff member
Moderator Supporting Member Administrator
Joined
Jan 3, 2011
Posts
50,966
Reaction score
19,474
Good job dawg.
I'm really happy with how she's coming along and my boys are pretty excited to work on it with me so that's cool! My next projects this weekend with it is hub assemblies, try and track down the leak on passenger front of cab (super common issue with gmt400's) and possibly start some metal work on the bed to see if I can't make some of those dents no so dent-like. :)
 
OP
OP
07Burb

07Burb

GM fan for life
Staff member
Moderator Supporting Member Administrator
Joined
Jan 3, 2011
Posts
50,966
Reaction score
19,474
I'm about 95% confident that I now have the cab interior 100% dry. Just to make sure, though, I went ahead and ordered new weatherstipping for the doors but that last couple big rains that cab has remained dry so that's feeling pretty good. Here pretty soon I'll be getting my audio sorted out, new-to-me seats installed and carpet ordered. I'll be out of town this weekend but hope to be able to make good progress on this over the next couple of weeks

Just picking away at her a little bit at a time :)
 
OP
OP
07Burb

07Burb

GM fan for life
Staff member
Moderator Supporting Member Administrator
Joined
Jan 3, 2011
Posts
50,966
Reaction score
19,474
Finally got time to start working on getting the “late model” obs seats in. Should be finished tomorrow night.

Stumbled across these and grabbed a few off OBSoutpost.com. Pretty slick set up and with 1/8” plate. I welded them in to make them more “permanent” and really like the setup.

IMG_8596.jpeg
IMG_8597.jpeg


On this far passenger seat, I put these in on the back-inner corner and front-outer corner (near door). I could not use it for the front-inner because a heat shield is in the way so I’m using a fender washer at that corner. Back-outer corner is in the stock 1992 mounting hole. I’m hoping the “60” portion of the seat is about the same setup. I didn’t have time to mock that up tonight so I’ll keep you posted tomorrow night.

IMG_8598.jpeg


After these are in for good, I start putting in heat/sound deadener and then audio. All to be complete before the end of the weekend. I’ll be starting to scope out carpet and seat covers soon. I already know what covers I’m going with (they are tan/black) but need to decide if I’m going with black or tan carpet. May get the seat covers first and let the make my decision for me.
 
OP
OP
07Burb

07Burb

GM fan for life
Staff member
Moderator Supporting Member Administrator
Joined
Jan 3, 2011
Posts
50,966
Reaction score
19,474
Seats are in. Far driver side bolts lined up perfect with existing holes so there’s 2 gold stars :) Inner most bracket for that 60 portion of the seat had to be modified. These seats came out of a 95-98 extended cab I had to cut down the rear portion of the bracket and weld it back. Not a huge deal at all but just something worth noting for anyone stumbling upon this thread and pondering the upgrade. Overall, it’s an easy swap with some fairly elementary level of fabrication skills needed :waytogo:

Next up, audio upgrades (this weekend), seat covers and carpet (TBD in the future :))


IMG_8600.jpeg

IMG_8601.jpeg
 
OP
OP
07Burb

07Burb

GM fan for life
Staff member
Moderator Supporting Member Administrator
Joined
Jan 3, 2011
Posts
50,966
Reaction score
19,474
Finally got my rendition of the 4 corner mod complete

58073E07-188E-42BE-9947-AC435029A71C.jpeg


Used these lights off Amazon and fitted them in. Also put them in the bumper lights but emptying new dorman connectors

IMG_8681.jpeg
IMG_8677.jpeg
IMG_8676.jpeg
 
OP
OP
07Burb

07Burb

GM fan for life
Staff member
Moderator Supporting Member Administrator
Joined
Jan 3, 2011
Posts
50,966
Reaction score
19,474
Fitting a patch to shave the tailgate handle. Hitting the body work ******* this thing this winter so I can paint it this Spring. Starting at the rear of the truck and moving forward.

IMG_8719.jpeg
 

Forum statistics

Threads
138,040
Posts
1,997,656
Members
102,976
Latest member
Capybarbro
Back
Top