Rigid SAE Fog Lights as DRLs (23 Denali)

Disclaimer: Links on this page pointing to Amazon, eBay and other sites may include affiliate code. If you click them and make a purchase, we may earn a small commission.

BobHolthaus

Member
Joined
May 2, 2023
Posts
97
Reaction score
57
Hello everyone: I’d like to add a pair of Rigid SRM or Dually SAE Fog Light to the front of my GFs 2023 Denali. Can someone point me to a link that may help me disassemble the lower grill area so that I can see how easily it would be to mount them in the very bottom center grill above the lower valance? It looks like a perfect place to mount them. I’d like to add a set of Amber, which we have on all of our other vehicles, as DRL’s and as enhanced lights at night.

And while I am asking, any threads on how to aim the factory fog lights higher? GMC has done a nice job “sealing” the wheel wells and underneath with plastics. Thanks in advance.
 

jgraves

Full Access Member
Joined
Nov 19, 2021
Posts
127
Reaction score
90
I watched one of M&R Automotive's videos before pulling the grill on my AT4 to install Dually XL lights. https://www.youtube.com/@MandRautomotive

Wheel liner removal isn't too complicated (just time consuming) and can be done without removing the wheels and gives access to the fog lights. I never looked too closely at the housings / mounts as I wasn't trying to modify the factory fogs.
 
OP
OP
BobHolthaus

BobHolthaus

Member
Joined
May 2, 2023
Posts
97
Reaction score
57
I watched one of M&R Automotive's videos before pulling the grill on my AT4 to install Dually XL lights. https://www.youtube.com/@MandRautomotive

Wheel liner removal isn't too complicated (just time consuming) and can be done without removing the wheels and gives access to the fog lights. I never looked too closely at the housings / mounts as I wasn't trying to modify the factory fogs.
Thank you for this. Do you have pics of your install and how you did it by chance? Thank you!
 

jgraves

Full Access Member
Joined
Nov 19, 2021
Posts
127
Reaction score
90
I only have this photo. I fabricated a couple "Z" shaped brackets from 1/8" wall square tube and screwed into the lower grill support with self tapping sheet metal screws. I would have preferred a more robust attachment (such as rivnuts) but they've held up fine for 1500 miles.

IMG_4553.jpeg
 
Last edited:
OP
OP
BobHolthaus

BobHolthaus

Member
Joined
May 2, 2023
Posts
97
Reaction score
57
I only have this photo. I fabricated a couple "Z" shaped brackets from 1/8" wall square tube and screwed into the lower grill support with self tapping sheet metal screws. I would have preferred a more robust attachment (such as rivnuts) but they've held up fine for 1500 miles.

View attachment 417092
Thank you for the pic. Any chance you'd be willing to take a daytime shot of the front end with grill on, one with the lights off, and one with the lights on? Did you wire these into your high beams, or just to a switch? Thank you for sending this, and the videos of the guys with the light bars. I watched those last night.
 

jgraves

Full Access Member
Joined
Nov 19, 2021
Posts
127
Reaction score
90
They're just wired to a switch temporarily. I haven't decided how to tap the high beam signal yet, and was pressed for time when installing these. I tapped the high beam fuse on my old truck and have a CANswitch on my motorcycle, neither are applicable to the new Yukon.

I'll try to grab a couple more photos in the next few days.
 

jgraves

Full Access Member
Joined
Nov 19, 2021
Posts
127
Reaction score
90
These are driving pattern, reach without the amber covers is about the same as the factory high beams, a bit less with the covers installed. I aligned them with the grill support so they point to the side slightly. They are a much broader and taller pattern than the headlights, which is great for illuminating wildlife in the ditch and fields along the road, and also the other side of a valley, etc. I find the amber provides better illumination on wet roads and less glare from road signs. Even with the amber covers, they are not friendly to oncoming traffic, so I only run them where I'm unlikely to encounter other traffic.
 
OP
OP
BobHolthaus

BobHolthaus

Member
Joined
May 2, 2023
Posts
97
Reaction score
57
I am a 15 year customer of Rigid Industries (I’m also a dealer, but don’t sell much; just have a dealership because of my business). I love their products. I am a Jeeper and use Rigid’s
On my 2023 Wrangler Rubicon Diesel. I love the light output and the spread. I think yours are a perfect light for what you described. Now the challenge to tackle the high beam tap so that you can optionally have them triggered by the high beams. Any idea where you can tap a lead? I’m a 12v ninja if you need any help (well, traditional 12v, not a CANBUS techie).

Thank you for taking the time to share all of your info.
 

jgraves

Full Access Member
Joined
Nov 19, 2021
Posts
127
Reaction score
90
There appear to be 2 wires from the high beam switch to the BCM (flash to pass and high beams, both active low). I'm not sure if the high beam is a momentary or continuous ground. assuming it is a continuous ground, it will be fairly straightforward to trigger a couple opto-isolators or SSRs with the high beam switch. it's a bit more involved than an add-a-fuse on the high beam circuit of my 2010, but also should only activate the driving lights with the high beam switch, not the flash to pass. If it's also momentary, ensuring the driving lights are always synchronized with the high beams may be a challenge.

BTW, there are schematics available on the GM upfitters website. Headlights on page 2-13. https://www.gmupfitter.com/wp-conte...L_Electrical_Body_Builder_SM_en_US_092822.pdf

I've also been a long time Rigid customer, reverse (diffused) and driving on my 2010, driving and diffused on my compact tractor, scene and diffused on my trailer, and spot and driving on my motorcycle.
 

Vladimir2306

Full Access Member
Joined
May 18, 2023
Posts
1,064
Reaction score
1,251
Maybe my experience will be useful to someone, I put Rigid in the lower grill.
 

K5-Z71

Member
Joined
Jan 5, 2023
Posts
69
Reaction score
112
Location
TX
I was unable to come up with a method to decode the logic from the BCM to the headlamps but it does seem like a simple task for a an aftermarket company to create.

My work around is to measure the amperage draw of the headlamps to determine if the high or low beams are activated. Each headlight will draw 1.41 A on low beams and 2.08 A with the high beams activated. Just have to extend the GND wire to run through a Current Sensing Switch which is adjusted to activate when the current draw is greater than 1.7 A, the current sensing switch will activate a relay to turn on the light bar. Then in the cab install a spdt 3 position rocker switch to achieve either system disarmed, normal operation (on with high beam) or on regardless of headlight state.
 

jgraves

Full Access Member
Joined
Nov 19, 2021
Posts
127
Reaction score
90
I followed your thread on the using the current sensing switch, and may follow your path if I can't come up with a physically switched trigger. Did you investigate this wire between the high beam switch and BCM? I'm planning to probe it tomorrow to determine what voltage the BCM is feeding it and if it's momentary or constant.

1703982154175.png
 

K5-Z71

Member
Joined
Jan 5, 2023
Posts
69
Reaction score
112
Location
TX
Probably should finish my install at some point.. Your installation looks very nice, I may use it.

I did not check in that location as I mainly utilize the automatic Hi/Low beam feature. It does appear to be a good spot to pull a ground based on stalk switch position but I assumed that the BCM would not communicate back to wire 307 the status of the Hi/Low beams when the system is in automatic mode. I am very interested to hear the results of your test, this would be a much simpler setup.
 

jgraves

Full Access Member
Joined
Nov 19, 2021
Posts
127
Reaction score
90
I don't use the auto high beams. I find it leaves the high beams on where I would normally dim them, doublely so if my driving lights are tied into the high beams.

I'll post my findings and eventual solution here, but I don't plan to explore the auto high beam function.
 
OP
OP
BobHolthaus

BobHolthaus

Member
Joined
May 2, 2023
Posts
97
Reaction score
57
Maybe my experience will be useful to someone, I put Rigid in the lower grill.
Thank you for posting this. Write up. I appreciate it. Unfortunately, I have a diesel.
 
OP
OP
BobHolthaus

BobHolthaus

Member
Joined
May 2, 2023
Posts
97
Reaction score
57
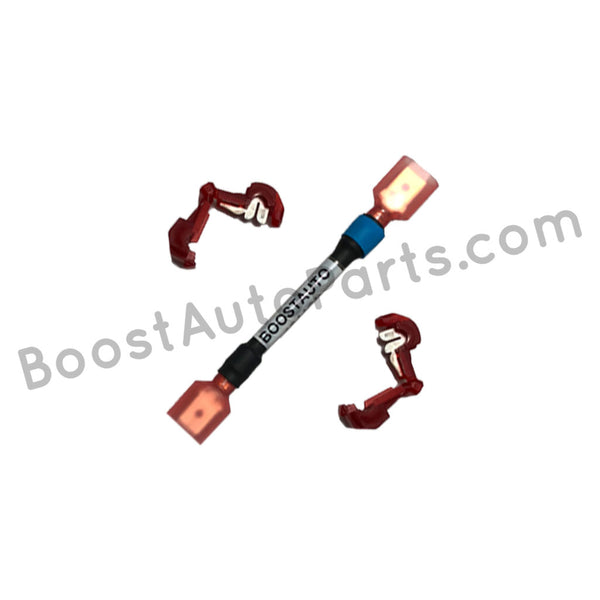
Guys: I found an install video about fog lights coming on anytime the lights are turned on. This was for a Sierra. Would this work on our vehicles? Thanks, and happy new year.

 
OP
OP
BobHolthaus

BobHolthaus

Member
Joined
May 2, 2023
Posts
97
Reaction score
57
Guys: I found an install video about fog lights coming on anytime the lights are turned on. This was for a Sierra. Would this work on our vehicles? Thanks, and happy new year.

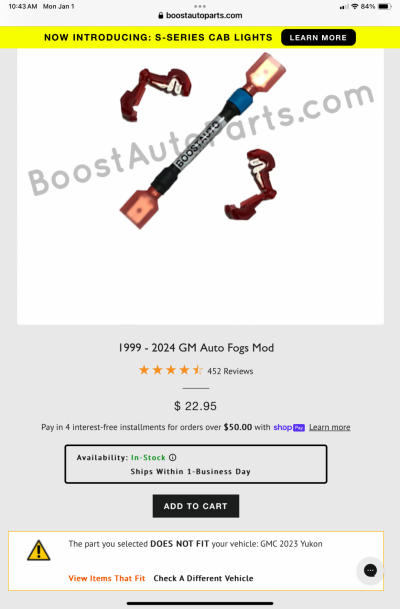
Never mind, checked figment guide on site and it says it doesn’t work for a 2023 Yukon. Any idea why? Any of you guys able to figure this out?


Attachments

  • IMG_1702.png
    IMG_1702.png
    714.2 KB · Views: 25

jgraves

Full Access Member
Joined
Nov 19, 2021
Posts
127
Reaction score
90
At least on the 2022+ Sierra, the fog lights are powered by a single pin (X1-6) from the lighting control module. BA is using the left front parking light power (X1-1) to power both fog lights through their jumper, which is likely a diode (directional).

The Yukon uses separate pins (on different connectors) from the LCM to power the fog lights (X1-3 (left) and X3-2 (right)). I suspect this indicates the Yukon fog lights draw more power than the Sierra fog lights. It should be possible to do a similar mod on a Yukon, but a bit more involved than the Sierra, both in parts required and installation effort. The Yukon modification community is also a fraction of the size of the pickup modification community so likely not a worthwhile investment.
 

Forum statistics

Threads
138,094
Posts
1,998,792
Members
103,016
Latest member
BadDaddy2003
Back
Top