I just installed the suspensionmaxx kit and thought I'd share my experience and hopefully help the next person.
In general, I felt like the instructions weren't completely accurate and/or could have provided a bit more detail. As with others, I also had to call them for help and they were very helpful - could not have done it without them. However, the calls could have been avoided with a bit more info.
I am extremely satisfied with the results.
Hope this helps.
Front:
- Step 2 under procedure says "Installation will be performed on both left and right sides together". This is an extremely important statement. You are not going to be able to get the first side you work on low enough to insert the spacers and reinstall the strut without unbolting the other side (or unbolting the sway bar). UNBOLT BOTH SIDES AT THE SAME TIME PRIOR TO ATTEMPTING TO INSTALL SHIMS AND SPACERS!
- Step 5 -- the nuts that are attached to the lower struts go away - that is, you need to pry them off the bottom of the strut and you won't re--use them; rather, you will use the new bolts included with the kit
- Step 12 FYI you don't need to remove the strut. Just lower it enough to put your shims and reinsert it.
- Step 16 - as others have stated, "lightly striking" the knuckle to unseat the ball joint isn't likely going to work. I had to strike mine with a heavy mallet, hard from multiple directions to get it to break free.
- Step 20 - I wasn't able to raise the A-Arm enough with the jack to come close to being able to insert the spacer between the a-arm and strut. 6' prybar also didn't get me there. Based on a call to suspensionmaxx, I had to use a bottle jack to get my jack point as far outward on the bottom of the a-arm as possible and you can only push that so far before it starts lifting your frame off your jackstands. Then, pry down on the a-arm and up on the strut coilspring (the pivot point is your A arm; the end of your prybar is in the coilspring - protect it with cardboard or cloth to prevent scratching the coating off your spring). That did the trick, giving me just enough room to insert the spacer. I would not have been able to do this without the bottle-jack and the pry-bar which was long enough for me to sit on. Could have done it with a 2nd (strong) person and a crowbar perhaps.
I also had problems with the rear. The instructions indicate you don't need to remove the tires. With my factory 20s and tires, you aren't likely going to be able to drop your axle enough to remove your springs with a floor jack and stands. So, I had to reposition everything, remove tires, get it as high as I could with the stands ,then drop my axle. IMPORTANT: it doesn't tell you that you need to unbolt the wiring at the axle (right above the rear differential). If you don't unscrew that bolt at the center of the axle, you're going to break those lines. Those things were under an extreme amount of tension when I realized what was going on - luckily I caught it in time and loosened it before lowering the axle any further. Also, the axle breather hose was stretched to the max by the time I finally got the axle low enough to get the springs out so watch that too - I couldn't figure out how to disconnect the hose so I just risked it.
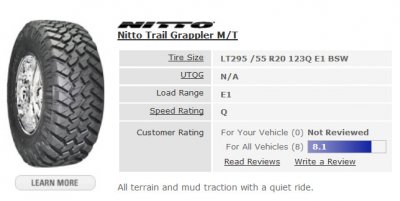
Here are some b4 and after pics. I wanted to keep my factory 20" wheels and they seem to work well with the Nitto Trail Grapplers LT295/55R20/10. However, my tire shop wasn't able to do the alignment for me afterward (Note SuspensionMaxx does provide alignment specs) as they were worried they would damage the wheels, which protrude beyond the wall of the tire - advised me to take it to the dealer.
Rides like factory although the tires, as expected, are not quiet. I wish I'd gone with the Terra Grapplers, which I have on my 2002 Yukon and like very much.
Here are some b4 and after pics. I feel like I can use my Yukon XL like I need to use it now and like I use my '02 - on and around the farm, on the beach, camping, and taking the kids to school... Isn't that how SUV's were originally intended? Sorry to rant but if I'd wanted a minivan I had a lot of those to choose from - where'd the SUVs go?


")