nimrodcs
Full Access Member
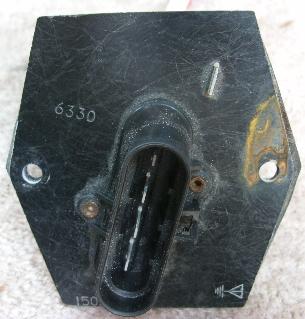
I had to replace this the other day on my '97 Tahoe LT (4DR) and couldn't find a thread with pictures, so, here goes...
Tools:
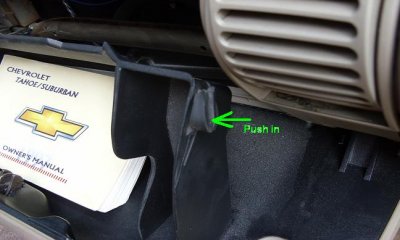
1. Gain access to the resistor by pushing in on the right side of the opened glove box. With a little effort, it should drop free. Lift it up off the hinges and set it out of the way.
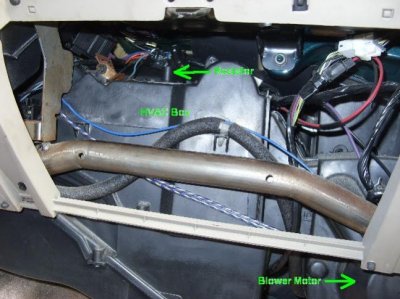
2. Looking through the glove box opening, you can see the HVAC box. Look on top of the HVAC box and a little to the left and you will see the blower motor resistor mounted snuggly.
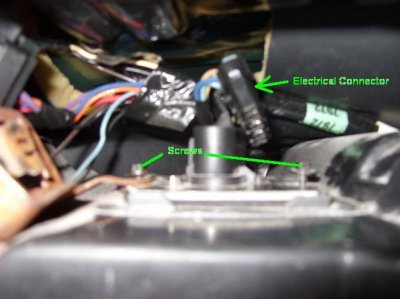
3. Unplug the electrical connector and begin removing the screws. I found it easier to start with the 7mm wrench to get it loose and then squeeze the ratchet in there to screw it out the rest of the way. There is a third screw on the front of the metal bracket to the left that will have come out as well.
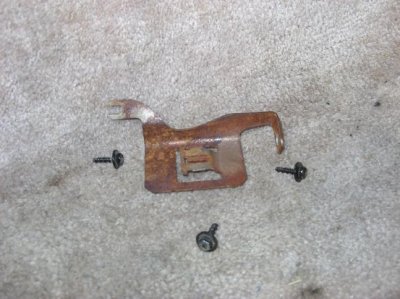
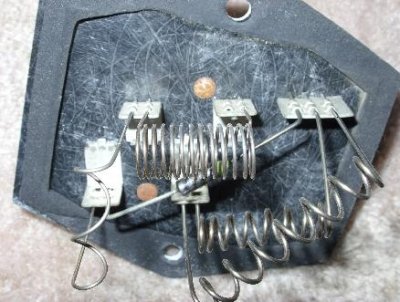
4. After removing the three screws and the metal bracket, pull the old resistor out, tilting it sideways and then sliding it toward you. You might bend the coils a little but this is ok.
5. Your new resistor should come with a new gasket. Do not forget to put this on the new resistor. Tilt the new resistor sideways and slide it into position carefully (you might have to bend the coils gently again). Make sure it seats properly.
6. Reinstall the two screws holding it in place (start with the wrench and tighten with the ratchet) and plug the electrical connector back in. If you want, you can reinstall the useless metal bracket. I left it out. I think it's suppose to hold a relay and the resistor in place, but I didn't see a need for it.
7. Set your glove box back on the hinges and slam it closed. Your done.
Now go have a beer.
Tools:
- 7mm Wrench
- 7mm Socket (1/4" Drive)
- 1/4" Drive Ratchet (small as you can find)
- New blower motor resistor ($17 at O'Reilly's)
1. Gain access to the resistor by pushing in on the right side of the opened glove box. With a little effort, it should drop free. Lift it up off the hinges and set it out of the way.

2. Looking through the glove box opening, you can see the HVAC box. Look on top of the HVAC box and a little to the left and you will see the blower motor resistor mounted snuggly.

3. Unplug the electrical connector and begin removing the screws. I found it easier to start with the 7mm wrench to get it loose and then squeeze the ratchet in there to screw it out the rest of the way. There is a third screw on the front of the metal bracket to the left that will have come out as well.


4. After removing the three screws and the metal bracket, pull the old resistor out, tilting it sideways and then sliding it toward you. You might bend the coils a little but this is ok.
5. Your new resistor should come with a new gasket. Do not forget to put this on the new resistor. Tilt the new resistor sideways and slide it into position carefully (you might have to bend the coils gently again). Make sure it seats properly.
6. Reinstall the two screws holding it in place (start with the wrench and tighten with the ratchet) and plug the electrical connector back in. If you want, you can reinstall the useless metal bracket. I left it out. I think it's suppose to hold a relay and the resistor in place, but I didn't see a need for it.
7. Set your glove box back on the hinges and slam it closed. Your done.
Now go have a beer.

