Complete audio overhaul/replacement (install thread)

Disclaimer: Links on this page pointing to Amazon, eBay and other sites may include affiliate code. If you click them and make a purchase, we may earn a small commission.

RichardCranium

Full Access Member
Joined
Dec 13, 2016
Posts
870
Reaction score
1,669
Location
Mebane, North Carolina
Figured I'd share here, since I updated this install in my own build thread in the PPV forum. Nothing ground breaking by any means, but showing what I decided to go with since I wanted "better than stock" audio.

First thing I did was choose a head unit. I wanted to use Android Auto, so it narrowed down the DD head units I had to select from. I ended up going with the Alpine iLX-w650. I always had Alpine back in the day, so why not? And it had a nice touch screen, decent power output, and the capability to add a sub later if I chose. Also, the same for Alpine's own amp that mounts to this unit.

My setup:

(1) Alpine iLX-w650 Android head unit
(1) PAC tone interface box w/ SWC
(1) CarXTC DD installation kit
(1) Alpine KTA-450 Amplifier (45w RMS x 4ch)
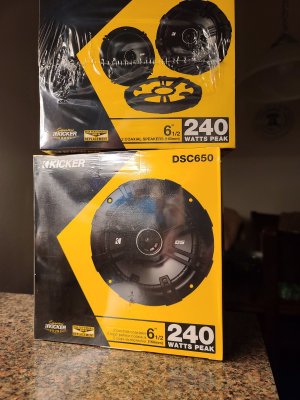
(4) Kicker 43DSC6504 6.5" Coaxial speakers
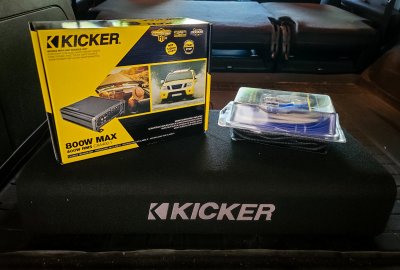
(1) Kicker CXA400.1 Sub amplifier (400w RMS @ 2ohm)
(1) Scosche 8ga Amp wiring kit
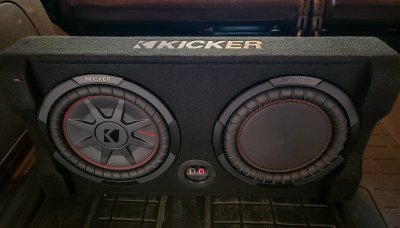
(1) Kicker 48TRTP102 Sealed subwoofer box, Down-firing 10" CompRT sub

When I installed my head unit, I went ahead and ordered the factory USB tray for the bottom, and plugged my USB input from my head unit into that port. I also decided not to run the microphone up into the factory overhead provisioning, instead I cut a port out in the bottom pocket and have the mic peaking out. From feedback from folks directly, it sounds great from there. I did this mainly because the overhead provisioning for a mic is susceptible to cabin noise, while the mic sitting in that pocket has a more isolated radius to pickup sound. Apparently it works well, so its permanent.
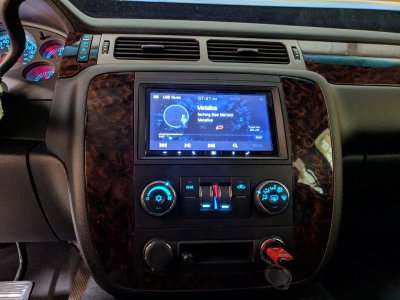
head.jpg
 
Last edited:
OP
OP
RichardCranium

RichardCranium

Full Access Member
Joined
Dec 13, 2016
Posts
870
Reaction score
1,669
Location
Mebane, North Carolina
Next on the agenda was replacing the 4 door speakers. This is a PPV, so no a-pillar tweeters. I could have added them, but don't feel I need them.

After doing some research and narrowing down my choices for the shallow depth application we face, I decided on these Kickers.

speak4a.jpg

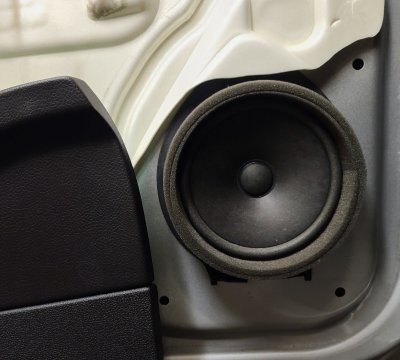
The OEM paper woofers. Honestly, I can't believe they lasted as long as they did. They didn't sound terrible, but obviously weren't great. RIP dudes, y'all out.....

spea1.jpg

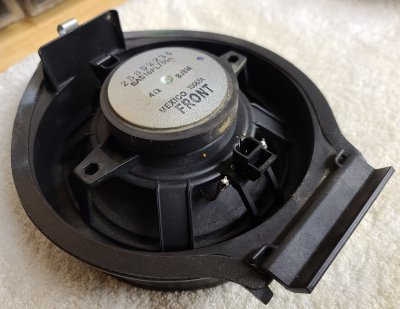
The factory front and rears door speakers are molded into a plastic bucket. There are aftermarket brackets available, but why when you can just cut the factor speaker away pretty easily and use this bucket?

speak2.jpg

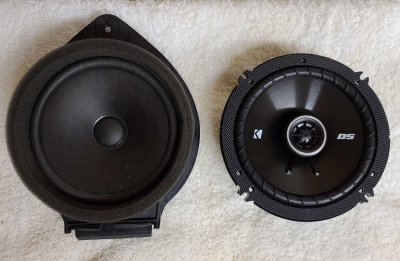
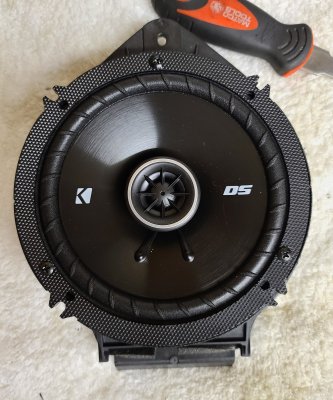
Factory versus its replacement......

speak2b.jpg
 
OP
OP
RichardCranium

RichardCranium

Full Access Member
Joined
Dec 13, 2016
Posts
870
Reaction score
1,669
Location
Mebane, North Carolina
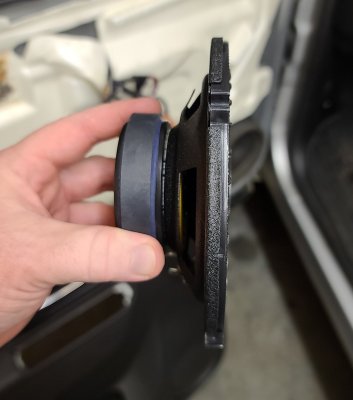
Profile of the new slim speakers.


speak4.jpg

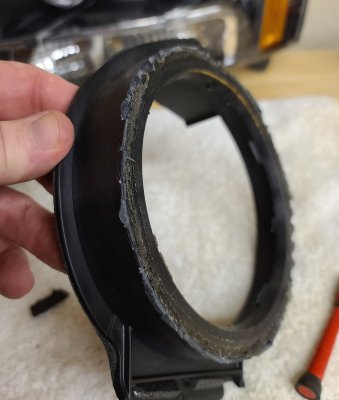
Simple to remove the woofer, just break the spokes coming from the magnet, or cut them. Then just trip down the lip around the face of the bucket like I've shown below. Pretty doesn't matter, no one will ever see it. Just get it trimmed flush, and be careful not to break the plastic.


speaker3.jpg

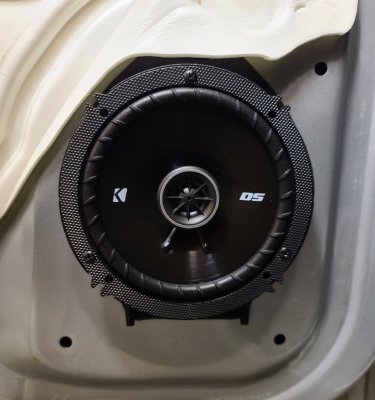
New speakers mounted in the factory buckets, using the screws the speakers came with.

speak5.jpg
 
OP
OP
RichardCranium

RichardCranium

Full Access Member
Joined
Dec 13, 2016
Posts
870
Reaction score
1,669
Location
Mebane, North Carolina
That Alpine head unit is 16w x4 RMS, so even with the better speakers.....it sounded so much better. But not long after I installed the head unit, Alpine released a newer version of the amp that is made to pair with this head unit. The new amp offered more power, plus DPP. I grabbed it a couple months after installing the head unit, and a few weeks after installing these Kicker door speakers.

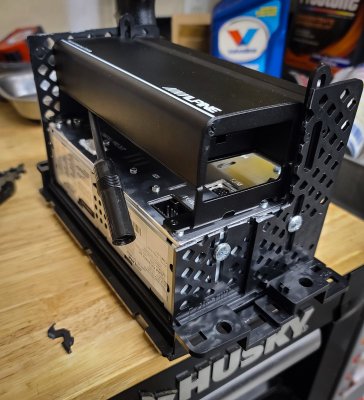
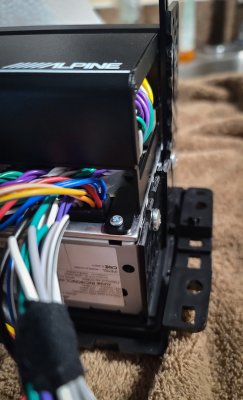
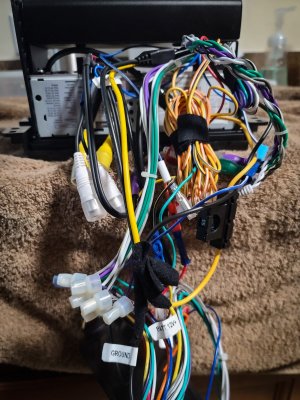
The amp mounted to the back of the head unit, bolts right up. I had to modify my DD install mount for the head unit a little. Originally I cut it to accommodate the wiring harness of the amp, but upon test fitting......I found the wiring harness really needed to be routed under the amp and out of the bottom side.

amp.jpg

Final mounting position for the harness shown here.

amp2.jpg

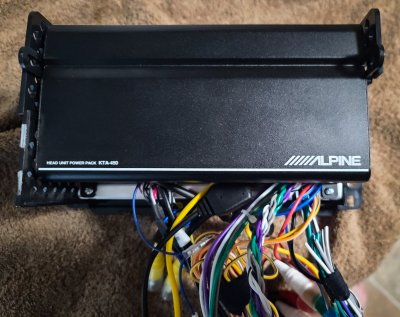
Full rear view of the amp.

amp3.jpg

The amp does have gain, balance, and crossover adjustments. The only downfall to the amp being mounted in the dash is not being able to access this stuff easily. But this isn't a competition install, its just a factory upgrade. I selected the crossover settings to prevent the 6.5's from trying to produce any low bass, adjusted the gain with the radio on, and reinstalled it. amp4.jpg
 
OP
OP
RichardCranium

RichardCranium

Full Access Member
Joined
Dec 13, 2016
Posts
870
Reaction score
1,669
Location
Mebane, North Carolina
Since installing the head unit, new 4 door speakers, and an amp for those door speakers.......I've been waiting to add a subwoofer. I debated a few ways to add one in a subtle application, and with the limitation that I am not trying to impress anyone while I cruise the strip......this is for my own enjoyment when I want to crank the volume. With that said, I decided to go with this pre-made Kicker enclosure. It has a 10" CompRT Sub and a 10" reFLEX passive radiator. Essentially they work together in this sealed box, and produce pretty incredible bass that sounds like its coming from a huge ported box.

This is the box, standing on its side so you can see the speaker.

20210413_162449.jpg

This is actually how the sub sits, below.

subaa.jpg

I got home and got right on the install, I dropped some coin for this stuff and I wanted to hear it.

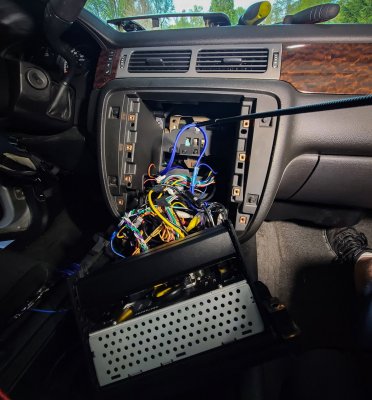
Head unit out, connecting the RCA's and remote wire.

subfishrca.jpg


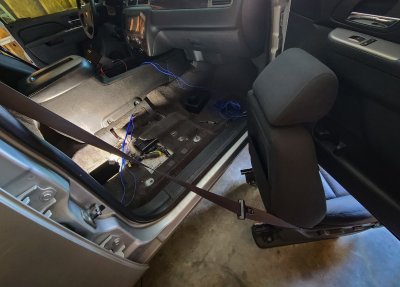
Front seat out

subfrontseatout.jpg
 
OP
OP
RichardCranium

RichardCranium

Full Access Member
Joined
Dec 13, 2016
Posts
870
Reaction score
1,669
Location
Mebane, North Carolina
Rear seat out on the driver's side.

subrearseatout.jpg

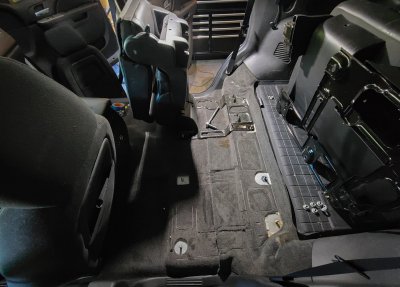
Seats came out to make it easier to fish the RCA's, power, and remote wires through. I ended up pulling the power wire through a factory grommet on the firewall, under the brake booster. From there I tucked it under the dash and through the center console.

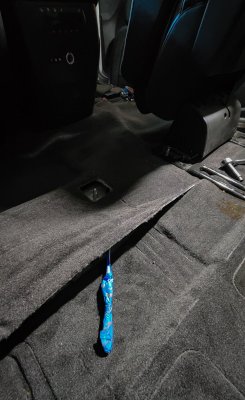
subsnake.jpg

I taped the wires to a long screwdriver, and actually inserted a 4ft long prybar under the carpet to help pick it up out of the way.


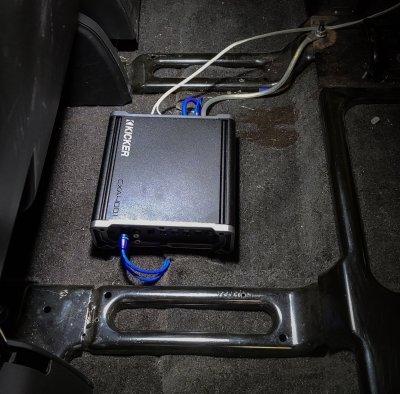
I mounted the amp over the carpet seam right in the middle, under the back seat. I grabbed ground on the seat chassis, and the cables run under the carpet were cut to length or pulled through sliced in the carpet to keep things nice and neat.

Pardon the mystery stain......not sure what it is, how it got there, or when this happened. Blame it on drunk girls, the likely culprit. :)

subampinstalled.jpg
 

89Suburban

Bull in the china shop
Supporting Member
Joined
Jan 10, 2013
Posts
13,124
Reaction score
36,037
Location
SE PA
Figured I'd share here, since I updated this install in my own build thread in the PPV forum. Nothing ground breaking by any means, but showing what I decided to go with since I wanted "better than stock" audio.

First thing I did was choose a head unit. I wanted to use Android Auto, so it narrowed down the DD head units I had to select from. I ended up going with the Alpine iLX-w650. I always had Alpine back in the day, so why not? And it had a nice touch screen, decent power output, and the capability to add a sub later if I chose. Also, the same for Alpine's own amp that mounts to this unit.

My setup:

(1) Alpine iLX-w650 Android head unit
(1) PAC tone interface box w/ SWC
(1) CarXTC DD installation kit
(1) Alpine KTA-450 Amplifier (45w RMS x 4ch)
(4) Kicker 43DSC6504 6.5" Coaxial speakers
(1) Kicker CXA400.1 Sub amplifier (400w RMS @ 2ohm)
(1) Scosche 8ga Amp wiring kit
(1) Kicker 48TRTP102 Sealed subwoofer box, Down-firing 10" CompRT sub

When I installed my head unit, I went ahead and ordered the factory USB tray for the bottom, and plugged my USB input from my head unit into that port. I also decided not to run the microphone up into the factory overhead provisioning, instead I cut a port out in the bottom pocket and have the mic peaking out. From feedback from folks directly, it sounds great from there. I did this mainly because the overhead provisioning for a mic is susceptible to cabin noise, while the mic sitting in that pocket has a more isolated radius to pickup sound. Apparently it works well, so its permanent.

View attachment 276361


Looks great! I really wish I had those simple dial controls for my HVAC. I can't stand the digital ones mine has. I wonder if they are interchangeable?
 

Joseph Garcia

Supporting Member
Joined
Aug 2, 2018
Posts
6,512
Reaction score
8,518
Great write-up!

Our collective knowledge base has been increased.

I definitely know what you mean, when you talk about designing and installing an audio system that sounds great to you INSIDE the truck, and NOT designed to set off car alarms or announce your arrival from 2 blocks away.
 

Forum statistics

Threads
129,220
Posts
1,812,321
Members
92,320
Latest member
RanchoTexas
Top