ypsetihw
Full Access Member
I come from the VW Vortex forums where there is a writeup for everything short of wiping yourself. I just did the front brakes on my girl's 01 Tahoe today and while the community was helpful with my questions, I was unable to find a detailed writeup beforehand. I figured I'd document as much of it as I could in the hopes that others will benefit.
Parts & Consumables:
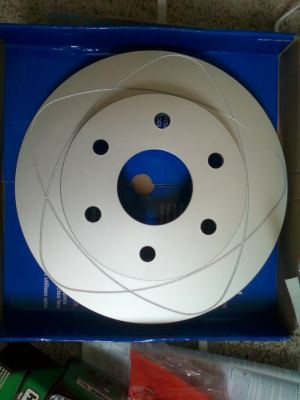
New Front Rotors (ATE Slotted)
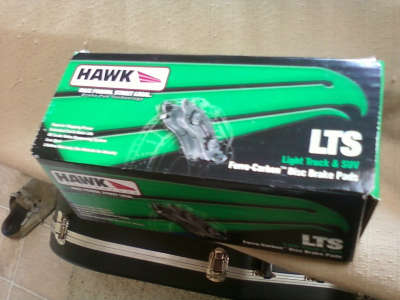
New Front Pads (Hawk LTS)
CRC Synthetic Brake Grease
CRC Brakeleen
PB Blaster
Rubber Gloves (optional)
DOT3 Brake Fluid
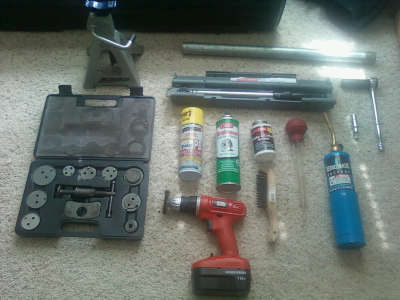
Tools:
Jack
Jackstands
Stock Tire Iron
T55 ratchet bit (preferably 1/2" drive, not 3/8")
18mm deep impact socket (preferably 1/2" drive)
1/2" ratchet
Torque Wrench
Breaker bar or 3'+ section of pipe
Butane Torch or equivalent (trust me you want this to break the carrier bolts)
Caliper Piston Compressor Tool or C-clamp
Wire Hanger
Wire Brush or Wire Wheel for the drill
Sandpaper
Turkey Baster
1. Take off wheel stud cover and break wheel nuts loose
2. Raise and support vehicle and remove wheel (do one side at a time)
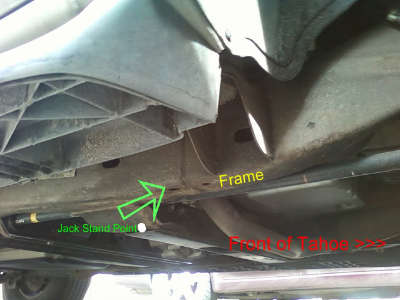
3. Use the breaker bar and T55 to remove the slider bolts. These bolts have long pins on the end that need to be cleaned and re-greased, set them aside and note the top and bottom pins. If you haven't already, turn the wheel away from the side you're working on so you have better clearance to the back of the caliper.
4. Remove the Caliper and slide the old pads out of the carrier (which is still on the truck). Hang the caliper off to the side or sit it on top of the rotor. This is where the wire hanger comes in. Whatever you do, don't let it hang solely by the brake line or you'll have a mess on your hands.
5. Using the torch, heat the bracket *around* the carrier mounting bolt, not the bolt itself. You want the bracket to expand so you can break the bolt loose. These bolts seem to be torqued to infinity, and I actually broke a 3/8" 18mm socket in half trying to remove this bolt at first. Once I had heat and a heavy-duty impact socket, it came right off. Using the deep socket allows access to these carrier bolts even with the caliper installed.
6. Remove the two caliper carrier bolts and the rotor should fall off the hub. If not, give it a gentle tap around the hub with a hammer, it should pop right off.

7. Using PB Blaster, Brakecleen, a wirebrush and wirewheel, and sandpaper, remove as much of the surface corrosion and rust that you can from the hub surface. Ideally it will be totally clean, but this proves near impossible. Just make sure the rotor mating surface is smooth and relatively clean.
8. Now we want to put stuff back together because it is easier to compress the piston back on the car. Loosely reinstall the caliper bracket and the caliper itself. I found that you only need to install the upper caliper slider bolt and this allows you to maneuver the tool once installed on the car.
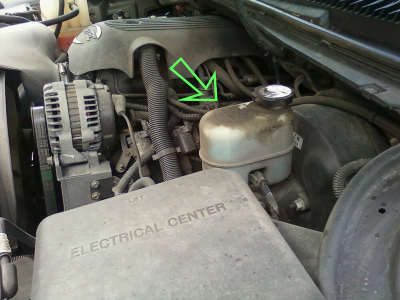
9. Open the hood, remove the cap from the brake fluid reservoir, and use the turkey baster to remove a bit of the fluid from the reservoir. We do this because when we compress the piston, the fluid will run back into the reservoir. The fluid on the top is usually pretty dirty, and we'll remove and replace a few basters full.
10. Go back to the caliper. Twist the caliper tool or C-clamp down and compress the pistons. There are two pistons on each side. If you compress one at a time, you need to go back and forth a couple times, because as you compress one side, the other will come back up a little. A trick is to use one of the old pads to push both pistons at once.
Almost there! Grab a
11. Take it all apart again and grab your brake parts grease. Grease all over the mating surface where the hub meats the rotor, making sure to wipe any grease off the studs. Install the new rotor (spray it down with brakecleen first to make sure there is no grease on the braking surface)
12. Install the caliper carrier bolts. Torque them as hard as you can, we don't want these to move.
13. Grease the notches on the pads but take care not to get any on the braking surface, and install them in the notches on the carrier. Grease the backs of the pads where the caliper makes contact.
14. Clean, generously grease, and reinstall the caliper mounting bolts. Take care to make sure the rubber boots don't get jacked up when reinstalling them. Torque them good, but not overtight, I went with 60 ft/lbs. You might have to wiggle a bit to get everything to sit back together, but if you've compressed the pistons properly, it will eventually all side back in. Putting a lug nut on the rotor will help keep it flush with the hub, and can ease things a bit when fiddling with the new pads/caliper.
15. Take pictures, button up the wheel, and drop the truck. Top off the brake fluid in the reservoir back up to full and replace the cap. Close the hood. Then more before you start on the other side.
Bedding in:
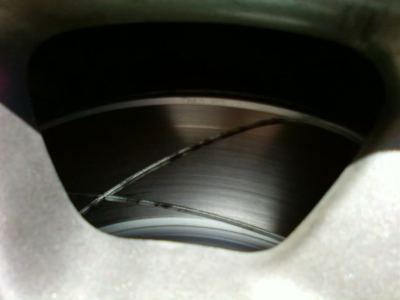
It is important that you follow the bed-in procedures recommended by the manufacturer. Generally this involves pumping the brakes up while the car is off to bring the new pads into contact with the rotor and set the pistons. Check the fluid after you do this. Then start her up and go for a drive. Make a series of 45-10mph slowdowns and try to avoid coming to a complete stop until you've done several cycles. Then mix in a few 60-10mph stops and drive it for a bit to let her cool. Let the car sit afterwords for 20 mins or so to allow the new pad material to set up on the rotor, and you're good to go.


Parts & Consumables:
New Front Rotors (ATE Slotted)
New Front Pads (Hawk LTS)
CRC Synthetic Brake Grease
CRC Brakeleen
PB Blaster
Rubber Gloves (optional)
DOT3 Brake Fluid
Tools:
Jack
Jackstands
Stock Tire Iron
T55 ratchet bit (preferably 1/2" drive, not 3/8")
18mm deep impact socket (preferably 1/2" drive)
1/2" ratchet
Torque Wrench
Breaker bar or 3'+ section of pipe
Butane Torch or equivalent (trust me you want this to break the carrier bolts)
Caliper Piston Compressor Tool or C-clamp
Wire Hanger
Wire Brush or Wire Wheel for the drill
Sandpaper
Turkey Baster

1. Take off wheel stud cover and break wheel nuts loose
2. Raise and support vehicle and remove wheel (do one side at a time)

3. Use the breaker bar and T55 to remove the slider bolts. These bolts have long pins on the end that need to be cleaned and re-greased, set them aside and note the top and bottom pins. If you haven't already, turn the wheel away from the side you're working on so you have better clearance to the back of the caliper.
4. Remove the Caliper and slide the old pads out of the carrier (which is still on the truck). Hang the caliper off to the side or sit it on top of the rotor. This is where the wire hanger comes in. Whatever you do, don't let it hang solely by the brake line or you'll have a mess on your hands.
5. Using the torch, heat the bracket *around* the carrier mounting bolt, not the bolt itself. You want the bracket to expand so you can break the bolt loose. These bolts seem to be torqued to infinity, and I actually broke a 3/8" 18mm socket in half trying to remove this bolt at first. Once I had heat and a heavy-duty impact socket, it came right off. Using the deep socket allows access to these carrier bolts even with the caliper installed.
6. Remove the two caliper carrier bolts and the rotor should fall off the hub. If not, give it a gentle tap around the hub with a hammer, it should pop right off.

7. Using PB Blaster, Brakecleen, a wirebrush and wirewheel, and sandpaper, remove as much of the surface corrosion and rust that you can from the hub surface. Ideally it will be totally clean, but this proves near impossible. Just make sure the rotor mating surface is smooth and relatively clean.
8. Now we want to put stuff back together because it is easier to compress the piston back on the car. Loosely reinstall the caliper bracket and the caliper itself. I found that you only need to install the upper caliper slider bolt and this allows you to maneuver the tool once installed on the car.
9. Open the hood, remove the cap from the brake fluid reservoir, and use the turkey baster to remove a bit of the fluid from the reservoir. We do this because when we compress the piston, the fluid will run back into the reservoir. The fluid on the top is usually pretty dirty, and we'll remove and replace a few basters full.

10. Go back to the caliper. Twist the caliper tool or C-clamp down and compress the pistons. There are two pistons on each side. If you compress one at a time, you need to go back and forth a couple times, because as you compress one side, the other will come back up a little. A trick is to use one of the old pads to push both pistons at once.
Almost there! Grab a

11. Take it all apart again and grab your brake parts grease. Grease all over the mating surface where the hub meats the rotor, making sure to wipe any grease off the studs. Install the new rotor (spray it down with brakecleen first to make sure there is no grease on the braking surface)
12. Install the caliper carrier bolts. Torque them as hard as you can, we don't want these to move.
13. Grease the notches on the pads but take care not to get any on the braking surface, and install them in the notches on the carrier. Grease the backs of the pads where the caliper makes contact.
14. Clean, generously grease, and reinstall the caliper mounting bolts. Take care to make sure the rubber boots don't get jacked up when reinstalling them. Torque them good, but not overtight, I went with 60 ft/lbs. You might have to wiggle a bit to get everything to sit back together, but if you've compressed the pistons properly, it will eventually all side back in. Putting a lug nut on the rotor will help keep it flush with the hub, and can ease things a bit when fiddling with the new pads/caliper.
15. Take pictures, button up the wheel, and drop the truck. Top off the brake fluid in the reservoir back up to full and replace the cap. Close the hood. Then more
 before you start on the other side.
Bedding in:
It is important that you follow the bed-in procedures recommended by the manufacturer. Generally this involves pumping the brakes up while the car is off to bring the new pads into contact with the rotor and set the pistons. Check the fluid after you do this. Then start her up and go for a drive. Make a series of 45-10mph slowdowns and try to avoid coming to a complete stop until you've done several cycles. Then mix in a few 60-10mph stops and drive it for a bit to let her cool. Let the car sit afterwords for 20 mins or so to allow the new pad material to set up on the rotor, and you're good to go.
Last edited:

