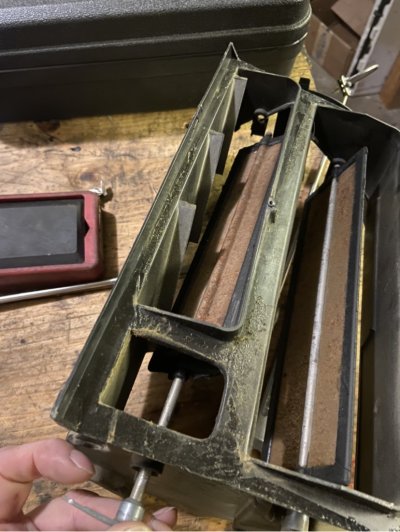
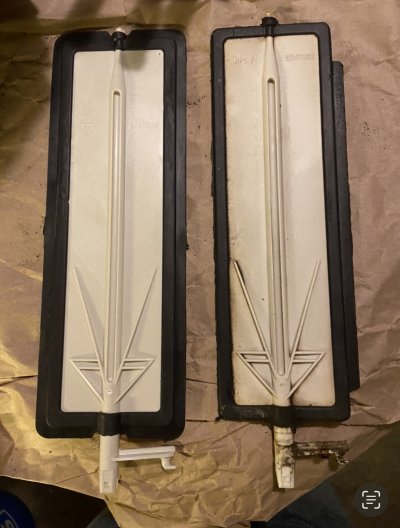
A/C evaporator replacement 98 Yukon

Disclaimer: Links on this page pointing to Amazon, eBay and other sites may include affiliate code. If you click them and make a purchase, we may earn a small commission.

olliec420

Full Access Member
Joined
Apr 12, 2016
Posts
167
Reaction score
122
So on my 98 (C60 front a/c only) I have been charging it up repeatedly since I got it. I knew the service port valves were leaking and I ordered them a while ago but I never put them in. Well I was going to do it some weeks ago but before I did I thought to myself I really outa get a leak detector and make sure that's the only place I'm leaking before I start making moves. Well I put the detector inside the cab near the evaporator and that thing was beeping like crazy. The part I really didn't want to fix.

I watched some videos and saw how to get access without dash removal so its not bad as I thought it would be. But while I'm in there, what all should I be replacing. Here is the list I have so far:
1) low and high service port cores
2) accumulator/dryer
3) evaporator
4) blower motor
5) resistor
6) heater core?

What am I missing? Thanks!
 

OR VietVet

Multnomah Falls
Supporting Member
Military
Joined
Oct 8, 2014
Posts
19,261
Reaction score
31,735
Location
Willamette Valley
Yes on the heater core, especially if original and how old are easily accessed actuators? Do the orifice and flush lines and condensor.
 
OP
OP
olliec420

olliec420

Full Access Member
Joined
Apr 12, 2016
Posts
167
Reaction score
122
Yes on the heater core, especially if original and how old are easily accessed actuators? Do the orifice and flush lines and condensor.
Thanks for the quick response! Im on rock auto putting together the cart right now.
I wasn't going to get in to the orifice and condenser if I didn't have to. When its working as it is, it works great. But the blower motor squeaks a bit. But I see the orifice is cheap. Will I need the tool or can I use needle nose?

The actuators are what? Heater air door actuator? Thats the only one I see.
 

east302

Full Access Member
Joined
Dec 21, 2016
Posts
1,560
Reaction score
1,389
Location
Mississippi
Just curious, do you have a link to that video showing the evaporator removal without pulling the dash? Seems like you’d have to cut the box open or something.

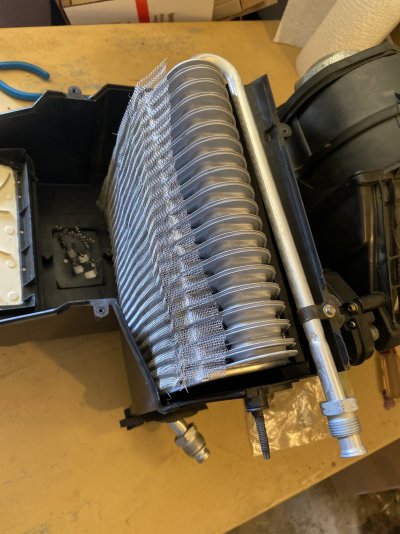
If you’re going in with the dash in, note that there’s a screw holding the line in place and also a condensate trap/screen that’ll need to be swapped over. Also some rubber gasket along the evaporator face that’ll need to be reused or recreated. It usually tears apart whenever I’ve tried to salvage it so trimming some weatherstripping from a big box store is usually in order.

IMG_6517.jpeg

There are three actuators - the heater (mode), the blend door by the gas pedal and the recirc door actuator tucked up above the blower.

Pulling the dash isn’t that difficult and would let you get in and replace the air box dampers. Their rubber edges usually dry rot and you get air leaks.

Here’s a link on the dash removal, maybe it’ll help if you go that route. But, if you have any cracks in your dash I’d be hesitant to pull it since it’ll flex when it comes down.

 
Last edited:
OP
OP
olliec420

olliec420

Full Access Member
Joined
Apr 12, 2016
Posts
167
Reaction score
122
Just curious, do you have a link to that video showing the evaporator removal without pulling the dash? Seems like you’d have to cut the box open or something.

If you’re going in with the dash in, note that there’s a screw holding the line in place and also a condensate trap/screen that’ll need to be swapped over. Also some rubber gasket along the evaporator face that’ll need to be reused or recreated. It usually tears apart whenever I’ve tried to salvage it so trimming some weatherstripping from a big box store is usually in order.

View attachment 405763

There are three actuators - the heater (mode), the blend door by the gas pedal and the recirc door actuator tucked up above the blower.
I only saw one on rock auto. I ordered it. I just thought about it but no matter what settings I'm on some air comes outa defrost vents. Do you know the name of what actuator or door would do that?
Pulling the dash isn’t that difficult and would let you get in and replace the air box dampers. Their rubber edges usually dry rot and you get air leaks.
Yeah I got cracks and when I got it there was major problem in the front end and everything was getting shaken to shit and did a number on that plastic. The previous owner drove it like that. I fixed all that now and now this. I sure hope this is it for a while.
Here’s a link on the dash removal, maybe it’ll help if you go that route. But, if you have any cracks in your dash I’d be hesitant to pull it since it’ll flex when it comes down.


OR VietVet

Multnomah Falls
Supporting Member
Military
Joined
Oct 8, 2014
Posts
19,261
Reaction score
31,735
Location
Willamette Valley
If is easy, do the actuator, no matter which one. I have used needle nose on the orifice when the tool would not work but the tool is inexpensive to own, or maybe get at a auto parts store. The tool is useful for the install as well and make sure you use a/c oil to lube the seal before the install.

I typed this earlier and forgot to post it.
 

east302

Full Access Member
Joined
Dec 21, 2016
Posts
1,560
Reaction score
1,389
Location
Mississippi
I only saw one on rock auto. I ordered it. I just thought about it but no matter what settings I'm on some air comes outa defrost vents. Do you know the name of what actuator or door would do that?
Thanks for the link, I’d just figured there was no other way to get to that evaporator. If the dash is already rough, then it’s worth a shot.

The blend (heater) and mode (floor-dash-defrost) actuators are the same. The recirc would be a different part number.

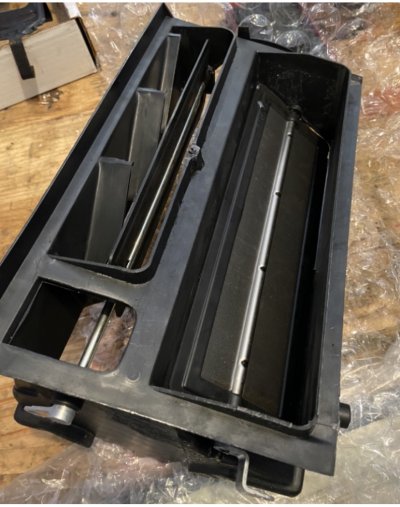
The way the box is designed, there is always some air flowing into the side defrost vents regardless of vent setting. The air bypasses the dampers through the small port in the lower left. The one above it is to the dash defrost vents and the one on the right is to the floor and panel vents.

IMG_3215.jpeg

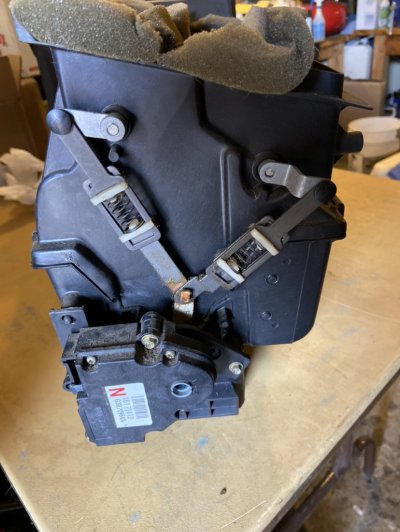
If the air isn’t adjusting to the correct vent setting, then the actuator (by the gas pedal) is a good suspect. The floor damper arm connects right to the actuator, the other two dampers connect with the linkage arms.

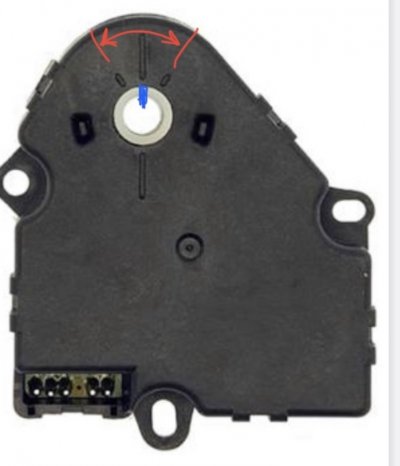
The actuator has a silver notched dial on it. Watch it as you turn it from floor to panel to defrost. It should turn smoothly between the lines on the actuator. The damper linkage arms should also adjust smoothly. Check to see that the linkages are intact. The silver arms at the top are connected to the damper shafts.

If the dial hesitates, jerks or makes a ratcheting sound, then the internal plastic gears are likely cracked and a new actuator would be needed.

IMG_3216.jpeg

IMG_3726.jpeg

IMG_2820.jpeg

If the above checks out and air is adjusting correctly but just leaking, then the internal dampers are probably deteriorating.

This photo is an old vs new floor damper but the other two have similar rubber edges. You can see where the perimeter seal disintegrated so air went right past. The dash definitely has to come out to replace these, unfortunately.

IMG_3727.jpeg
 
Last edited:
OP
OP
olliec420

olliec420

Full Access Member
Joined
Apr 12, 2016
Posts
167
Reaction score
122
Thats helpful. Making me not want to take this apart and sell it. lol
 

Eman85

Full Access Member
Joined
Apr 18, 2021
Posts
377
Reaction score
555
Never had to replace an evap core on those, not common. If I was going to replace the evap core and I hadn't replaced the compressor I would go ahead and replace it and be done with it. Compressor is the most common point of leakage and the weak link in the system. You'll know more when you pull the orifice tube as that's where you'll find all of the worn internals of the compressor. Be sure to flush the condenser and add the correct amount of oil back.
 
OP
OP
olliec420

olliec420

Full Access Member
Joined
Apr 12, 2016
Posts
167
Reaction score
122
Never had to replace an evap core on those, not common. If I was going to replace the evap core and I hadn't replaced the compressor I would go ahead and replace it and be done with it. Compressor is the most common point of leakage and the weak link in the system. You'll know more when you pull the orifice tube as that's where you'll find all of the worn internals of the compressor. Be sure to flush the condenser and add the correct amount of oil back.
The compressor seems to work great. Its not OEM, its been replaced at some point. Maybe the previous owner changed that and then found out it was the evaporator and just sold it.
 

Forum statistics

Threads
129,239
Posts
1,812,624
Members
92,339
Latest member
Thekenstar
Top