Big 3 upgrade?

Disclaimer: Links on this page pointing to Amazon, eBay and other sites may include affiliate code. If you click them and make a purchase, we may earn a small commission.

danimalmax

Full Access Member
Joined
May 4, 2009
Posts
256
Reaction score
4
Location
louisiana
Does anyone have any info on a write up for a big 3 electrical upgrade? My lights dim when i use my windows and i have an 8 high mod that will soon be a 12 high mod, not sure if thats enough lights to require the big 3 upgrade

any opinions on this and available write ups, pics?
 

WrenchGuy

WrenchGuy
Joined
Jun 1, 2009
Posts
179
Reaction score
1
Yeah I made one.

EDIT - BAD LINK

That will do it.

---------- Post added at 08:43 AM ---------- Previous post was at 08:08 AM ----------

Also the seats motors and window motors suck juice. There will always be a slight dimming caused by the 14 volts turning into 12 volts through the battery.

This upgrade will definitely help with those lights added.
 
Last edited by a moderator:

tann808

Member
Joined
Jun 9, 2009
Posts
40
Reaction score
0
Location
Honolulu, HI
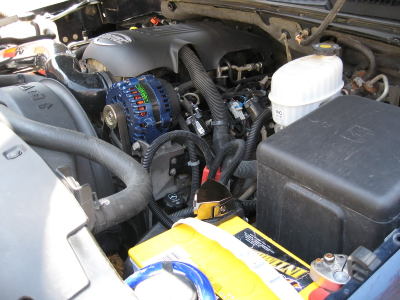
Do the Big Three and if that's not enough, i'd suggest a second or third battery. I installed a second Yellow Top in the top left side of the engine bay (Thanks to JKMotorsport for the write up on the dual battery install)

I'm also running additional Kinetiks in the rear (3) HC2400 because of my stereo but if you don't need that much I'd suggest the second battery if the Big Three is not enough.
 

J-Will

#Merica
Joined
May 31, 2009
Posts
1,191
Reaction score
1
Location
SW MO
ok. here i come with the stupid questions. what is the big 3 mod. what does it do. and why do you do it?
 

OKLAGMCRUISER

Need drop...send $
Joined
May 16, 2009
Posts
1,155
Reaction score
0
Location
Kiefer, OK
ok. here i come with the stupid questions. what is the big 3 mod. what does it do. and why do you do it?

it's an addition to or upgrade of the 3 main grounds for your electrical system.

battery to ground
engine block to ground
alternator to ground

Pat

---------- Post added at 09:02 AM ---------- Previous post was at 09:01 AM ----------

I'm surprised it isn't sticky worthy.

i think it should be too.
 

bass1775

Full Access Member
Joined
May 7, 2009
Posts
151
Reaction score
0
Location
Maryland
Just read about the Big 3. Sounds good, can this be done as added insurance? I'm not having any electrical issues but, I've added some electrical stuff, ie; audio system, MSD, Driving lamps. Also, am interested in adding that second battery. Any install instructions?
 

OKLAGMCRUISER

Need drop...send $
Joined
May 16, 2009
Posts
1,155
Reaction score
0
Location
Kiefer, OK
Just read about the Big 3. Sounds good, can this be done as added insurance? I'm not having any electrical issues but, I've added some electrical stuff, ie; audio system, MSD, Driving lamps. Also, am interested in adding that second battery. Any install instructions?

check post #2 for a link to a how to. it will not hurt to do the big3 even with all stock items in the truck. in my 99 i just added some 8 gauge to each of the big 3 items and saw a difference.

Pat
 

tast101

Supporting Member
Joined
May 2, 2009
Posts
2,390
Reaction score
30
Location
Colton, CA
WrenchGuy's big 3 writeup
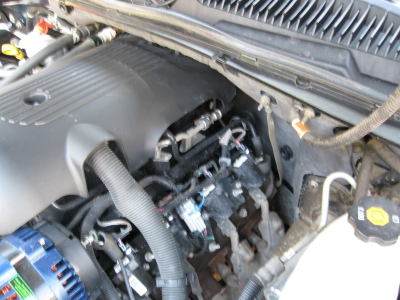
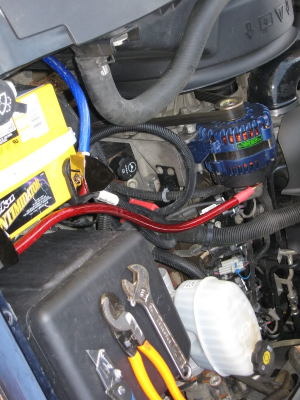
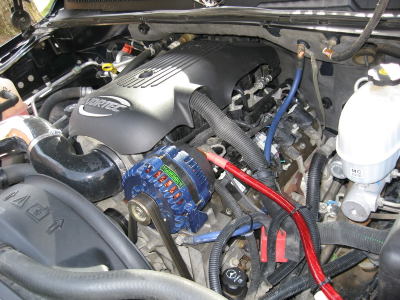
I figured I'd post up my installation of the Big 3 to help the guys out. Its enough I think for everyone to get an idea. I did mine with the plan of having Audio system grounds to the frame. In which I grounded the battery directly to it.

Here we go, I will acknowledge a couple things I didn't utilize cuz it was too late...lol (sorta)

These will be the areas your going to be workin with when you pop the hood
IMG_1065.jpg

IMG_1066.jpg

I tried to make my pics user friendly as possible. The first wire I'm doing is the battery to frame ground.(This could be run to the chassis but for good current flow from the back grounds I'm going to the frame directly.)

You can run this wire down next to the radiator. UTILIZE the plastic loop that is open on the radiator!! I cut my wire already before I noticed it. 1/0 fits right in it. You may have to put your terminal on after its through there though.
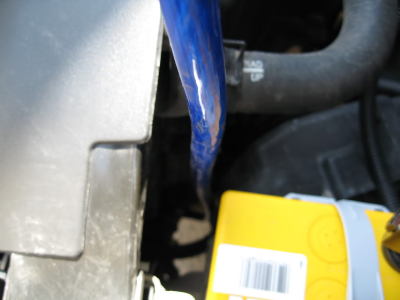
IMG_1067.jpg

Then there is the bumper support bolts that make a perfect ground connection. They're right under the Washer Fluid jug behind the drivers side fog light.
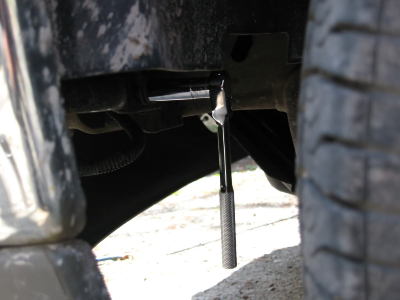
IMG_1068.jpg

Grab your 15mm socket and remove the 3 bolts that hold it on. Easy job except for the damn dirt in your face. Wear goggles...lol
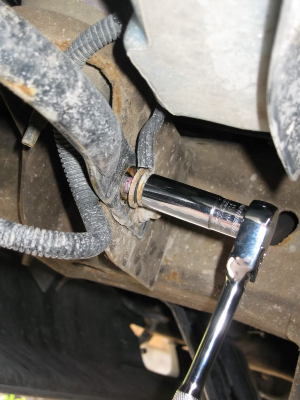
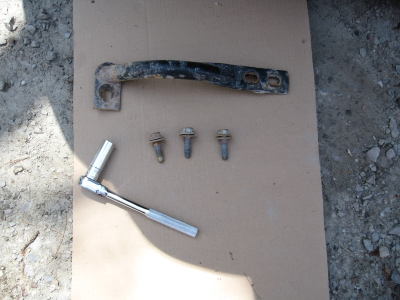
IMG_1069.jpg

IMG_1070.jpg

Then use whatever tools you got to clean the metal off to make it bare. I used a Dremel but whatever you can come up with will work as long as you get everything off of it.
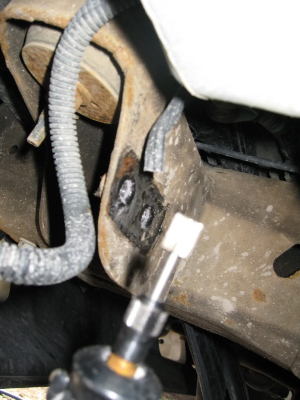
IMG_1071.jpg

Then do the same thing on the mating face of the support and where the connection will be me made.
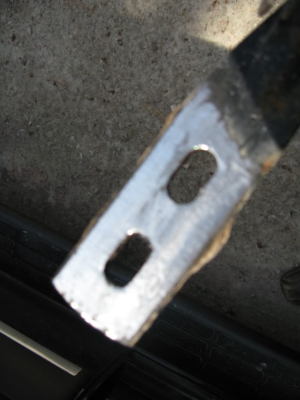
IMG_1072.jpg

I used a step bit to make the terminal hole larger to fit the bolt. Gravy. Then just bolt the support back on with your wire connected to it.
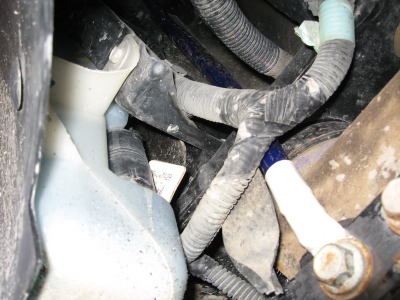
IMG_1074.jpg

Make the connection at the battery and your finished with the battery to frame ground. I used KnuKonceptz terminals which have "compression fittings" so not having the terminal on yet was fine but I cut the wire too short to utilize the loop on the radiator. I didn't see it before hand oh well.
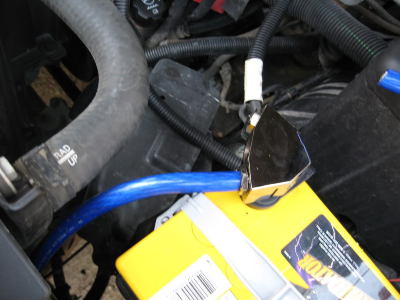
IMG_1076.jpg

The Alt to Positive is very simple and I'm sure everyone has a grasp on that. I've determined that fusing this thing is installers preference. I'm not to worried about it myself.

IMG_1077.jpg

Then there was commotion over the chassis to engine ground on mine being quite long. Well I probed all over the place and the old ground seems to me to be the best since its a pain the ass to get to the other end of the stock one. I just went from the stock chassis end to the mount bolt on the Alt bracket.

IMG_1078.jpg

May not be perfect but should put everyone in the right direction on doing this thing...lol Zip tie at the end. I also used rubberized undercoating to coat the battery to frame ground.

Ask away!
 

Forum statistics

Threads
131,990
Posts
1,860,493
Members
96,385
Latest member
BigBee44
Top