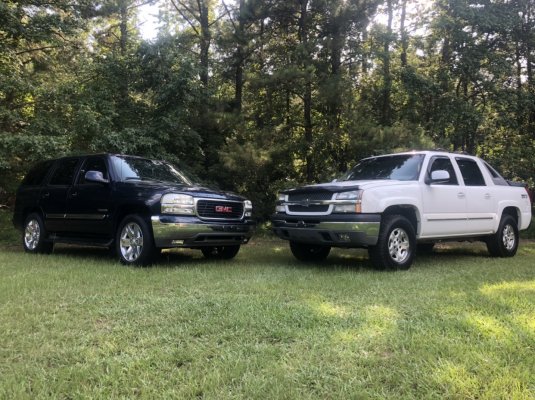
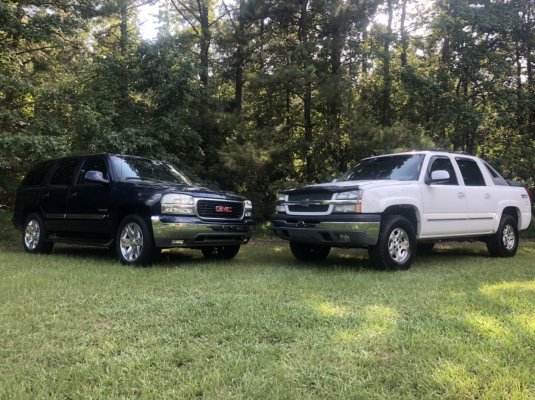
What did you do to your NBS GMT800 Tahoe/Yukon Today?

Disclaimer: Links on this page pointing to Amazon, eBay and other sites may include affiliate code. If you click them and make a purchase, we may earn a small commission.

Pilot

Full Access Member
Joined
Dec 26, 2017
Posts
229
Reaction score
452
Location
Brooklyn, NY
Put a LOT of time into the Tahoe this weekend. Permanently installed a battery maintainer with a plug mounted on the bumper, painted the passenger airbag cover, installed a Coverlay dash cover, installed a custom switch panel where the cassette player used to be.. This is a quick write-up on the battery maintainer.

So I've been having a TON of trouble with my Tahoe battery. I have a bunch of equipment that draws on the battery at all times and I don't drive it on a daily basis. In fact, I go out of town at least once a month. So three batteries have died on me, including my hella expensive XS Power D3400, which not only died, but is damaged an unchargable. :(

My plan is to eventually install a second battery for accessories, isolated from the starter battery (already bought the mounting tray), but for now, I made my owner extension cable:
  1. 3 wire power cable https://www.amazon.com/gp/product/B07F5YWC7B/ref=ppx_yo_dt_b_asin_title_o00_s01?ie=UTF8&psc=1
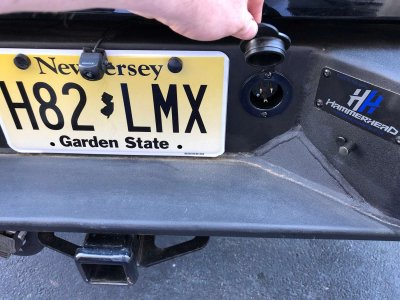
  2. Male 3 prong weather resistant outlet https://www.amazon.com/gp/product/B074T57WS6/ref=ppx_yo_dt_b_asin_title_o00_s02?ie=UTF8&psc=1
  3. Female 3 prong weather resistant outlet https://www.amazon.com/gp/product/B07SLM8LT5/ref=ppx_yo_dt_b_asin_title_o00_s02?ie=UTF8&psc=1
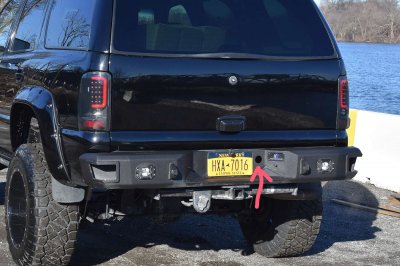
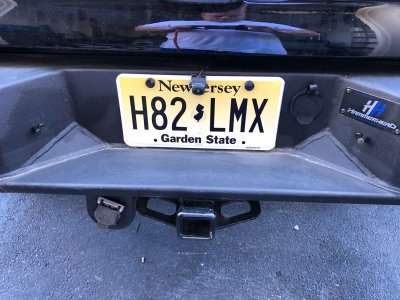
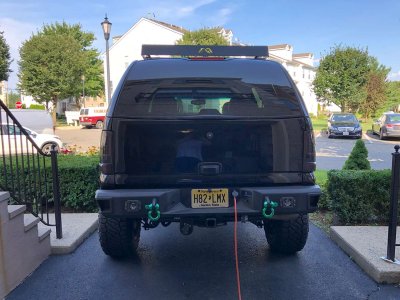
I have an aftermarket Hammerhead flush-mount rear bumper that already had a 1.75" hole for access to the key cylinder for the stock spare tire release. The outlet fit in there perfectly! I mounted my battery maintainer directly on top of my battery and ran the cable to the rear bumper. Here's a video of the process:


And here are some photos:

original-bumper.jpg

post-install-1.jpg

post-install-2.jpg

post-install-4.jpg

I'l try to cut together a video(s) of the dash cover and switch panel later today.
 

Rocket Man

Mark
Supporting Member
Joined
Dec 25, 2014
Posts
25,965
Reaction score
50,651
Location
Oregon
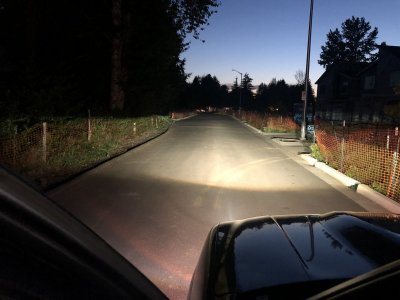
I thought I'd post a night time pic of the output with Morimoto mini H1's retrofitted in some new Anzo u-bar headlights. This is a simple retrofit which uses pre-made brackets that allow you to bolt the projectors in place of the ones that come on the headlights without having to bake them open. Perfect for those who aren't inclined to do the more difficult type of retrofit. I did a write-up on the process in my build thread, link is here. IMO these lights modernize the look and the retrofits make them even better. These are for Yukons only, sorry my Tahoe/ Burb friends. https://www.tahoeyukonforum.com/threads/rocket-mans-02-denali-build-thread-aka-the-beast.83457/page-229
Thanks @Sevenevez for the heads-up on the headlights

IMG_9434.JPG IMG_9442.JPG
 

geekdownrange

TYF Newbie
Joined
Jun 6, 2019
Posts
13
Reaction score
14
Location
Central Texas
Very clean install. A complete write up seems like a good add to the tech section.

Put a LOT of time into the Tahoe this weekend. Permanently installed a battery maintainer with a plug mounted on the bumper, painted the passenger airbag cover, installed a Coverlay dash cover, installed a custom switch panel where the cassette player used to be.. This is a quick write-up on the battery maintainer.

So I've been having a TON of trouble with my Tahoe battery. I have a bunch of equipment that draws on the battery at all times and I don't drive it on a daily basis. In fact, I go out of town at least once a month. So three batteries have died on me, including my hella expensive XS Power D3400, which not only died, but is damaged an unchargable. :(

My plan is to eventually install a second battery for accessories, isolated from the starter battery (already bought the mounting tray), but for now, I made my owner extension cable:
  1. 3 wire power cable https://www.amazon.com/gp/product/B07F5YWC7B/ref=ppx_yo_dt_b_asin_title_o00_s01?ie=UTF8&psc=1
  2. Male 3 prong weather resistant outlet https://www.amazon.com/gp/product/B074T57WS6/ref=ppx_yo_dt_b_asin_title_o00_s02?ie=UTF8&psc=1
  3. Female 3 prong weather resistant outlet https://www.amazon.com/gp/product/B07SLM8LT5/ref=ppx_yo_dt_b_asin_title_o00_s02?ie=UTF8&psc=1
I have an aftermarket Hammerhead flush-mount rear bumper that already had a 1.75" hole for access to the key cylinder for the stock spare tire release. The outlet fit in there perfectly! I mounted my battery maintainer directly on top of my battery and ran the cable to the rear bumper. Here's a video of the process:


And here are some photos:

View attachment 227307

View attachment 227308

View attachment 227309

View attachment 227311

I'l try to cut together a video(s) of the dash cover and switch panel later today.
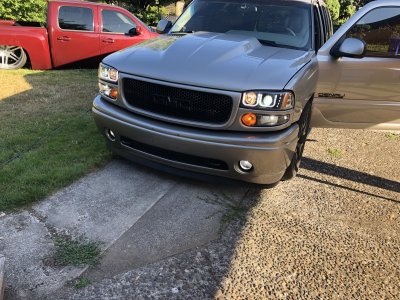
 

Tonyrodz

Resident Resident
Joined
Feb 16, 2012
Posts
30,987
Reaction score
45,145
Location
Central Jersey
Rewired the radio since it was killing the battery. Which was causing the passenger temp actuator to blow hot. So recalibrated that and it’s working like a champ now. And finished off with washing both3de462bc8b26ef26e2af68d3144a79ed.jpg


Sent from my iPhone using Tapatalk
Can the manual heat/ac controls be recalibrated? My roof vents are blowing hot.
 

Fless

Staff member
Super Moderator
Joined
Apr 2, 2017
Posts
10,455
Reaction score
20,757
Location
Elev 5,280
Removed the bug deflector that was missing screws and speed clips and was loose, and filled her up with 21.5 gals of E85. Have to drive her a bit this week to mix it up to see what the ethanol percentage changed to (was 55%).
 

dszx13

Full Access Member
Joined
Apr 8, 2017
Posts
262
Reaction score
604
Can the manual heat/ac controls be recalibrated? My roof vents are blowing hot.
I don’t see why not. I tried that in my Yukon but the actuator was bad instead of replacing it I took it apart and moved the door and put it back in. Didn’t want to spend an arm and leg on a new one


Sent from my iPhone using Tapatalk
 

Rocket Man

Mark
Supporting Member
Joined
Dec 25, 2014
Posts
25,965
Reaction score
50,651
Location
Oregon
Near the rear blower motor--under the plastic panel on the passenger side rear?
Yep. Pull that panel then the actuators are right there. My blend one was inop, it was stuck in the heat position. You can move the shafts by hand with the actuators removed.
 

Forum statistics

Threads
129,174
Posts
1,811,641
Members
92,268
Latest member
willie110hh
Top