Sooooooo, I bought a PPV ...

Disclaimer: Links on this page pointing to Amazon, eBay and other sites may include affiliate code. If you click them and make a purchase, we may earn a small commission.

OP
OP
RichardCranium

RichardCranium

Full Access Member
Joined
Dec 13, 2016
Posts
870
Reaction score
1,669
Location
Mebane, North Carolina
Work has really hampered any time to get this finished. Got them assembled now though, need to put the harness in and mount the assemblies without the lenses for alignment. Hope I can do that tonight or tomorrow. If North Carolina can go a few days without straight line winds and tornadoes......

Fresh headlights
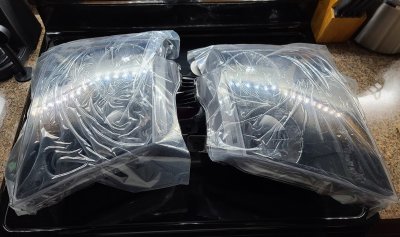
20210314_101234.jpg

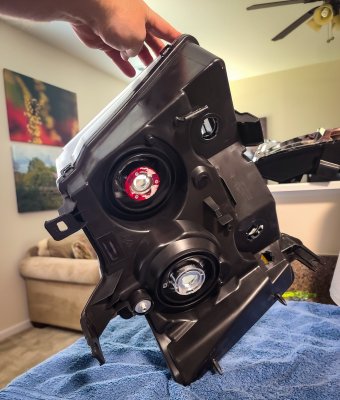
Pro tip when baking and splitting headlights: use a towel on your counter to provide a slip-free and soft surface to work with. Also, keep the assembly in a similar hold like I've shown here, similar to holding a football for a field goal/extra point. Those tabs all over the headlight are super soft when warmed, and will bend or deform easily.
20210314_120301.jpg

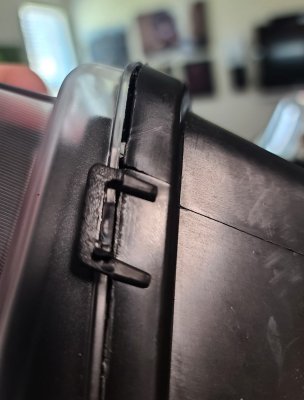
Another pro tip: find an inner seam to "work" a flathead screwdriver or prying tool, when separating your baked headlight. The marks from your tool won't be seen.
20210314_120204.jpg
 
OP
OP
RichardCranium

RichardCranium

Full Access Member
Joined
Dec 13, 2016
Posts
870
Reaction score
1,669
Location
Mebane, North Carolina
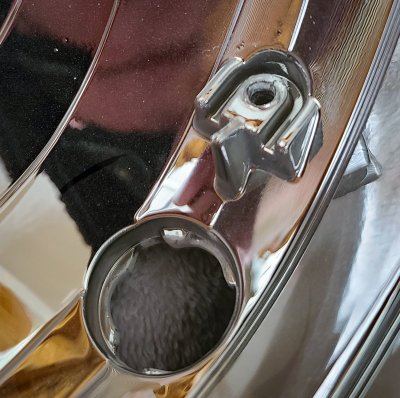
Refoector pedestal removal. Once the reflector is unbolted, you need to grind this part down so the projector fits flush.

20210314_155006.jpg

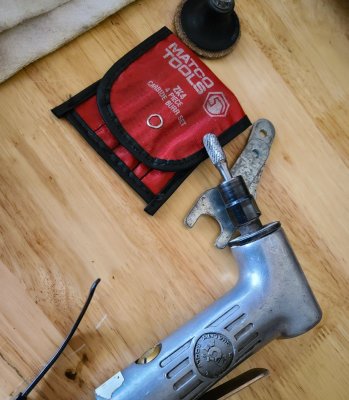
Used my pneumatic grinder, another reason I'll never sell my tools from my BMW tech days. These Matco bits will grind through damn anything.


20210314_155000.jpg


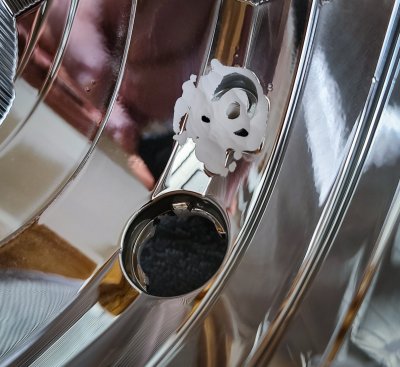
Good to go.

20210314_160038.jpg
 

Sparksalot

Supporting Member
Joined
Sep 20, 2020
Posts
5,183
Reaction score
14,258
Location
Bastrop County, Texas
Work has really hampered any time to get this finished. Got them assembled now though, need to put the harness in and mount the assemblies without the lenses for alignment. Hope I can do that tonight or tomorrow. If North Carolina can go a few days without straight line winds and tornadoes......

Fresh headlights

View attachment 274721

Pro tip when baking and splitting headlights: use a towel on your counter to provide a slip-free and soft surface to work with. Also, keep the assembly in a similar hold like I've shown here, similar to holding a football for a field goal/extra point. Those tabs all over the headlight are super soft when warmed, and will bend or deform easily.

View attachment 274722

Another pro tip: find an inner seam to "work" a flathead screwdriver or prying tool, when separating your baked headlight. The marks from your tool won't be seen.
View attachment 274723
I’m not exactly following what you are doing with these.
 
OP
OP
RichardCranium

RichardCranium

Full Access Member
Joined
Dec 13, 2016
Posts
870
Reaction score
1,669
Location
Mebane, North Carolina
Finally had time to put towards this, the hard part is over. Got everything installed, took out the airbox and some of the trim underneath the hood to tuck the harness is from being able to see it, also to keep it out of harm's way. Mounted up my headlights (sans lenses), and went to turn them on. Strangely enough, when I turned the headlight switch from off to parking lights, the relays clicked but headlights didn't come on. When I turned the switch to headlights on, the relays clicked again but still no lights. I flipped the brights on, they worked. I held the stalk back for "flash" mode, and turned the headlight switch back to parking light mode......low and behold, the low beams worked.

Was a bit stumped, there is literally nothing that can be inverted or plugged in wrong with this harness. After taking a break to cool down, I went for my parts box. They sent me the wrong harness. :banghead:

People mallke mistakes, I get it. Waiting to see how LightWerkz responds now, hoping they overnight the correct harness to me so I get it Thursday.
 

Forum statistics

Threads
129,181
Posts
1,811,789
Members
92,281
Latest member
rickyrick63
Top