Randeez 2012 Budget Yukon Denali Build (stick on hood scoops galore)

Disclaimer: Links on this page pointing to Amazon, eBay and other sites may include affiliate code. If you click them and make a purchase, we may earn a small commission.

OP
OP
randeez

randeez

Full Access Member
Joined
Sep 29, 2017
Posts
6,189
Reaction score
18,921
Location
south florida
ctsv made it back to the house, so far so good. work order for new converter, new (correct) fluid mobil1 blue label with a gm part number, new filter, anddd one more thing i dont remember what it was prob not important. i dont remember exactly how many miles it had when i dropped it off but its still real close to where i remember it so not like they hotdogged it around, and 50mi fuel economy was prob better than when i dropped it off so those two signs are good.

yukon - its getting there, i think i started talking in a different thread, but i decided more horsepower wasnt ever really the problem with it. nickle and diming the hell out of me. so im going to fix a few things (never ending story), going back to belt driven accessories, camaro water pump, hydroboost power steering pump. trying to get tie rod ends straightened out - i ordered a bump steer kit uses 3/4 heim joints and spacers, kinda made for lowered trucks but no reason it should work for lifted.

since all my radiators have AN fittings welded on, i figured fukit ill just get some 20AN hose from the radiator to a billet 20AN thermostat housing. the camaro pump was like $150, the billet thermostat was like $90, an fittings were like $60/each, 2' of 20an hose was another $50, fitting to convert the upper neck to 16an was another $70, and i had some brand new truck tensioners but they mount to the camaro pump different so i had to get a new tensioner also. i have a brand new truck water pump too i should just used lol... the outlet fitting is in a much better spot on the camaro pump tho, belt spacing is the same.

power steering pump, same thing i had a brand new one, but it sucks having to tee the returns in together, but i was able to just order the housing with two returns in it, i dont think there is any actual difference in the pumps other wise ill just order a new one of those too if it feels like the pump i have is struggling. also ordered some fittings to convert those over to 6an (return hoses have little/no pressure on them.

had a bad leak on one of my tranny cooler lines, the tube nut and sleeve wasnt right, wrong angle or something but it basically just straightened out the flare. i went ahead and ordered some new tubing, nuts, and sleeves. its going to need to be redone around the lower radiator hose anyway.
 
Last edited:

pwtr02ss

Full Access Member
Joined
Apr 1, 2013
Posts
10,364
Reaction score
20,939
Location
Tennessee
Great news on the v. I hope this time they got it right. I really like those cars and would like to get Steph one if she doesn't want a Tesla.

All the upgrades to the Yukon seem fitting for the direction you're wanting to go. I've enjoyed seeing you get some use out of it. Best of luck with the new stuff
 

iamdub

Full Access Member
Joined
Apr 23, 2016
Posts
20,758
Reaction score
44,615
Location
Li'l Weezyana
ctsv made it back to the house, so far so good. work order for new converter, new (correct) fluid mobil1 blue label with a gm part number, new filter, anddd one more thing i dont remember what it was prob not important. i dont remember exactly how many miles it had when i dropped it off but its still real close to where i remember it so not like they hotdogged it around, and 50mi fuel economy was prob better than when i dropped it off so those two signs are good.

yukon - its getting there, i think i started talking in a different thread, but i decided more horsepower wasnt ever really the problem with it. nickle and diming the hell out of me. so im going to fix a few things (never ending story), going back to belt driven accessories, camaro water pump, hydroboost power steering pump. trying to get tie rod ends straightened out - i ordered a bump steer kit uses 3/4 heim joints and spacers, kinda made for lowered trucks but no reason it should work for lifted.

since all my radiators have AN fittings welded on, i figured fukit ill just get some 20AN hose from the radiator to a billet 20AN thermostat housing. the camaro pump was like $150, the billet thermostat was like $90, an fittings were like $60/each, 2' of 20an hose was another $50, fitting to convert the upper neck to 16an was another $70, and i had some brand new truck tensioners but they mount to the camaro pump different so i had to get a new tensioner also. i have a brand new truck water pump too i should just used lol... the outlet fitting is in a much better spot on the camaro pump tho, belt spacing is the same.

power steering pump, same thing i had a brand new one, but it sucks having to tee the returns in together, but i was able to just order the housing with two returns in it, i dont think there is any actual difference in the pumps other wise ill just order a new one of those too if it feels like the pump i have is struggling. also ordered some fittings to convert those over to 6an (return hoses have little/no pressure on them.

had a bad leak on one of my tranny cooler lines, the tube nut and sleeve wasnt right, wrong angle or something but it basically just straightened out the flare. i went ahead and ordered some new tubing, nuts, and sleeves. its going to need to be redone around the lower radiator hose anyway.

I had the L99 water pump for my LQ9 S10 swap. Convenient setup.

That new truck pump OEM and do you wanna offload it?
 
OP
OP
randeez

randeez

Full Access Member
Joined
Sep 29, 2017
Posts
6,189
Reaction score
18,921
Location
south florida
I had the L99 water pump for my LQ9 S10 swap. Convenient setup.

That new truck pump OEM and do you wanna offload it?

let me 2x check to make sure its never had coolant in it
ACDELCO​
251713 (251-713)Water Pump

pretty sure i bought it last time i was planning on going back to belt driven accessories and never used it

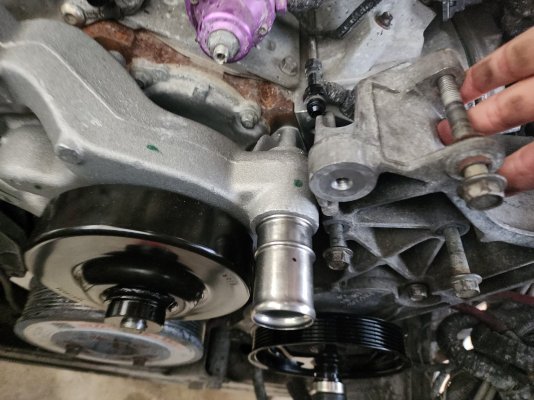
@iamdub camaro pump doesnt work with truck accessory bracket...going to have to use the truck pump I have
 
Last edited:

iamdub

Full Access Member
Joined
Apr 23, 2016
Posts
20,758
Reaction score
44,615
Location
Li'l Weezyana
It's like right there but doesn't work, and I wouldn't been able to put an idle pulley right there next to the hose outlet

View attachment 389377

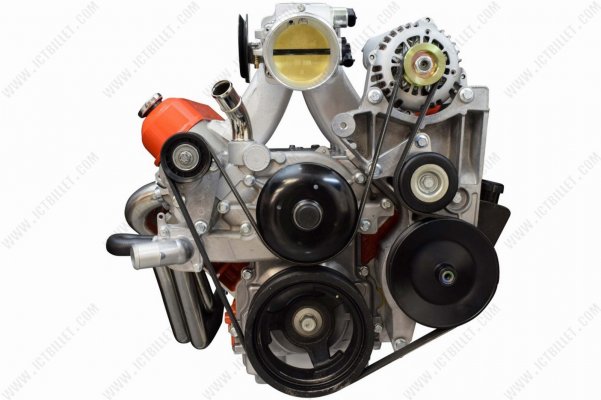
On mine, all that was chopped off to fit my LS6 intake manifold. The car intake, sitting much lower, made the TB interfere with the upward facing outlet of the truck WP. The idler was moved to where one of the mounting bolts is. Just used a longer bolt and some washers to space the idler appropriately. I'll see if I can find a pic. It's a common and easy mod.

*EDIT* Found a pic. Sort of.

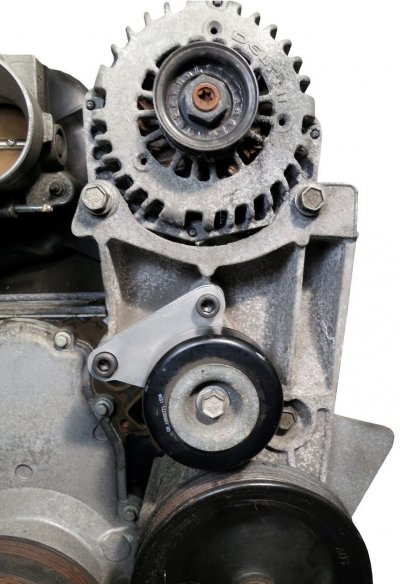
Anyway, there are idler relocation brackets if you don't wanna reuse one of those bolts and use washers:

551353_2__2.jpg

This is with the idler relocated. Just imagine that now unused idler mount and the associated webbing sliced off. I cut mine off with a cut-off wheel then smoothed it all with a flap disc. It looked factory original when done.

*EDIT #2*
Found a pic of the original mount cut off with another brand of idler relocator bracket:

Idler1__01151.1616002360.jpg
 
Last edited:
OP
OP
randeez

randeez

Full Access Member
Joined
Sep 29, 2017
Posts
6,189
Reaction score
18,921
Location
south florida
On mine, all that was chopped off to fit my LS6 intake manifold. The car intake, sitting much lower, made the TB interfere with the upward facing outlet of the truck WP. The idler was moved to where one of the mounting bolts is. Just used a longer bolt and some washers to space the idler appropriately. I'll see if I can find a pic. It's a common and easy mod.

yea i was looking at cutting it all off, then the snowball of moving the idler, longer bolt, longer belt... kinda just want to get it back together. using the truck pump isnt a big deal
 
OP
OP
randeez

randeez

Full Access Member
Joined
Sep 29, 2017
Posts
6,189
Reaction score
18,921
Location
south florida
May as well add to the build thread since this is becoming a ta-do.

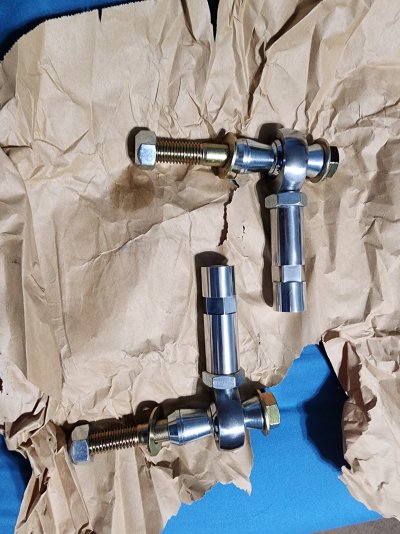
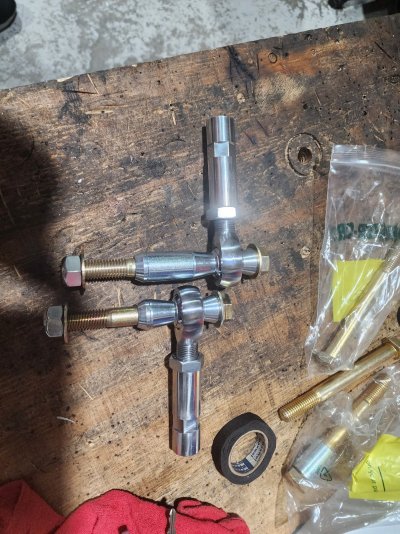
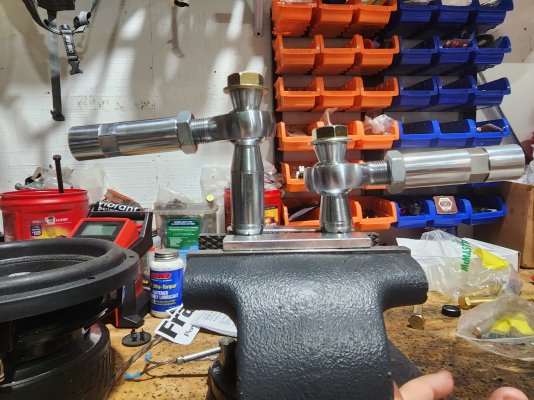
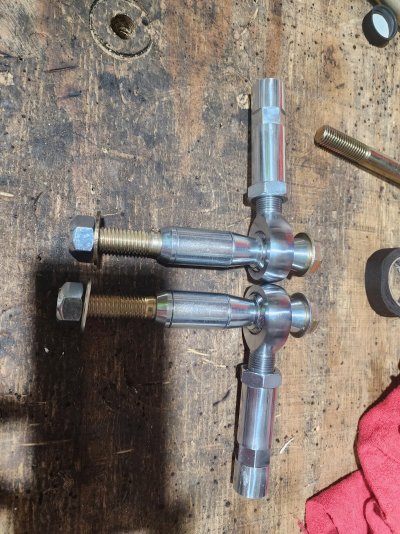
Bump steer kit, with the 6"+ lift (more like 7.5-8 with coilovers) tie rod ends are already angled down, accelerating brings the front end up, angling them down even more, angle=shorten=tires turn in.

20230119_165813.jpg20230121_185704.jpg20230121_185715.jpg
 

Attachments

  • 20230121_185732.jpg
    20230121_185732.jpg
    393.1 KB · Views: 1
OP
OP
randeez

randeez

Full Access Member
Joined
Sep 29, 2017
Posts
6,189
Reaction score
18,921
Location
south florida
alright so the end goal here is to flatten out the tie rod angles or even have them slightly above level, that way while accelerating if it goes from slightly above to below the net length stays close enough not to make a huge difference.
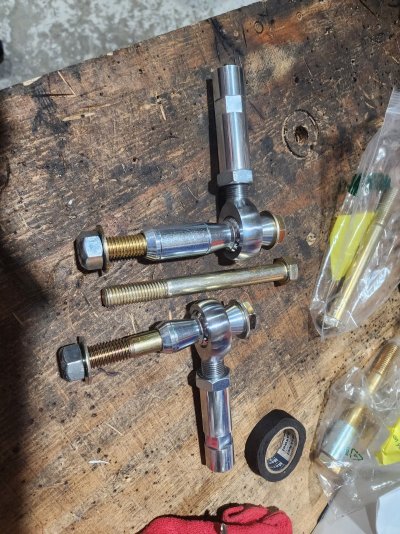
There are several ways to do this, im looking at three ways and will likely make small adjustments of each (instead of trying to get it all out of a single way; first is what the pictures are above, basically standing off the tie rod ends from the steering knuckles. second im going to say is to lower the suspension down some but ive get it set real nice, full lock to lock turns and articulation with tire in any position so id like not to - and eventually i would even like to go to a larger tire. and three is going to be dropping the steering rack...have a couple ideas in mind but its going to be last on the list.

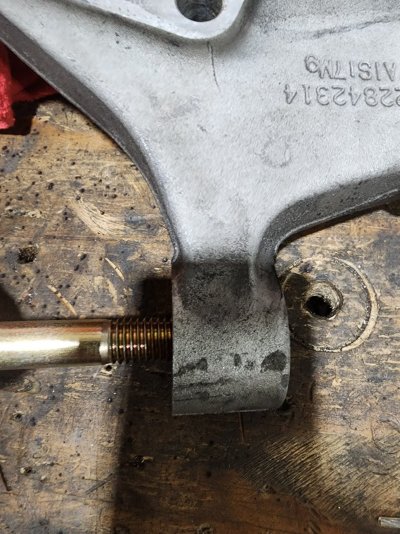
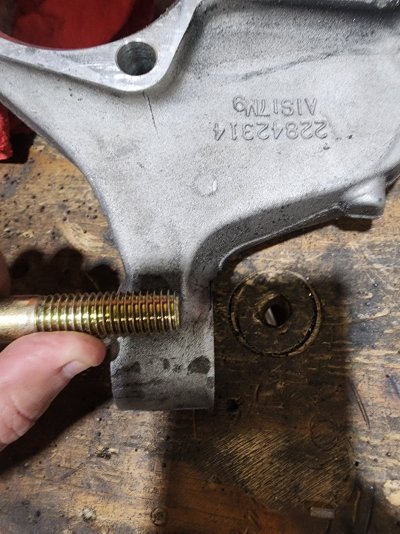
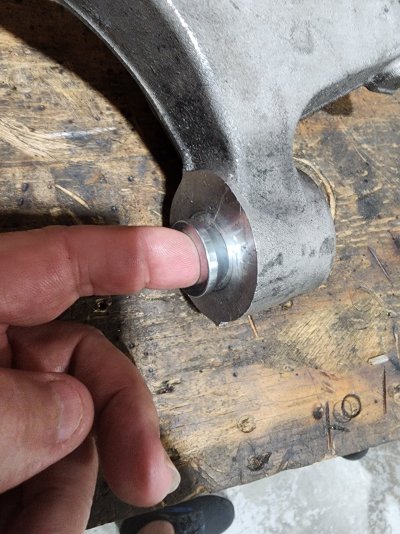
This "kit" is from www.twistedmetalworkz.com/ involves drilling out the knuckle for 5/8 bolt. this is made for a lowered truck to fix bump steer, so im by no means blaming them for having to take it the extra little bit to work for me. unfortunately as it sits it doesn't correct much more angle than i have with the stock TRE, maybe 1/4-1/2". having 22 rims i can get away with standing the heim joint kit off a lot further, im not going crazy cause the further out it goes the more leverage is put on it. im going for what should put me a solid inch above stock, longer grade 8 bolts, solid spacers, and im looking at countersinking in that small spacer to center and support the bolt. as i was mocking up with a stock knuckle the 5/8 bolt goes thru the taper more than half way. so even if i drill out the entire knuckle to 5/8, less than half of it is supporting the bolt.
 
OP
OP
randeez

randeez

Full Access Member
Joined
Sep 29, 2017
Posts
6,189
Reaction score
18,921
Location
south florida
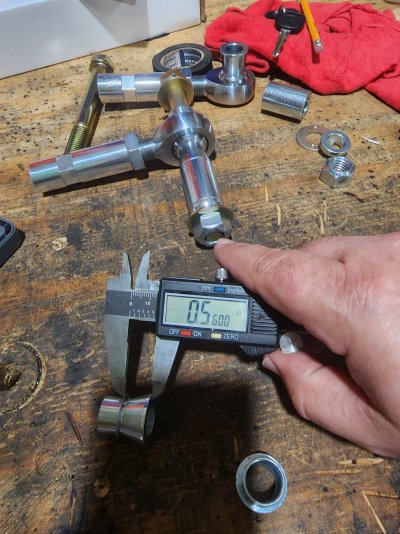
Longer bolts (6&6.5)and spacer came, waiting on smaller "alignment spacers" for the heims, the ones i have are a little bit over 1/2" long, i ordered some that looked stubby as hell, but they are basically the same length. the only definitive shorter ones i could find that will work are 3/8 from QA-1. they're 3/4 bore reduced to 5/8 for bolt. I ordered shorter ones for the top side (to move joint up). Was going to cut down the ones I had but figured it would be nice to have options for height as needed.
waiting on the 60° countersink bit to bury the small spacer in the tie rod hole
As long as no wheel interference I should be able to get quite a bit out of this.
The 6" bolt wont work full length, but I can move some spacers around and use if it looks better. the stock knuckle im mocking up on is about 1-3/8 thick with the shortened top spacer i'll have about 3/4" of threads coming out the bottom - plenty for washer and lock nut

20230123_221559.jpg20230123_221743.jpg20230123_222019.jpg20230123_222216.jpg20230123_222455.jpg
 

Forum statistics

Threads
129,196
Posts
1,811,972
Members
92,297
Latest member
btheboyscout
Top