ClemsonHoe
TYF Newbie
- Joined
- Apr 8, 2014
- Posts
- 16
- Reaction score
- 0
Well ladies and gentlemen, after being a longtime lurker on here (and many other forums), I've decided that it was time for me to keep a log of all the things I've done to my Tahoe, and more importantly, all the things I WANT to do.
Some background info: I'm a New Jersey native, Ocean County all my life, but I now attend Clemson University in the wonderful land of South Carolina. This naturally led to my username and wonderful build title, "A North to South Tahoe Build." The title's a work in progress, much like my vehicle, which will be customized to my liking from top to bottom and front to back. However, ONTO THE HOE.
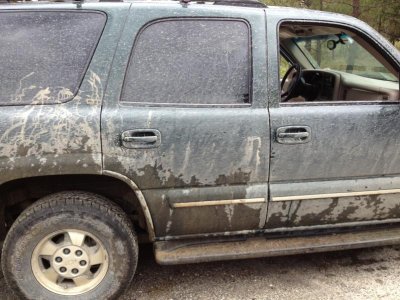
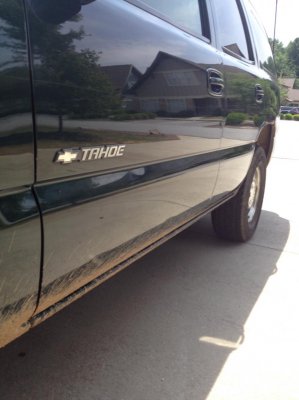
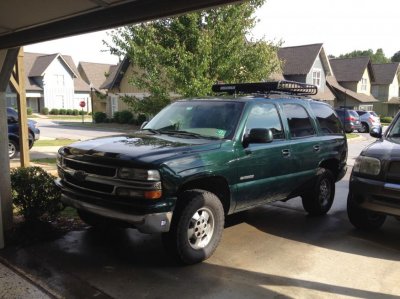
She's a Green 2002 Tahoe LT that has been in my family since the wonderful day we picked her up in November of 2001. With a measly 140k on the clock, she's lived a healthy life with my father and will keep on going for many more under my command. I took control of her just over a year ago and the mods have been minor up to this point. Luckily, that's all about to change. The goal I have in my mind is to turn this modest street queen into an all out Expedition Style rig that will be able to take on any obstacle I choose to set in its path. In order to achieve that, I want all future mods to be effective, reliable, and good looking (naturally).
Onto the good stuff; What I've done thus far.
As I said before, she's been in my possession for just over a year now, and until this point, she was 100% stock. So naturally, being a stupid teenager, first thing I did was I threw the loudest system I could afford in her, putting in two 12" Kenwood's into a massive dual ported box hooked up to a pioneer radio. Threw them back in the cargo area and bumped hard and loud for about three months. Needless to say, the appeal wore off quickly. So I took them out and added them to my on going home stereo set up instead (GREAT for movies.) This was about the time that I realized that driving off the road was a hell of a lot more fun than driving on it. And so that's where my mind really started turning, and has ever since.
If you've actually read all this up to this point, props to you, and thanks. So I'll promise it will get less wordy. LIST FORM! Everything done up to this point:
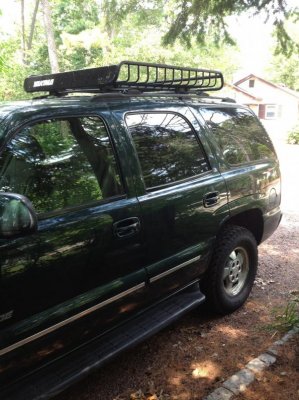
Yakima roof rack
20" LED bar on the roof rack
Custom Switch panel for LED Bar (Others to come)
CB radio with firestik 4' antenna
Hidden Radio Antenna
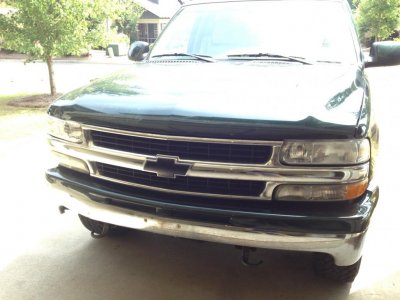
Blacked out BowTie
De-Molded both sides
Running Board Delete
Cranked Stock keys to even front and Rear
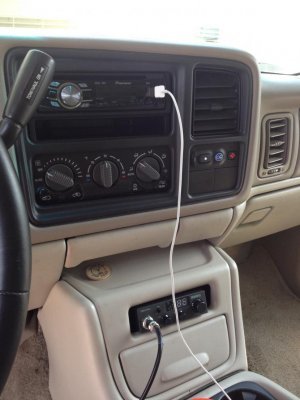
Tape Deck Delete
Pioneer HU
General AT2's in 265/70/16
[I'm sure there's more but I can't remember right now]
(expect many updates)
In Progress mods:
Interior LED swap (going to all green)
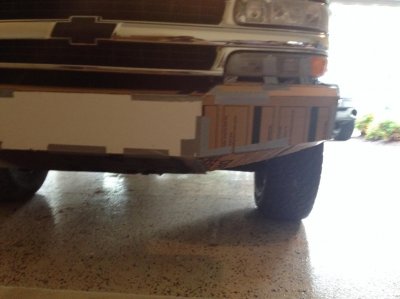
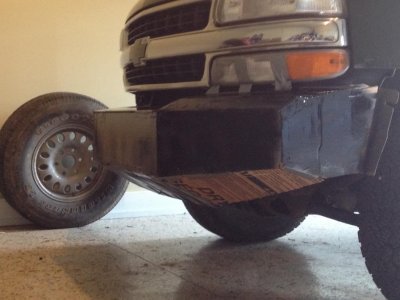
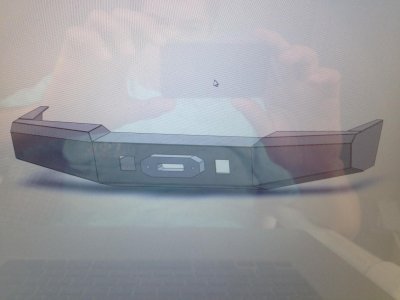
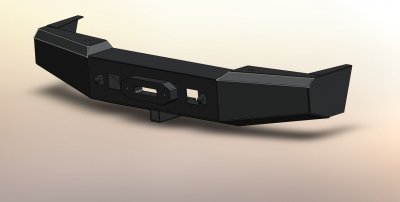
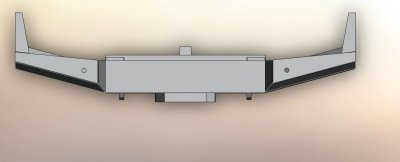
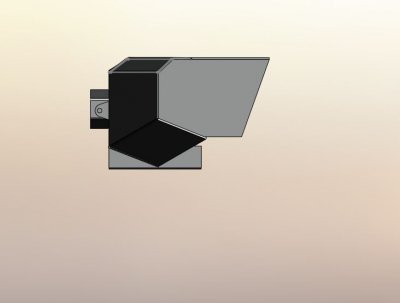
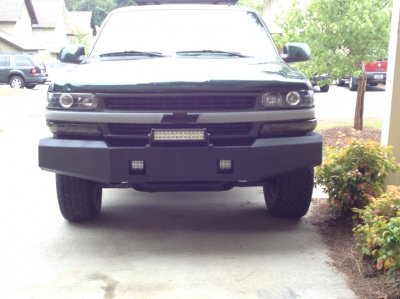
Designing new Front and Rear bumpers to be made by me by the end of July.
Now onto my favorite part, dreaming about the future: (not in any order)
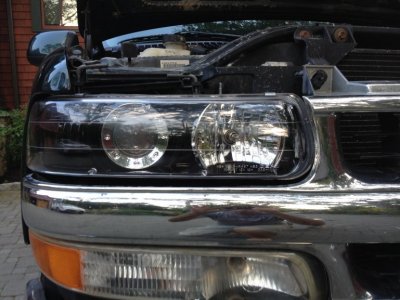
Replace the stock headlight housing's with black depo housings
35W 5000k HID's
Paint the radiator supports
Snorkel
Move LED bar from roof to new front bumper
Put an inverter under the center console
Create a relay bank in the Engine Bay
Clean up my in cab Switch Bank
Add a second battery (with isolator)
Add a roof mounted solar panel
Slotted rotors
HD Hood
HD Mirrors
BlackBear Tune
RCX 6" lift
All Moog steering components
Bilstein 5100's
35" x 17" General Grabbers
(Not decided on Rims yet)
Electric Fans
Custom Vinyl Wrap the Dash
Hi Lift and Shovel Mount on Roof Rack
Cargo Netting between rear seats and cargo area
Bed Liner the Wheel wells and Spare Tire area
Bed Liner the rocker panels
Some sort of extended Fender Flares
Upgraded Alternator
Install 8" or 10" sub in factory location with custom box. (The Stock sub is totally blown out, so I removed it today)
Once again, I'm sure I'm missing something, and as always, we always want new things for our vehicles, so this list will constantly change and be updated. Of course, being a college kid who has to work to achieve all these mods, alongside other bills, things will come in spurts. But I'm glad to be here and am excited to share all my progress with y'all.
OH, and before I forget, I haven't added any pictures to this post, but be sure to lookout for them tomorrow.
Some background info: I'm a New Jersey native, Ocean County all my life, but I now attend Clemson University in the wonderful land of South Carolina. This naturally led to my username and wonderful build title, "A North to South Tahoe Build." The title's a work in progress, much like my vehicle, which will be customized to my liking from top to bottom and front to back. However, ONTO THE HOE.
She's a Green 2002 Tahoe LT that has been in my family since the wonderful day we picked her up in November of 2001. With a measly 140k on the clock, she's lived a healthy life with my father and will keep on going for many more under my command. I took control of her just over a year ago and the mods have been minor up to this point. Luckily, that's all about to change. The goal I have in my mind is to turn this modest street queen into an all out Expedition Style rig that will be able to take on any obstacle I choose to set in its path. In order to achieve that, I want all future mods to be effective, reliable, and good looking (naturally).
Onto the good stuff; What I've done thus far.
As I said before, she's been in my possession for just over a year now, and until this point, she was 100% stock. So naturally, being a stupid teenager, first thing I did was I threw the loudest system I could afford in her, putting in two 12" Kenwood's into a massive dual ported box hooked up to a pioneer radio. Threw them back in the cargo area and bumped hard and loud for about three months. Needless to say, the appeal wore off quickly. So I took them out and added them to my on going home stereo set up instead (GREAT for movies.) This was about the time that I realized that driving off the road was a hell of a lot more fun than driving on it. And so that's where my mind really started turning, and has ever since.
If you've actually read all this up to this point, props to you, and thanks. So I'll promise it will get less wordy. LIST FORM! Everything done up to this point:
Yakima roof rack
20" LED bar on the roof rack
Custom Switch panel for LED Bar (Others to come)
CB radio with firestik 4' antenna
Hidden Radio Antenna
Blacked out BowTie
De-Molded both sides
Running Board Delete
Cranked Stock keys to even front and Rear
Tape Deck Delete
Pioneer HU
General AT2's in 265/70/16
[I'm sure there's more but I can't remember right now]
(expect many updates)
In Progress mods:
Interior LED swap (going to all green)
Designing new Front and Rear bumpers to be made by me by the end of July.
Now onto my favorite part, dreaming about the future: (not in any order)
Replace the stock headlight housing's with black depo housings
35W 5000k HID's
Paint the radiator supports
Snorkel
Move LED bar from roof to new front bumper
Put an inverter under the center console
Create a relay bank in the Engine Bay
Clean up my in cab Switch Bank
Add a second battery (with isolator)
Add a roof mounted solar panel
Slotted rotors
HD Hood
HD Mirrors
BlackBear Tune
RCX 6" lift
All Moog steering components
Bilstein 5100's
35" x 17" General Grabbers
(Not decided on Rims yet)
Electric Fans
Custom Vinyl Wrap the Dash
Hi Lift and Shovel Mount on Roof Rack
Cargo Netting between rear seats and cargo area
Bed Liner the Wheel wells and Spare Tire area
Bed Liner the rocker panels
Some sort of extended Fender Flares
Upgraded Alternator
Install 8" or 10" sub in factory location with custom box. (The Stock sub is totally blown out, so I removed it today)
Once again, I'm sure I'm missing something, and as always, we always want new things for our vehicles, so this list will constantly change and be updated. Of course, being a college kid who has to work to achieve all these mods, alongside other bills, things will come in spurts. But I'm glad to be here and am excited to share all my progress with y'all.
OH, and before I forget, I haven't added any pictures to this post, but be sure to lookout for them tomorrow.
")