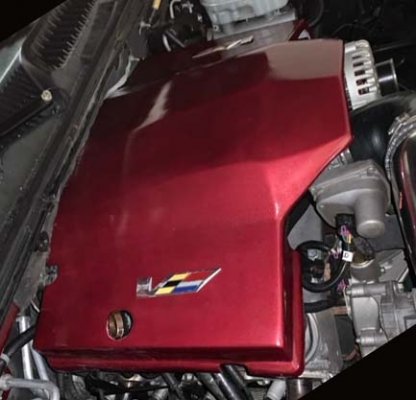
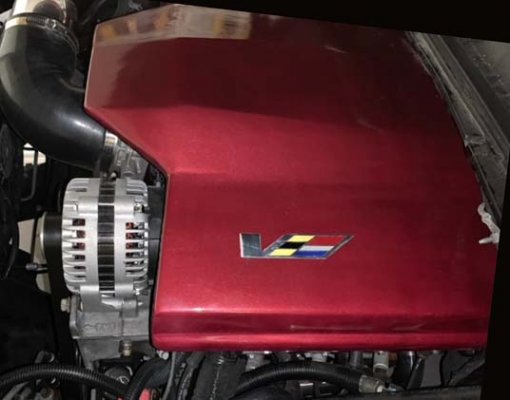
The simple answer is I used the same method GM uses for their 6.2L truck manifold cover. The cover connects to the manifold with grommets which allow it to be pressed on and pop off using two studs that are screwed into the manifold. Here is what I did: The manifold has threaded opening for up to five studs (or perhaps for some other purpose). I used four studs: 2 that are side-by-side near rear of the manifold and one each on the left and right nearer the front of the manifold. I cut four 1" diameter by 1" long sections from a pvc pipe. I then screwed 4 studs into the manifold at the locations mentioned above. Next, I smashed modeling clay on to the underside of the new cover at the approximate locations where the studs would touch the cover. I aligned the cover and pressed it down on the studs. This made impressions of the exact loction of each stud. Next, I cut away the clay from each stud impression, leaving a 1" diameter section that had the stud impression in the middle of it. I then took a sharpie and traced the outline of the clay. Next, I used JB weld to attach the pieces of pvc at the locations marked on the underside of cover and to attach the four grommets to the pvc. Using four grommets instead of two like GM uses, provides more stability and makes the new cover easier to level.Looks good. How is it attached?
Last edited: