Rocket Man's 2008 Bagged CC Silverado Build AKA "THE MACHINE"

Disclaimer: Links on this page pointing to Amazon, eBay and other sites may include affiliate code. If you click them and make a purchase, we may earn a small commission.

Bear77

Full Access Member
Joined
Aug 9, 2017
Posts
557
Reaction score
756
Location
South FL
That’s right Mark, you show that front part of the motor who’s the BOSS! Don’t let that cam beat you, you beat that cam! And make sure you turn that gear when it gets there tomorrow

Hmmm...that’s all I got for now! Great progress you’ve got going on there. Looking good


Sent from my iPhone using Tapatalk
 

Sam Harris

Supporting Member
Joined
Sep 26, 2018
Posts
7,400
Reaction score
14,794
Location
Texas
I pulled the rockers, timing cover, etc and was getting my dowels ready to keep the lifters from falling when I noticed the cam in the engine has one big bolt in the middle instead of 3 smaller bolts like the new cam has. My immediate thought was they sent me the wrong cam so I checked my emails to be sure I stated I had an LY2, then called Vinci HP and sent an email stating my engine was torn apart and I needed to get this figured out ASAP and if they needed to grind a new cam, I needed them to get on it. Then I saw a notice on their website stating all their cams are 3-bolt and I would need a 3-bolt cam gear. Doh. So off Googling I went and found a conversion kit from BTR on Summit’s site that said it would work. Ordered, next day air, for $70. Then I noticed an email back from Roger Vinci himself, with an exact explanation and a GM part# and stating I needed a 4 pole reluctor gear, make sure to get this exact part...then my phone rang and it was Roger who was talking so fast I didn’t want to interrupt him. He even apologized for taking so long to call me back...he was in the “cam lab” doing some testing on a new cam. Keep in mind the total time from my email and phone call to this point was 30 minutes. After he got done explaining about the reluctor and why I needed the gear from an 05-06 Corvette LS2 motor, I explained I found the info on his website and asked if the BTR product would work since it has the 4-pole 58-x reluctor and he said yep. Then he surprised me even more and said I now have his personal cell phone number, add him to my contacts but don’t give it to anybody, and I can call him directly if I need to get ahold of him in the future. Now that’s pretty cool. I have the cell phone number of the chief engineer and majority owner of Vinci High Performance. That dude is cool.
Wow!! Seriously great Customer Service!!
 
OP
OP
Rocket Man

Rocket Man

Mark
Supporting Member
Joined
Dec 25, 2014
Posts
25,965
Reaction score
50,651
Location
Oregon
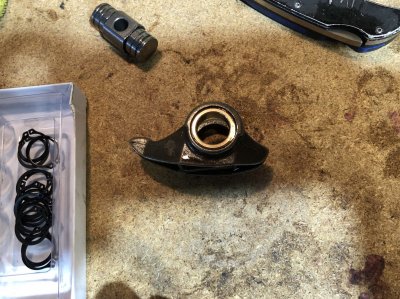
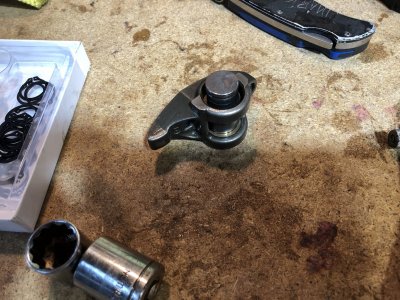
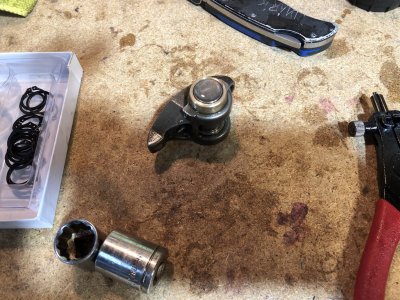
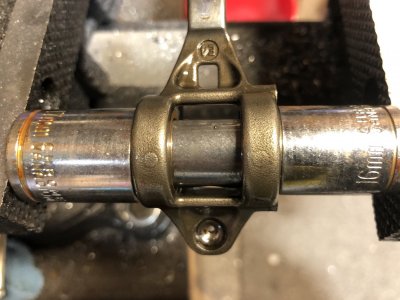
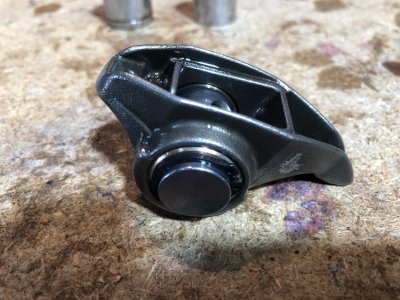
In case anybody is interested in the process of installing a rocker trunnion upgrade, I took some pics. I use sockets of appropriate sizes, in this case a 16 and 17mm 12-point for installation. Removing the old parts is a reverse of this install but using a slightly bigger socket on the receiving side so the whole trunnion slides inside it. First thing is you install one of the brass bushings on one side. I set the rocker on my toolbox and set this with a deadblow. The goal is to get it flush with the outside edge. Then you dip the trunnion in oil and set one end in that bushing, dip another bushing in oil and set it on top of the rocker, lining it up. This is where a press would be easier than a vise but I manage.

C61CEC1F-2D8A-4DFC-B06D-1F9E31F06C93.jpeg E18DFBF3-A0B5-4A50-8F8C-7D59F286EB63.jpeg AA26AD4F-C2B0-4C6F-8864-5EA9335F1489.jpeg
 
OP
OP
Rocket Man

Rocket Man

Mark
Supporting Member
Joined
Dec 25, 2014
Posts
25,965
Reaction score
50,651
Location
Oregon
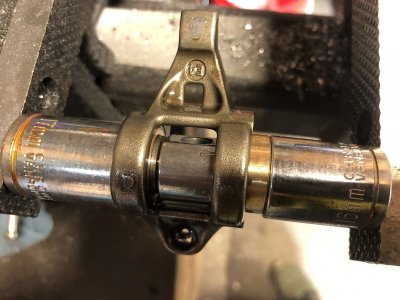
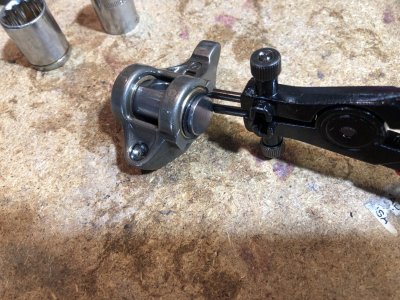
Then you need to press that bushing into the rocker until it’s flush. At this point I test for excess play or it might be binding if it’s too tight. For play, I look to see if one or both bushings need to be set further and do that in the vise as necessary. If it’s binding it’s back to the toolbox, where I set it on the 18mm socket and smack the trunnion with the deadblow until it moves smoothly and if I go too far, it’s back to the vise. The instructions just say to flush the bushings with the outside of the rocker but I have noticed there can be what I consider too much play so I adjust the bushings until I’m happy.

E6655BC1-5EA1-4A91-A4BE-2989DABBCAE4.jpeg E66C6FBB-5B55-4A2F-8B2F-49BCB9E98A6A.jpeg
 

Sam Harris

Supporting Member
Joined
Sep 26, 2018
Posts
7,400
Reaction score
14,794
Location
Texas
Then you need to press that bushing into the rocker until it’s flush. At this point I test for excess play or it might be binding if it’s too tight. For play, I look to see if one or both bushings need to be set further and do that in the vise as necessary. If it’s binding it’s back to the toolbox, where I set it on the 18mm socket and smack the trunnion with the deadblow until it moves smoothly and if I go too far, it’s back to the vise. The instructions just say to flush the bushings with the outside of the rocker but I have noticed there can be what I consider too much play so I adjust the bushings until I’m happy.

View attachment 249180 View attachment 249181
Very nice. I didn’t realize they were that much work!
 
OP
OP
Rocket Man

Rocket Man

Mark
Supporting Member
Joined
Dec 25, 2014
Posts
25,965
Reaction score
50,651
Location
Oregon
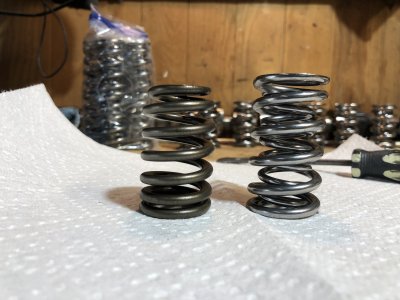
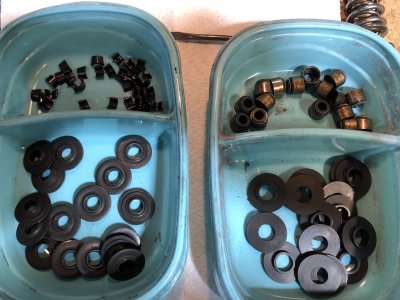
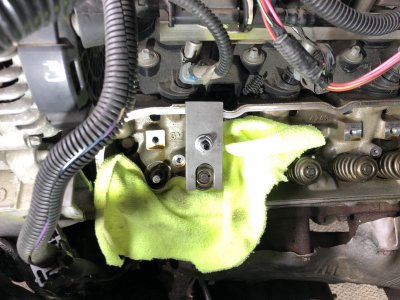
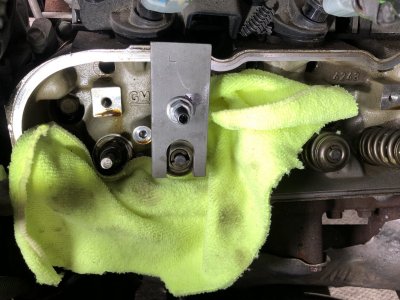
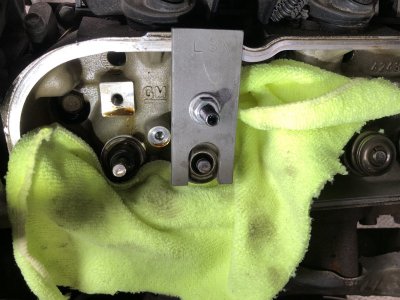
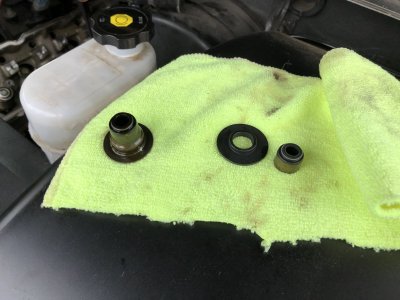
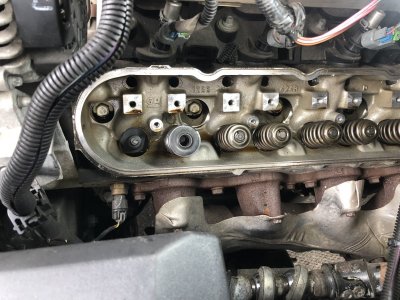
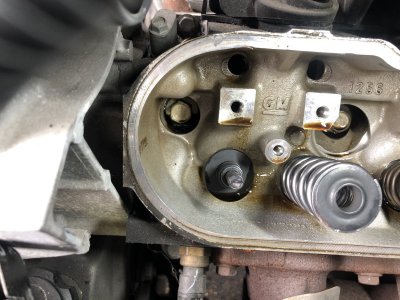
This shit is taking me forever! The cam gear came in this morning so I got the cam lined up right and installed it. Then I pulled the plugs and decided to pull the front wheels so I could lower the truck down to do the valve springs. And this is what’s taking forever. Here’s a few pics on swapping them. First, you’ll notice the height difference between the new duals and the OEM singles. Next pic is the new seats, hats, seals and keepers. Next is the spring compressor installed, then compressed, and finally the keepers removed with a pen magnet. This part is easy, it all comes off great.

6757E76A-17E1-4964-8EC4-1CDD0936C0E4.jpeg 664298E9-AE68-4447-9F23-11AA61987C3F.jpeg 81224E36-AAB6-4096-8193-17654A3349E0.jpeg 11CF78FF-C719-49F4-AA81-4A8378C6733D.jpeg 07CDF04E-4B3F-4E3B-A049-FACE3DE284D1.jpeg
 
OP
OP
Rocket Man

Rocket Man

Mark
Supporting Member
Joined
Dec 25, 2014
Posts
25,965
Reaction score
50,651
Location
Oregon
First pic here is the old hat-style seals which incorporate the seat, next to a new seat and Vitron seal. The hats would interfere with the center spring on the dual spring setup. Next up is installing the seats and seals. This part is easy too, just slide a seat down and then slide a seal over the valve stem and use an appropriate size socket to tap it down until you feel it seat. Notice the new spring height uncompressed. It makes it hard to keep the hat centered perfectly as you compress it. And it has to be perfectly centered to get the keepers in.

CE030F10-3FDE-4688-896D-38B04D855B65.jpeg 0B552520-19F5-4C43-9395-66270E7AD130.jpeg A05C0868-2619-496A-B075-16996E391924.jpeg
 

Forum statistics

Threads
129,178
Posts
1,811,725
Members
92,271
Latest member
Run4st
Top