Pro Comp 2.25” level

Disclaimer: Links on this page pointing to Amazon, eBay and other sites may include affiliate code. If you click them and make a purchase, we may earn a small commission.

wjburken

Supporting Member
Joined
Dec 26, 2017
Posts
9,797
Reaction score
26,679
Location
Eastern Iowa
Okay, back to the ordeal of installing the Bilstein Struts. As the picture above shows...Sunday morning I just have my truck with the driver wheel well just hanging out there... I ended up taking the broken tool back and rented 2 sets of strut compressors. I got home and started compressing the factory spring. It was a lot stronger than I thought it would be. I had to use my breaker bar to get it down enough to install the strut into the assembly. I had it on my kitchen table since it was so hot outside. Worked pretty well with 2 ratchet straps holding the assembly down on the table.

View attachment 232111 View attachment 232112

So I get ready to install the top nut to the 19 FtLbs the instructions call for and like the factory struts the rod just sat there and spins...tried the impact wrench and it still spinning. So once again I am stuck. I start researching and you need a special strut install tool. Basically its a nut drive that goes over the strut stud, these have an oval head while some have an Allan head slot, and then a larger nut driver that tightens down the top flange nut while holding the strut rod still. Had to drive across town to find it. it was the only one in town...

View attachment 232113 View attachment 232114

So I get it torqued down and outside I go. Only to find out I installed the strut in the spring backwards... Back we go to the table to strap down the assembly and spin the strut 180 degrees....lol

Back outside it went into the bucket very easy. Used the impact wrench to install the bottom strut bolts through the lift, and used the impact on the sway bar end link, and the tie rod end. Had to jack up the lower control arm and pry the upper control arm down to seat the ball joint. With it pried down you can tighten the ball joint nut without it moving. You have to use an impact wrench on the tie rod end or the ball joint in it will spin.

By this time its like 5 pm. I hurry to the other side and repeat the process. It only took about an hour for the other side. This one was a little difficult to hold the strut rod still even with the vice grips. I had to hold the strut rod with vice grips which I almost couldn't close, and use the impact wrench to spin the top nut off fast enough. Everything is put together and looks really high in the front compared to what is use to be. I am really liking it. I will definitely have to get new upper control arms. There is about 3/8 to 1/2" clearance between the control arm and the stop. I will probably do that over the next few weekends. I need to install the rear now and get different wheel spacers and do the alignment. I think its going to look sick when I am done with it! I will get some pictures of the front on flat ground sometime this week!

Looks like a job well done despite the challenges. I bet your wife was thrilled with the kitchen table getting used as a workbench! Did the My Little Pony doll help with it's magic?
 

R3cord303

Posse In Effect
Joined
Feb 28, 2019
Posts
1,166
Reaction score
1,421
Location
Oregon Valley
After using spring compressors on my old S10 to change the worn out LCA bushings- never again. Not a freaking chance in hell I'm ever gonna use em. Wall mounted ones- maybe but not ever the kind that hang out on the strut itself. Sooooo much energy held back, screw. that.
 

The_Burban

Full Access Member
Joined
Mar 19, 2018
Posts
287
Reaction score
192
Nice work . I just did Z71 springs with Bilstein 5100s. I'm not brave or dumb enough to do that spring compressor like you did.

No shame about installing wrong. Mechanic I handed them off to Did the same. Another broke the strut.
 
OP
OP
B

Bwiggins1985

TYF Newbie
Joined
Aug 12, 2018
Posts
27
Reaction score
4
Nice work . I just did Z71 springs with Bilstein 5100s. I'm not brave or dumb enough to do that spring compressor like you did.

No shame about installing wrong. Mechanic I handed them off to Did the same. Another broke the strut.

It was more of a WTF moment lol...and Ughhhhh....

I went ahead and ordered upper control arms this week to install this weekend.

After using spring compressors on my old S10 to change the worn out LCA bushings- never again. Not a freaking chance in hell I'm ever gonna use em. Wall mounted ones- maybe but not ever the kind that hang out on the strut itself. Sooooo much energy held back, screw. that.

I was a little nervous about using the spring compressor but I figured what the heck... and that’s why I figured 2 sets so 4 bolts. And my thoughts were if anything were to come loose it wouldn’t go far as it was strapped down.

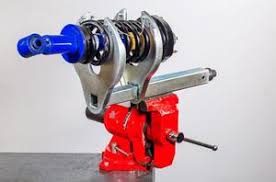
Has anyone seen a failure with these tools? In theory the bolts could break or the hooks could slip or break off. The tool pictured below is the tool I had first and it actually broke and I had to hammer compressed spring out which was kind of freaky... I totally understand the principal of stored kinetic energy.

092D8671-24F2-40D4-B053-4D5E4C508D16.jpeg
 
OP
OP
B

Bwiggins1985

TYF Newbie
Joined
Aug 12, 2018
Posts
27
Reaction score
4
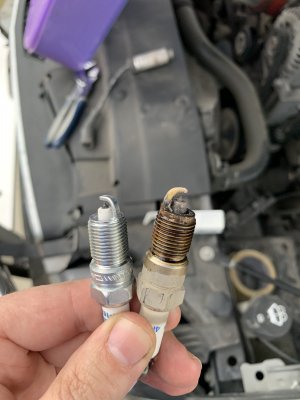
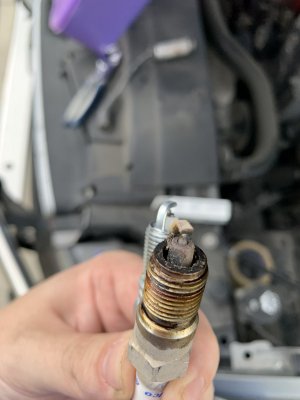
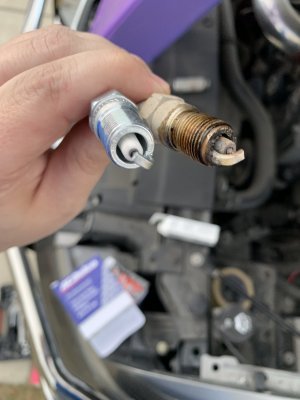
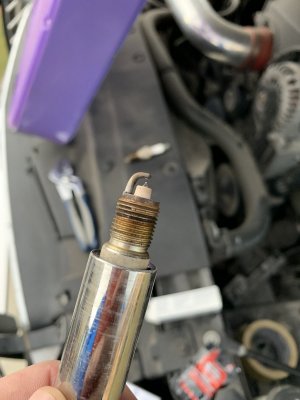
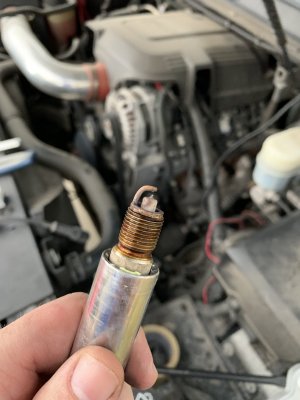
This is what I did last night after I started having a misfire on the drive to the airport on the way out of town last week... yay... I am not sure if these are the original plugs or not... I think I am going to replace the ignition coils and the wires also. It threw code P0301 which was misfire cylinder 1. Really cool side note...since I installed my Kenwood with the Datalink Maestro I could actually check the code and reset it on the radio...instead of going to autozone or etc to get it checked! I started with the odd plugs after cylinder 1 which was gross... (first 3 pics)...then a thunderstorm blew through and I had to come inside per the wife because of the lightning lol.

2DF75C6F-C415-4C4B-BE8F-112D9A1542C0.jpeg 2D004038-158D-4A23-9AE1-C2145A0BD8D7.jpeg 4B8DC90B-3039-47BD-A8FB-C1473F92C031.jpeg 6F33E9C8-4ADF-4370-8B98-7D44A2F9E40F.jpeg 8805D118-C9FF-48AD-B517-B7A731053733.jpeg

Came back out a few hours later and tackled the even plugs. Plug 8 wasn’t as bad as everyone makes it out to be. Once I pulled the plug wire off I was able to install the 5/8 spark plug socket onto the plug with my left hand. You can’t install a regular extension for a 3/8 drive ratchet. So I inserted my 1/2 to 3/8 adapter which gave just enough clearance to get past the exhaust manifold. From there I was able to turn the 1/2” drive socket wrench until I was able to click it into the adapter on the spark plug socket and was able to loosen it up. Once loose enough you have to take the wrench off and take the plug out by hand with the adapter and plug socket still attached.

From there you can install the new plug with the plug socket and the adapter by hand until hand tight then turn/slide the 1/2” drive wrench to where you can click it into the adapter-plug socket and tighten the spark plug up. Reinstall the wires...Done!!! It probably took maybe 8 ish minutes for the last plug swap...
 
Top