bosworth496
Full Access Member
So first things first I'm not responcable for your screw ups...
TOOLS NEED:
1- Can of VHT night shade.
1- Can of Krylon clear coat
1- Bottle of Meguiar's ultimate compound
Microwfiber towels (a few of them)
Polishing pads (a few of them)
Masking tape
News paper
Razor blades
2000 Grit sand paper
Step 1:
Take your lights off the truck by the 2 little screws when you open the back hatch. if your doing the third break light close the back hatch and open the back window and take the 2 10mm nuts off and the 3 star bolts out and remove the hole wing then take the other 10mm bolts off that hold the light in.
Step 2:
Now get some dish soap and a rag and clean your lights to get off the grime, wax,dirt etc... Then dry really good...
Step 3:
If your going to mask the reverse light off like i did then go a head and mask over it and get a new razor blade and lightly follow the little lines around it peel the extra tape off and should look like this....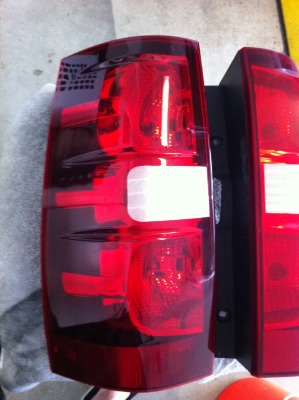
Step 4:
Now comes wet sanding the light. Take a some 2000 grit sand paper and get it wet along with the light a little bit. Now apply some pressure to the light while sanding not a lot your just trying to scuff it up so the paint will stick. When its done should look cloudy with no shine, do the same steps with all three lights make sure to clean good with water when done so it looks like this...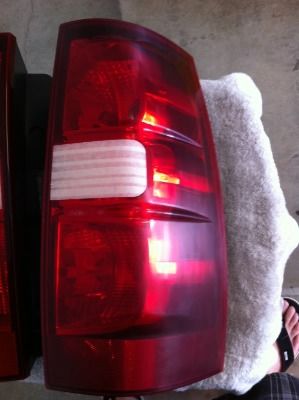
Step 5:
Its now time to mask off the back side of the light which is not fun its like wrapping a really odd christmas gift just make it work lol and seal it up....
Step 6:
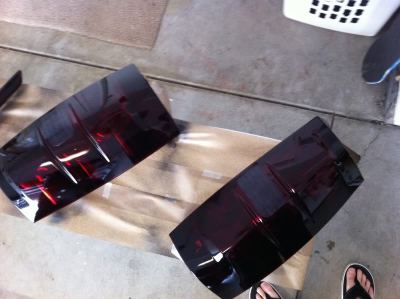
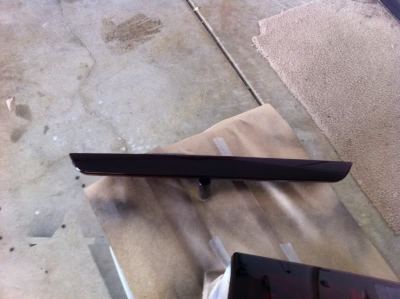
Here come your own judgement on how many coats you want to do i did 3 so its up to you how dark you want to go...Now its time to shake up the VHT NIGHT SHADE for about a 1 min or so.... Now apply your first coat evenly on each light till its covered like this... (if you like this darkness move to step 9)
Step 7:
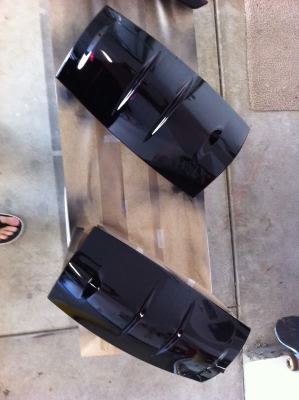
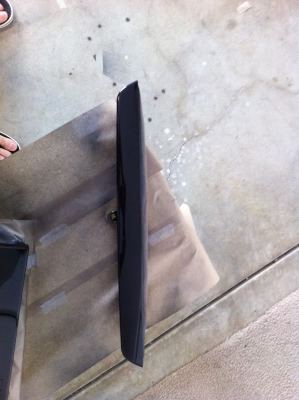
After letting the first coat sit for 5 min or so apply the 2nd coat of tint same as the first evenly if you chose to do so which will look like this... (if you like this darkness move to step 9)
Step 8:
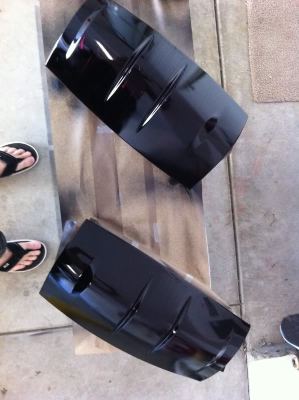
Now after letting the 2nd coat sit for 5 min your ready for the 3rd and final coat.. Apply same way as you have done coat 1 & 2 evenly... and should look like this...
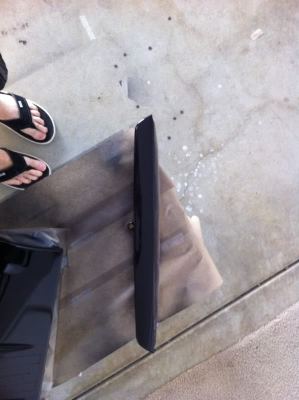
Step 9:
Ok step 9 is the clear coat which you can do at anytime after you have reached your desired tint...and is the same steps you do to apply the VHT NIGHT SHADE...which is 5 min intervals of each coat.. I would do 3 coats of clear no matter what darkness you chose.....after your 3rd and final coat of clear let dry for 2-4 hours before step 10...
Step 10:
So now its time to peel off the masking tape and to lightly wet sand the lights with 2000 grit sand paper (try not to wet sand over the reverse light if you can)...Your object here is to smooth out and get rid of most of the imperfections in the clear so the main this here is LIGHTLY wet sand till the light looks like this....(you can either do it on the truck or off)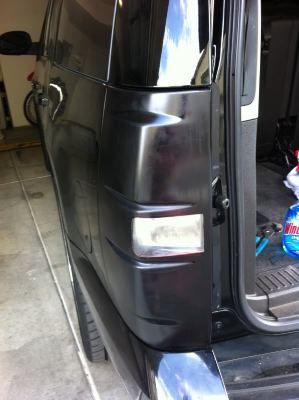
Step 11:
Now that all your lights are nice and wet sanded its time to get your rub on!!!!! and or use a buffer this is just like waxing a car and all you want to do here is buff out the light till its nice and pretty and looks great like this....
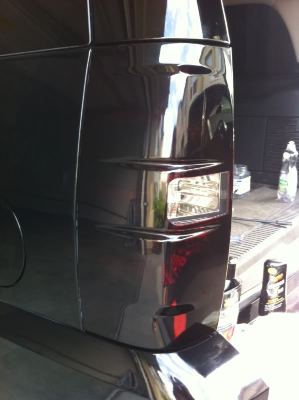
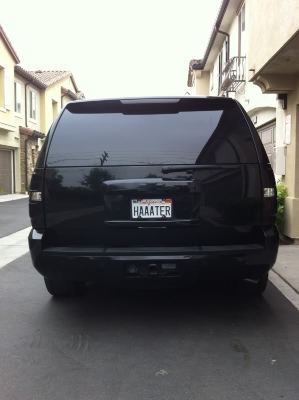
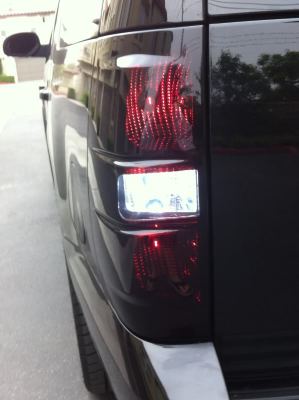
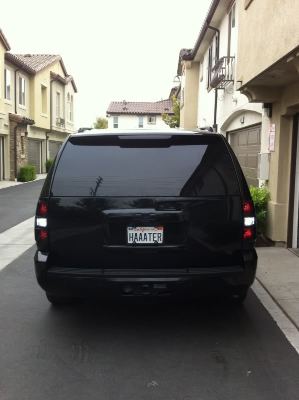
so there it is guys!! good luck and have fun!!
like I said in the begging if you mess up its on you!!
If you get a ticket its on you!!!
Sincerely: Bosworth496
TOOLS NEED:
1- Can of VHT night shade.
1- Can of Krylon clear coat
1- Bottle of Meguiar's ultimate compound
Microwfiber towels (a few of them)
Polishing pads (a few of them)
Masking tape
News paper
Razor blades
2000 Grit sand paper
Step 1:
Take your lights off the truck by the 2 little screws when you open the back hatch. if your doing the third break light close the back hatch and open the back window and take the 2 10mm nuts off and the 3 star bolts out and remove the hole wing then take the other 10mm bolts off that hold the light in.
Step 2:
Now get some dish soap and a rag and clean your lights to get off the grime, wax,dirt etc... Then dry really good...
Step 3:
If your going to mask the reverse light off like i did then go a head and mask over it and get a new razor blade and lightly follow the little lines around it peel the extra tape off and should look like this....

Step 4:
Now comes wet sanding the light. Take a some 2000 grit sand paper and get it wet along with the light a little bit. Now apply some pressure to the light while sanding not a lot your just trying to scuff it up so the paint will stick. When its done should look cloudy with no shine, do the same steps with all three lights make sure to clean good with water when done so it looks like this...

Step 5:
Its now time to mask off the back side of the light which is not fun its like wrapping a really odd christmas gift just make it work lol and seal it up....
Step 6:
Here come your own judgement on how many coats you want to do i did 3 so its up to you how dark you want to go...Now its time to shake up the VHT NIGHT SHADE for about a 1 min or so.... Now apply your first coat evenly on each light till its covered like this... (if you like this darkness move to step 9)


Step 7:
After letting the first coat sit for 5 min or so apply the 2nd coat of tint same as the first evenly if you chose to do so which will look like this... (if you like this darkness move to step 9)


Step 8:
Now after letting the 2nd coat sit for 5 min your ready for the 3rd and final coat.. Apply same way as you have done coat 1 & 2 evenly... and should look like this...


Step 9:
Ok step 9 is the clear coat which you can do at anytime after you have reached your desired tint...and is the same steps you do to apply the VHT NIGHT SHADE...which is 5 min intervals of each coat.. I would do 3 coats of clear no matter what darkness you chose.....after your 3rd and final coat of clear let dry for 2-4 hours before step 10...
Step 10:
So now its time to peel off the masking tape and to lightly wet sand the lights with 2000 grit sand paper (try not to wet sand over the reverse light if you can)...Your object here is to smooth out and get rid of most of the imperfections in the clear so the main this here is LIGHTLY wet sand till the light looks like this....(you can either do it on the truck or off)

Step 11:
Now that all your lights are nice and wet sanded its time to get your rub on!!!!! and or use a buffer this is just like waxing a car and all you want to do here is buff out the light till its nice and pretty and looks great like this....


so there it is guys!! good luck
 and have fun!!
like I said in the begging if you mess up its on you!!
If you get a ticket its on you!!!
Sincerely: Bosworth496


