Project 99 Yukon

Disclaimer: Links on this page pointing to Amazon, eBay and other sites may include affiliate code. If you click them and make a purchase, we may earn a small commission.

OP
OP
My99Yukon

My99Yukon

Full Access Member
Joined
Apr 27, 2017
Posts
109
Reaction score
129
Try these links from RICKAFIX on youtube. They are pretty informative and these are what I went by when I did mine. It shows it from the start to finish.


I am almost sure that I tried every permutation including the owners manual directive on changing to 4Lo but I tried this again on your recommendation to make sure I was not in error to no avail.

I will either try to crack the case myself per the youtube...thanks...or have someone take care of it, depending on the cost.

Also, I agree that with the earlier post on the injection. When I have access to a garage, i will change out the spider, cap and rotor and keep you posted. The Yukon runs pretty well right now, but I like the challenge and also knowing that I have common failure points solved before they become an issue. A bit OCD, but I like having confidence in my systems. I appreciate the nudge.
 
OP
OP
My99Yukon

My99Yukon

Full Access Member
Joined
Apr 27, 2017
Posts
109
Reaction score
129
Pics of my 3" Magnaflow Catback system and exhaust pipefullsizeoutput_c89.jpeg attached to my Gibson ceramic headers.
 
OP
OP
My99Yukon

My99Yukon

Full Access Member
Joined
Apr 27, 2017
Posts
109
Reaction score
129
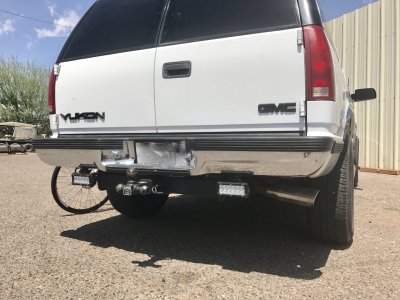
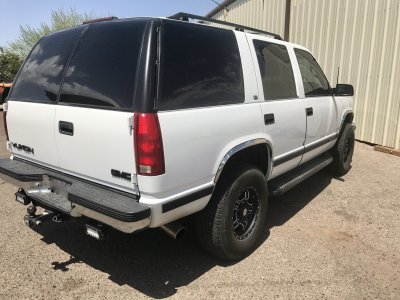
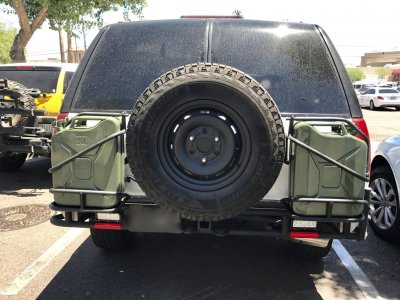
Rear Bumper - Swingout - Wavian Authentic NATO Jerry Fuel Can

It seems like a small change but I am excited today to make a visual and actual change from the soccer mom mobile to a more capable off road vehicle. For all the purists out there, don't be a hater because this is a work in progress and I am happy with the improved departure angle, additional fuel and range for SHTF and having the spare tire accessible instead of stuck under the ass end.

I went from this...

fullsizeoutput_c8b.jpeg

and this...

IMG_0834.JPG

to this...


IMG_0914.JPG

and this...


fullsizeoutput_d10.jpeg

Locking gas cap bars, solid DOM tubular steel rear bumper that protects the rear end and doors ( rock sliders welded to frame ) from an inadvertent bounce off a rock, extra fuel, incorporated 2" inch attached to the frame ( I have a hitch mounted D Ring for rescue pulls ) and it looks great.

I got probably an extra 7 or 8 inches on my departure angle and incorporated my backup lights into the tubes for protection. Love it!
 
Last edited:

bunchz71

Full Access Member
Joined
Mar 29, 2016
Posts
162
Reaction score
30
No Soccer Mom Tahoe has bad ass backup lights like that lol. Do they work well ? I never thought about doing lights like that.
 
OP
OP
My99Yukon

My99Yukon

Full Access Member
Joined
Apr 27, 2017
Posts
109
Reaction score
129
I was a bit skeptical that only 36W would do what I needed since I have tinted windows but these work pretty well. Bigger is always better but these are great for the price ($35) point. Low amp draw, perfect for what I needed. You can leave these on to light your campground for a while and not worry about drawing down your batteries. I would do them again. If, when, I upgrade to a new head unit that includes a back up camera, this will be perfect to see my ass end n reverse.

https://www.amazon.com/gp/product/B00IZ9VAOI/ref=oh_aui_detailpage_o03_s00?ie=UTF8&psc=1
 
OP
OP
My99Yukon

My99Yukon

Full Access Member
Joined
Apr 27, 2017
Posts
109
Reaction score
129
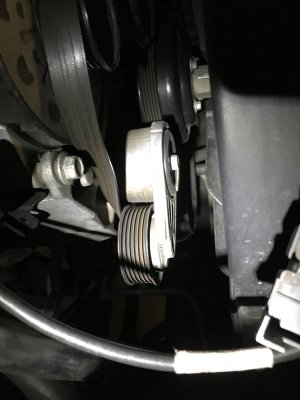
Replaced Belt Tensioner Assembly

One of the last times I was under the hood, I noticed that my Belt Tensioner Assembly was wobbling outside my comfort level. Easy replacement. Just relax the tension with a 3/8 ratchet, pull the belt off the assembly, unbolt the old one, drop in the new one, tighten it all back up and back in business.

IMG_1155.JPG
 
OP
OP
My99Yukon

My99Yukon

Full Access Member
Joined
Apr 27, 2017
Posts
109
Reaction score
129
Second / Dual Battery Project & Big Three / Four Upgrade Complete

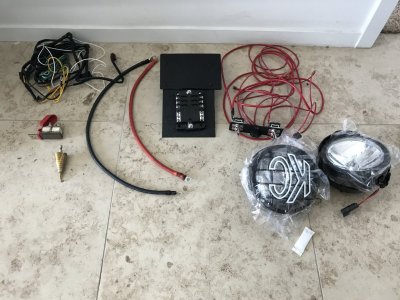
Parts List:

After extensive research, I finalized how I wanted to do my second battery to run my accessories. A second battery is a challenge because it demands that

  • have a process to recharge your second battery fully
  • isolate your batteries when using aux power
  • stay inside the limits of your alternator capacity
  • prevent discharge from main battery
  • monitor the health of your second battery

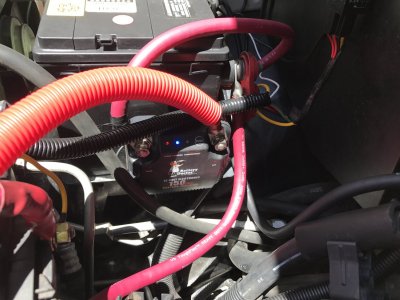
So my solution is multifaceted but the core is the battery isolator and charger. I chose the 150amp Wirthco Battery Doctor for its low amp draw, isolation and ease of use. I didnt like the solenoid concept so I went with this. The only downside is that if I upgrade to a larger alternator, I will have to find another solution that allows for higher amp input.

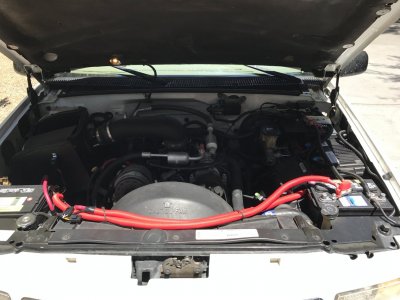
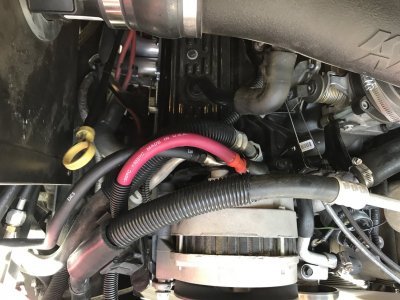
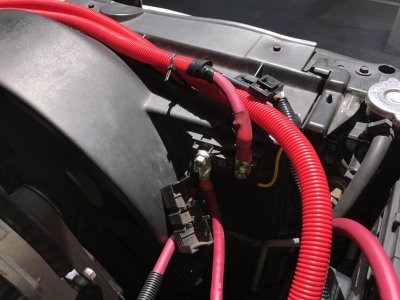
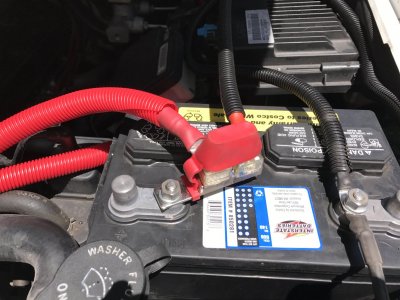
I have a deep cycle auxiliary battery. This fit nicely into my existing location. Now the wiring. Since I was going to run quite a bit of new wire, it was also time to do the big three/four upgrade with 1/0g welding cable. Lots of info on this but I felt one of the most important was a negative return from the alternator back casing to the negative terminal on the primary battery.

I upgraded the braided wires in the stock locations (frame-block and frame-body) as well as the other cabling. I can tell you the results were dramatic across the board. Shifting was smoother and the engine simply seemed happier. After nearly 18 years, I suppose it was time to make a few of these upgrades. I need to add a bit more wire loom on some of the short runs but I'll get to that.

I used Blue Sea Systems fuses on the second battery as well as the stock fuse holder for runs to the second battery and primary relay/fuse box. All positive runs have appropriate fuse sizes for what I would be powering off of them. Blue Sea is a bit more expensive but I like their quality and how they fit into my build.

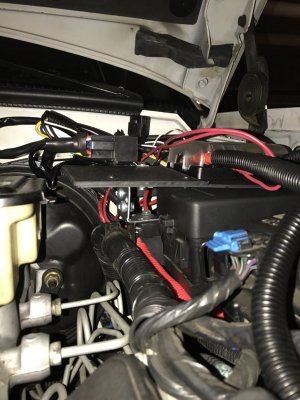
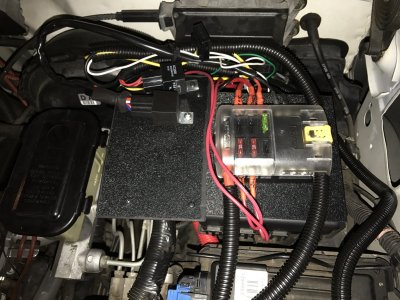
I built a custom mount to hold a Blue Sea fuse block and the relays that will be running off the second battery. Ill post that build in another dedicated post.

I have two (2) KC HiLite Slimlite 130W Spots and Two (2) KC HiLite SlimLite 100W Driving Lights and I power them both directly from feeds coming off the alternator since I will largely only be using them when driving. Backup lights and other aux items are wired to the second battery with toggles.

I built a monitoring system and switch/toggle platform in the cabin that I will post later. The beauty of this is that I have room to expand, the auxiliary power items are on the second battery fused on a separate box and I can shut off the aux amp draw at the flick of a toggle switch.
IMG_1282.JPG IMG_1283.JPG IMG_1285.JPG IMG_1286.JPG IMG_1287.JPG
 
Last edited:
OP
OP
My99Yukon

My99Yukon

Full Access Member
Joined
Apr 27, 2017
Posts
109
Reaction score
129
Auxiliary Fuse Block

To avoid having several nests of wires scattered around the engine bay, I wanted to consolidate my wires, relays, fuses and power cable coming off the second battery of the dual battery system.

Here is the basic starting point:

IMG_1237.JPG

I used a 12x12 sheet of ABS supported by a rigid aluminum sheet that I tied some angle brackets into. I put a second sheet of ABS across the top of the bolt heads to make it look a bit cleaner and also get rid of the large metal heads that would otherwise be right by the relays. This bolts directly to an existing support off the OEM fuse block.

IMG_1351.JPG

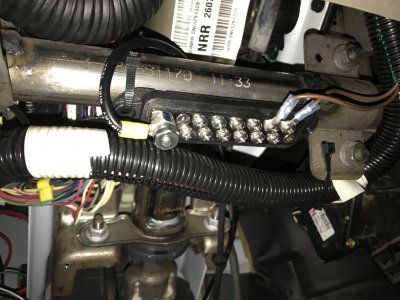
When it is bolted down and the Blue Sea fuse block installed, I ran the 4g positive and ground wires back to the second battery. I chose this block so I could have a common ground point for the relays and also a jump off point to run a 10g ground wire into the cabin where I installed a ground bus bar.

IMG_1349.JPG

Jumping inside the cabin:

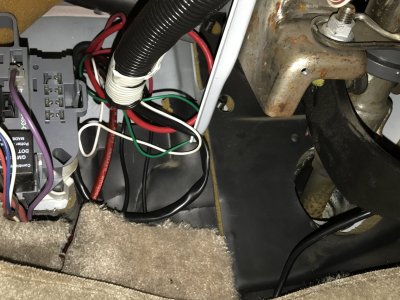
IMG_1352.JPG IMG_1353.JPG
 
OP
OP
My99Yukon

My99Yukon

Full Access Member
Joined
Apr 27, 2017
Posts
109
Reaction score
129
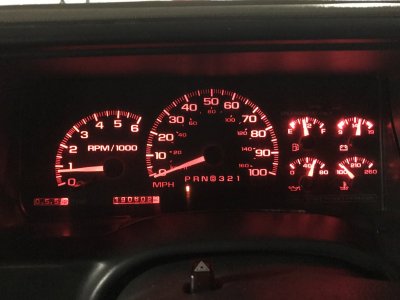
Instrument Cluster LED Conversion

Partsam T10 194 LED Cluster

Since I was tearing into the dash to install my auxiliary toggle switch plate, it seemed like the perfect time to swap out the instrument cluster lights. It is strange that with a 50/50 shot at getting the polarity right, I got ZERO right on the first attempt. I thought maybe I had broken something in the process but I flipped them all around and they all worked.

I knew the LED's would not dim like the stock lamps but I figured I would try them and see if it was obtrusive. I chose red and I could not be happier.

They look great, it looks way more modern and they are easier on the eyes. And yes, with the Big Four and upgraded grounds all around, the primary battery is getting a great charge off my alternator.

I would definitely make this upgrade!

IMG_1342.JPG
 
Last edited:
OP
OP
My99Yukon

My99Yukon

Full Access Member
Joined
Apr 27, 2017
Posts
109
Reaction score
129
Dash Console Auxiliary Switch Panel

Parts List:
BlueSea Systems 12v Monitor
BlueSea Systems Dual USB 4.8A 12V Charger
ACDelco 15-72547 GM Original Equipment Heating and Air Conditioning Control Panel with Rear Window Defogger Switch
Chevy Tahoe Radio Stereo CD Replacement Pocket

I wanted to clean up the ugly installation for the existing aux light switches and reclaim some of the space from the long broken and unused CD Player...
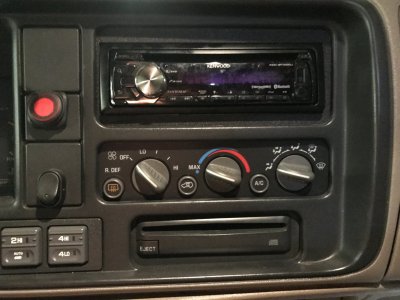
IMG_1128.JPG

So I fabbed a custom platform out of some ABS and prewired a bunch of 20amp toggle switches. I realized later that I might need to use a 30amp switch at some point so rather than ordering new expensive switches, I just wired the 20amp toggles that I had with 10g wire so I can swap the toggles out when I need a higher load capacity.

The KC lights came with 30amp switches so I used these for the driving and spot lights. I ordered a third switch from KC so I could use that for my backup lights and they would all look uniform.

I kept the lower right toggle switch to turn on/off my Blue Sea 12v Battery Monitor so it would not draw any power when I am parked for extended periods.
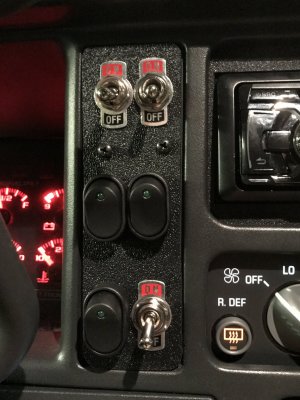
IMG_1343.JPG

I run 10g wires directly from the Blue Sea 12v monitor to my custom fuse block which is tied to the second battery by 4g to try to get the most accurate reading possible. I removed the three hole 12V panel and cut some ABS to size, drilled holes, wired it up and screwed the panel into the interior plastic lip. It fit perfectly and the interior lip had just enough width to allow for a solid hold.
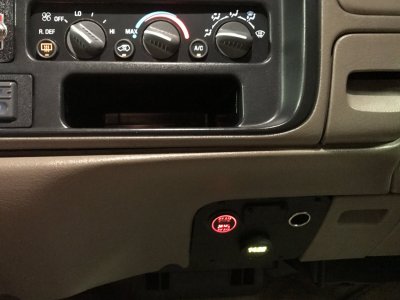
IMG_1348.JPG

The last part of this dash makeover and wiring project was to get rid of the old CD player and fix the fan control switch which oddly enough had just started to fail in the last few weeks.

I bought a switch to just replace this failing part for $20 but by plastic on the 18 year old panel just fell apart when I started to work on it so I ended up having to buy the $140 OEM AC Delco 15-72547 Heating and AC Control cluster. Not thrilled about that but at least I know that I will be reliable for a very long time.

I replaced the old CD with the Chevy Stereo CD Replacement holder. It fits perfectly and gives me a place to put my cell phone when driving.

It is hard to see the numbers on the 12v monitor but it is fun to see the WirthCo 20092 Battery Doctor 125 Amp/150 Amp Battery Isolator doing its job really well. I added a single 12v 4.2amp dual USB port which is on the same switch as the battery monitor so I can shut them off at the same time and reduce any parasitic draw when I am stationary.

I feel like I am back in the cockpit of a fighter jet.
 
Last edited:

Forum statistics

Threads
129,103
Posts
1,810,354
Members
92,177
Latest member
buckner0121

Latest posts

Top