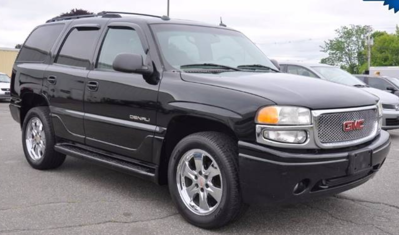
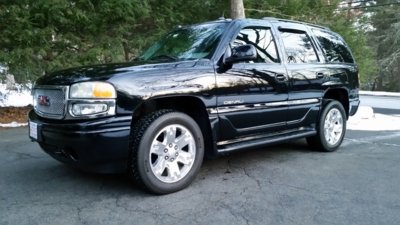
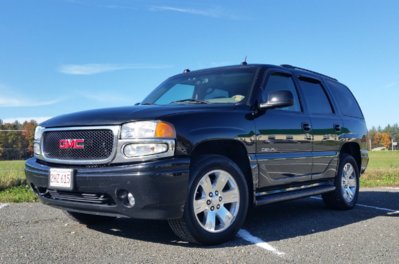
Mals' 2005 Yukon Denali Maintenance / Build Thread

Disclaimer: Links on this page pointing to Amazon, eBay and other sites may include affiliate code. If you click them and make a purchase, we may earn a small commission.

mals

Full Access Member
Joined
Jun 18, 2016
Posts
332
Reaction score
362
Location
Western Mass
Hello all -

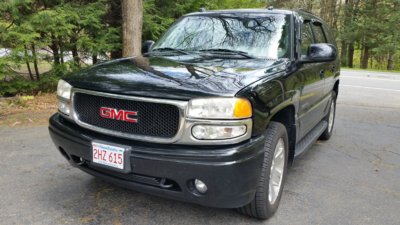
I purchased my 2005 6.0L AWD Yukon Denali in June 2016 with 155K on the odometer. I’ve been active on and off here on the forum over the past year and a half, but thought it was time to put all the work I’ve done in one place. Mostly for my own benefit, but also hopeful for the use of others that are planning to tackle similar projects.

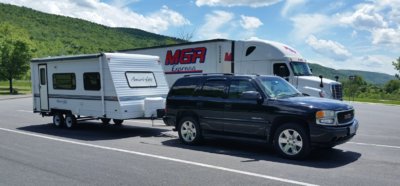
This vehicle was primarily purchased as a tow vehicle for our travel trailer. I’ve had Silverados as work trucks for the past 15 year, so when I was looking at full sized tow vehicles the Yukon felt familiar and comfortable. I was planning on just getting a beater of a Tahoe or Yukon, but I happened across a Yukon Denali that was in decent shape, but needed a little TLC, and was priced to sell. I knew it had some issues, but they all seemed like things I could work on myself. With the help of this forum, and the countless how-to videos on YouTube, it’s been a fun project.

Here are the items I've successfully tackled so far:
  • Exhaust Manifold Gaskets (and extract 4 broken manifold bolts)
  • Engine Coolant Temp Sensor (Snapped while working on exhaust manifold)
  • Replaced Spark Plugs (Since I pulled the old ones working on the manifold)
  • Replaced the Oil Pressure Sending Unit
  • Replaced the Passenger Side Air Blend Door Actuator
  • Replaced Exhaust Hanger Isolators
  • Installed new 4300k HID Low Beams with 55W Ballasts
  • Replaced the 8 mini-bulbs in the Steering Wheel Controls
  • Replaced the 11 mini-bulbs in the HVAC Control Unit
  • Replaced the mini-bulbs and stepper motors in the Gauge Cluster
  • Reflowed the solder on the surface mount resistors to restore dim PRND321 display
  • Installed NNBS Yukon 5307 Aluminum 20" Rims w/ four new NBS TPMS sensors
  • Full Sized Matched Spare Made Using a 20" Rim from a 2009 Nissan Titan
  • Installed AirAid Modular Intake Tube
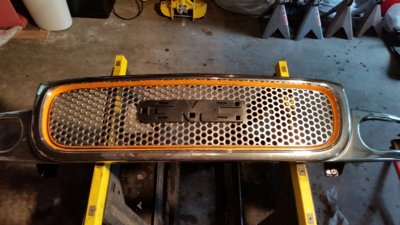
  • Blacked Out Denali Mesh Grille Inset
  • Replaced Yellowed Headlights w/ NOS OEM Housings
  • Oil & Filter Change – Pennzoil Platnum HM Synthetic & Mobil 1 M-107A (160K)
  • Serviced Transfer Case – Amsoil Signature Series Synthetic ATF (160K)
  • Serviced Rear Differential – Amsoil Severe Gear Synthetic 75W-90, Lube Locker Gasket, & Replacement Cover (160K)
  • Serviced Front Differential – Amsoil Severe Gear Synthetic 75W-90 (160K)
  • Replaced Pitman Arm, Idler Arm, and Idler Bracket (161K)
  • Replace Turn Signal Flasher Module (161K)
  • Replace A/C Evaporator Core Case GM #88891577 & Actuator GM #52402599 (162K)
  • Upgraded the Front Brakes to NNBS Equipment (Calipers / Rotors / Pads)
  • Replaced Rear Brakes (Calipers / Rotors / Pads / Parking Shoes)
  • Replaced All Flex Brake Lines with Stainless Lines (Goodridge 6-line G-Stop)
  • Replaced Front & Rear Bump Stops
  • Replaced Front Ride Level Sensor
The To-Do List:
  • Service Transmission – Filter & Full Volume Replacement using Amsoil Signature Series Synthetic ATF
The Wish List:
  • Black Bear AutoCal Tune (Used AutoCal Purchased / Waiting to Purchase Tune)
  • Repair / Replace Damaged Hood

-mals
 
Last edited:
OP
OP
mals

mals

Full Access Member
Joined
Jun 18, 2016
Posts
332
Reaction score
362
Location
Western Mass
When I purchased my Yukon, I noticed that there was an exhaust leak at the manifolds. Once I really looked into it, I realized that it was because four of the bolts, both fronts and both backs, were broken off.

Three of the bolts were broken off at the bolthead with enough of the bolt stem proud of the head to work out after soaking them with PB Blaster daily for a week. The fourth one was broken off in the head, and needed to be drilled and ez-outed.

Once all the bolt holes were clear I replaced the exhaust gaskets with ACDelco 12617944 Gaskets, and replaced all the bolts with ARP 434-1202 Stainless Steel Header Bolts.

While I was doing that work I replaced the spark plugs, since I had them out make pulling the exhaust manifold easier. I also ended up needing to replace the coolant temp sensor (ACDelco 213-4333) after some how snapping it off while doing the work.

It's not a project I want to repeat, and hopefully using the ARP bolts will keep me from having to.
 
Last edited:
OP
OP
mals

mals

Full Access Member
Joined
Jun 18, 2016
Posts
332
Reaction score
362
Location
Western Mass
One thing that I didn't realize after only test driving my Yukon during the day was that most all of the incandescent bulbs in the dash and steering controls were burned out. In the end I ended up replacing the 8 mini-bulbs in the steering wheel controls, the 11 mini-bulbs in the heating control unit, the mini-bulbs and stepper motors in the gauge cluster, and reflowing the solder on the surface mount resistors to restore dim PRND321 display to full brightness.

I didn't think to take any photos while I was doing the work, but most of what I did was documented elsewhere. I used write ups found here and elsewhere and watched a bunch of youtube videos before tackling it. Here are some of the most useful:
All the bulbs and stepper motors were ordered from Amazon.
 
Last edited:
OP
OP
mals

mals

Full Access Member
Joined
Jun 18, 2016
Posts
332
Reaction score
362
Location
Western Mass
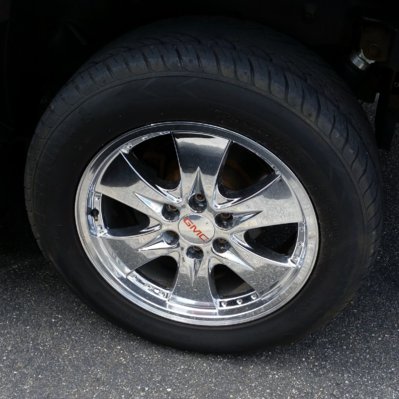
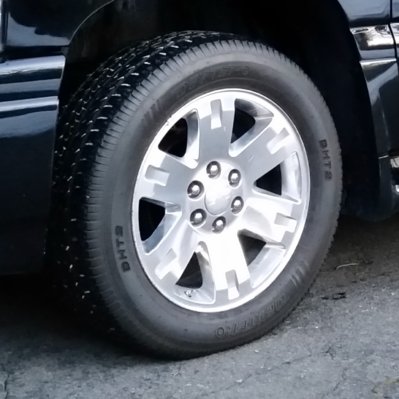
When I purchased my Yukon it had a set of dealer installed 20” six spoke GM 5239 wheels. They weren’t quite my style, and a life in New England salty winters had damaged them to the point that the chrome was flaking off. After months of searching Craigslist a set of NNBS 20” GM 5307 wheels off a 2014 Yukon came up. They were plasti-dipped black, and took the chance for $400 that they were in decent shape underneath. It was a real pain getting the plasti-dip off (WD-40 was the final solution), but I'm glad I took the gamble every time I walk up to it.

I moved the four tires that were on the Yukon over to the new wheel, and while they were remounting them I had four new ACDelco 15114379 TPMS sensors installed.

Before:

old_wheels.jpg

After:

5307_wheel.jpg

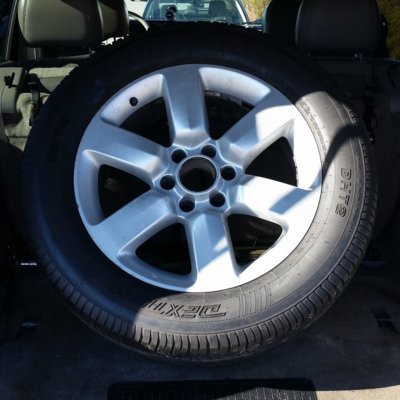
Since there was no spare under the vehicle when I purchased it I found a used tire on Ebay that matched the style and tread depth of the ones that came on my Yukon, and then picked up a 20" rim from a 2009 Nissan Titan at a salvage yard. I had them mounted and balanced as a full sized spare. Now I don't have to worry about damaging the AWD do to a difference in the spare’s diameter, and I have a spare that I feel comfortable using if I had to put it on while towing.

Titan Spare:

Titan_spare_wheel.jpg
 
Last edited:
OP
OP
mals

mals

Full Access Member
Joined
Jun 18, 2016
Posts
332
Reaction score
362
Location
Western Mass
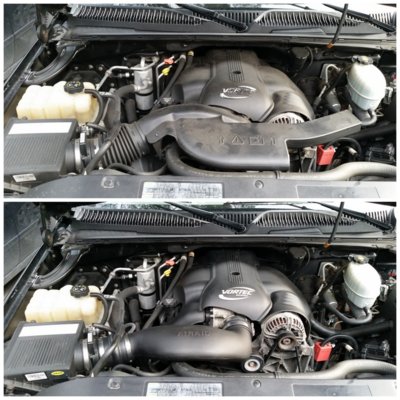
I picked up a nice clean Vortec 6000 cover from @TheAutumnWind for the cost of shipping plus some beer money. While I had it off, I thought it would be a good time to install a new intake tube, so I grabbed an Airaid MIT 200-919 from Advance Auto Parts. They list it for $145, but I stacked a 30% off coupon code and some of their SpeedPerks rewards ($20 & $5) that I had earned from previous purchases. I walked out the door with it for $81 in the end.

They two of them together really cleaned up the engine bay.

Airaid.jpg
 
Last edited:
OP
OP
mals

mals

Full Access Member
Joined
Jun 18, 2016
Posts
332
Reaction score
362
Location
Western Mass
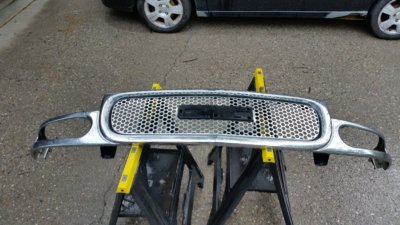
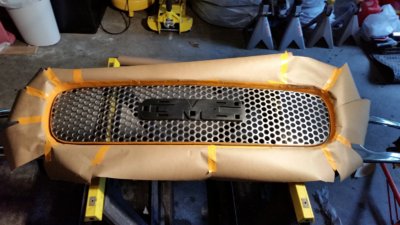
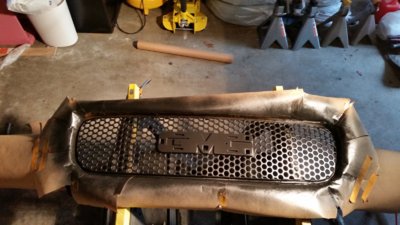
This grille was damaged when I got it last year, so I repaired the cracks with epoxy and sprayed it with a semi-gloss Rustoleum designed for plastic. I used Scotch Brite to clean the surface, and then wet sanded the the chrome mesh before I masked it off and painted it.

For the damaged struts between the main grille and the turn signal surrounds I used JB Weld epoxy. For the main break in the grille surround I embedded a 1"x4" piece of perforated steel in the epoxy to bridge the area.

2017-05-14 09.08.59.jpg

2017-05-14 10.04.45.jpg

2017-05-14 10.22.10.jpg

2017-05-14 10.58.59.jpg

2017-05-14 15.10.37.jpg

It was basically a test to see if I Iiked the look, which I do. If my repairs fail or the paint doesn't hold up I'll find a new grille and have it professionally painted, but for now they are both holding up well.
 
Last edited:
OP
OP
mals

mals

Full Access Member
Joined
Jun 18, 2016
Posts
332
Reaction score
362
Location
Western Mass
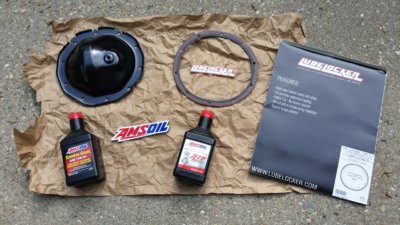
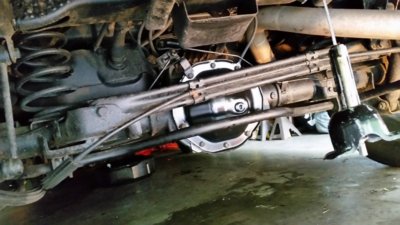
Changed the fluid in both my front and rear differentials and the transfer case. While I had it apart I installed a new cover on the rear diff and used a LubeLocker gasket when I put it back together.

2017-05-24 16.37.26.jpg

2017-05-24 17.34.50.jpg

This was my first servicing of the diffs and transfer case since buying the Yukon. The rear diff fluid looked fairly clean, and had been serviced before at some point. Only a little metal dust on the magnet. The front diff appeared to have never been serviced in the 160K on the vehicle. The fluid was dark and opaque. The magnet was covered in a thick layer of fuzzy metal shaving, but no metal chunks or chips.

The transfer case fluid looked clean, but the big surprise was about a quart of extra fluid came out when I opened the fill port before draining the case. A little research suggests that I have a bad input shaft seal on the transfer case and ATF from the transmission is making its way in. I've been keeping an eye on it now since the level in the case is where it should be, but haven't noticed a drop in the level of the transmission fluid.
 
Last edited:
OP
OP
mals

mals

Full Access Member
Joined
Jun 18, 2016
Posts
332
Reaction score
362
Location
Western Mass
When I purchased the Yukon one of the items on the to-do list was that the back HVAC did not work properly. I tracked it down to what I thought was a bad air blend door actuator. After watching some videos it seemed pretty straight forward, just removing all the interior trim and panels to actually get at it. Much simpler than getting to the passenger side front actuator that I replaced earlier.

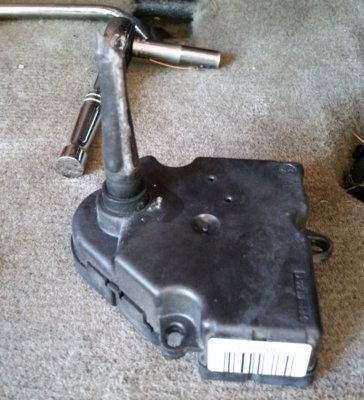
When I finally got to it, and pulled out the actuator to my surprise this is what I found:

2017-07-16 15.34.21_crop.jpg

The shaft came out with the actuator, and appears to be no longer attached to the blend door.

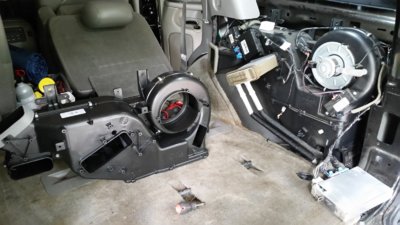
After watching this video, I decided just to replace the entire rear HVAC housing. For the price it was worth only having to do it once rather than attempting to repair the blend door, only to have it fail again later.

It was pretty straight forward, and I just moved step by step taking components off the old unit and transferring them to the new one. Even with taking my time, it only took about an hour to swap it out.

2017-07-22 14.00.11.jpg
 
Last edited:

Forum statistics

Threads
129,106
Posts
1,810,399
Members
92,184
Latest member
WhiteHorseBFD792
Top