adventurenali92
Full Access Member
That's impressive! I'm terrible with wires so those are things I wouldn't even attempt haha.
Disclaimer: Links on this page pointing to Amazon, eBay and other sites may include affiliate code. If you click them and make a purchase, we may earn a small commission.
You will have to unscrew it from the base off the windshield in order to take it apart. However it is super easy to take the mirror off the windshield. Take the little plastic cover that covers the wire off. And then unplug the wire harness from the back of a mirror. And then on the bottom side of the base where it's mounted to the windshield there's a little star patterned screw. Unscrew it and the whole mirror comes off the little mount and the mount stays in the glass. Its pretty simple. It's been a while since I have torn apart a center view mirror. Along the edge of the mirror housing there is a small plastic seam that runs all the way around the mirror. I believe that it's just a little speed clip type clips that hold it together and they can be popped apart with a flathead screwdriver. You just have to be very gentle and take your time.
If you are talking about the front overhead AC controls above the rearview mirror, those are wired in series. There are 4 bulbs, and wired in two sets of two. So if one bulb burns out, two bulbs will actually go out. When you wire those, wire them exactly like a 99-02 AC control panel. I have a write up on here explaining it. Use a 330 ohm resistor on each pair of LEDs, and make sure you have them wired in series a multimeter will help you trmendously for this part, helping you do continuity tests to see where each circuit goes, and which end is positive and which end is negative.
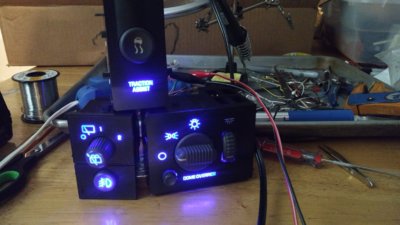
Read this thread and see if it helps. Just disregard the part about the separate lower panel, because your overhead control only has one panel in it. Just pay attention to the first part where I describe how to do the 4 LEDs on the main board. You need to do your panel EXACTLY like that.
http://www.tahoeyukonforum.com/thre...-yukon-ac-control-backlights-with-leds.16839/
I'm saying that the bulbs are wired in series just like that. So yeah, you will want to wire your LEDs exactly like that. I don't remember exactly which ones will need the resistors, but that's basically how you will want to set them up once you use your meter and find out which leg is positive.So, I'm a little confused and want to clarify something. You're saying to do it exactly like that piece in the link even though it's not the same part as the overhead controls and it's older than mine?
I'm saying that the bulbs are wired in series just like that. So yeah, you will want to wire your LEDs exactly like that. I don't remember exactly which ones will need the resistors, but that's basically how you will want to set them up once you use your meter and find out which leg is positive.
Okay. So any chance I can splice in that resistor in one of the wires like you did? That's a neat trick! It'd be nice to skip the resistors for each bulb
Does anybody know if the traction control (round button) is supposed to be back lit and can it be upgraded to LED?

