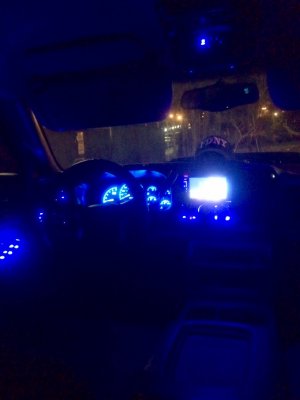
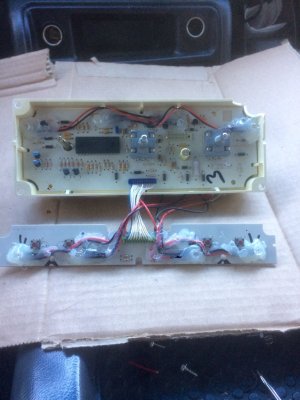
2001 tahoe swapping led to ac controls

Disclaimer: Links on this page pointing to Amazon, eBay and other sites may include affiliate code. If you click them and make a purchase, we may earn a small commission.

OP
OP
M

mbp1979

Full Access Member
Joined
Mar 13, 2016
Posts
253
Reaction score
115
Location
North Little Rock
I got it all lined out just had to put resistors on each led and finally just trace each circuit with a meter. Mine was the 99-02 with the auto control feature all the ones you see are the newer model like you have or the older like mine but without the auto feature just 1 through 5 thank you for trying to help a brother out.
 

Archer04

Member
Joined
Jan 24, 2017
Posts
67
Reaction score
31
I had to use resistors for each light, test polarity. Also be very careful with the soldering iron, it is easy to melt or cause a break in the card from the heat. I also used a 9v battery for testing, the way I did it was to connect a light with resistor to the board and then verify it lit up as well as any that were already connected. Kept that up til I got the last one done. Another thing to do is instead of desoldering the old light from the backside of the card is to cut the old bulb off from the front side and then solder to the old post, this will prevent from having to touch the card to remove the old solder. Finally I never said it was perfect, I did burn my card as mentioned and then had to troubleshoot to find where I needed to make a jump between the lights to get them to work, again this is where that 9v and leads come in handy.
 
OP
OP
M

mbp1979

Full Access Member
Joined
Mar 13, 2016
Posts
253
Reaction score
115
Location
North Little Rock
I had to use resistors for each light, test polarity. Also be very careful with the soldering iron, it is easy to melt or cause a break in the card from the heat. I also used a 9v battery for testing, the way I did it was to connect a light with resistor to the board and then verify it lit up as well as any that were already connected. Kept that up til I got the last one done. Another thing to do is instead of desoldering the old light from the backside of the card is to cut the old bulb off from the front side and then solder to the old post, this will prevent from having to touch the card to remove the old solder. Finally I never said it was perfect, I did burn my card as mentioned and then had to troubleshoot to find where I needed to make a jump between the lights to get them to work, again this is where that 9v and leads come in handy.

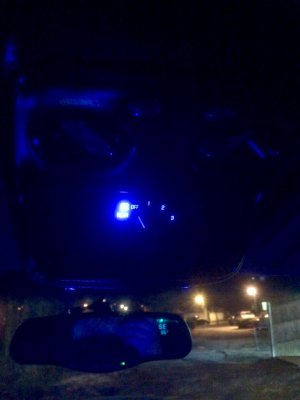
If you use fine tip on ur solder iron helps greatly when you remove and resolder the leds in the board if your using just a standard tip it's alot easier to screw up and put to much heat on it. Not that it doesn't or won't but definitely less room for error.
 

Archer04

Member
Joined
Jan 24, 2017
Posts
67
Reaction score
31
Yes and if your new to the use of a soldering iron and don't properly tin the tip and then keep it clean as you work this will also create problems and the potential to burn the board. Also like I said I tested after each LED was soldered on, be careful with that as well if you touch the wrong part of the board you can cause an arc which will short out the board.
 

Cattivo

Full Access Member
Joined
Dec 21, 2016
Posts
1,251
Reaction score
2,207
Location
The Concrete Jungle
I came up with a different method. If you want to change every bulb to blue led without ANY soldering, check out my build thread... page 12 starting at comment #119...for the upper controls, 4x4, headlight and fog light switches skip to page 15 comment# 143

A196.jpg

A197.jpg
 
Last edited:

Rocket Man

Mark
Supporting Member
Joined
Dec 25, 2014
Posts
25,965
Reaction score
50,651
Location
Oregon
I came up with a different method. If you want to change every bulb to blue led without ANY soldering, check out my build thread... page 12 starting at comment #119...for the upper controls, 4x4, headlight and fog light switches skip to page 15 comment# 143

View attachment 76178

View attachment 76179
That looks a bit too much, too bright. Let me guess- led strips?
 

Cattivo

Full Access Member
Joined
Dec 21, 2016
Posts
1,251
Reaction score
2,207
Location
The Concrete Jungle
That looks a bit too much, too bright. Let me guess- led strips?

They're 5mm blue led's, my phone takes really bad pics and makes them look brighter than they actually are. They would be the same brightness if I chose to solder them in. It's a perfect glow of blue throughout the cabin, not blinding at all

A170.jpg
 

Archer04

Member
Joined
Jan 24, 2017
Posts
67
Reaction score
31
I used the 5mm also in my build, but I did use 3mm in a few spots where I thought the bulb needed to be smaller. Also I used flat top blue LED in spots for better diffusion of light. Yours looks great, nice job @Cattivo
 

Forum statistics

Threads
129,174
Posts
1,811,648
Members
92,268
Latest member
willie110hh
Top