2" Leveling Kit Installation

Disclaimer: Links on this page pointing to Amazon, eBay and other sites may include affiliate code. If you click them and make a purchase, we may earn a small commission.

mikebrawn1

Member
Joined
Jan 19, 2015
Posts
30
Reaction score
0
Like somebody else said. You don't have to pull the ball joint or tie rod end off. Just pull bottom two bolts on strut and loosen sway bar link or remove if you desire and push down on rotor or caliper and you will have enough room to install the lift. Should only take a few minutes to complete. i just replaced my struts with quick struts and just pulled top nuts of strut, bottom two bolts and loosened sway bar end link. Very easy job. Took 5 minutes each side. Sits higher in the front but will settle down some.
 

bobbyf1989

TYF Newbie
Joined
Jan 11, 2016
Posts
5
Reaction score
0
Step 18

Using the floor jack, raise the lower control arm to reconnect the upper ball joint. Just start the nut to hold it together at this time.

D32C3B80-4607-478E-A915-34F3708FCEF3-255-000000192F1D96FF_zpsdf0d7afd.jpg


Step 19

Using a 17mm socket and 17mm wrench, tighten the bolts and nuts.

527617AB-E710-4970-B1BD-67BBC927C993-255-00000019312FFCDB_zps1a4b3110.jpg


Step 20

Using a 10mm wrench on the tip of the tie rod stud to prevent it from spinning and a 21mm wrench on the nut, tighten the nut.

92123D59-8989-40D4-8A2E-46EA23F25612-255-0000001932FDB075_zpsc3a521a3.jpg


Step 21

Using a 7/32 allen wrench on the underside of the ball joint stud to prevent it from spinning and an 18mm wrench on the nut, tighten the nut.

732B70E1-5214-44FE-B578-2D9B4D73DB1C-255-00000019350AEF89_zps1c37772d.jpg


Step 22

Reinstall the swaybar link using the 15mm socket and wrench.

E0296F11-D451-4921-B5DC-0787F06C0018-255-000000191A97DED2_zps08c0747b.jpg


Step 23

Reconnect the ABS wire.


Step 24

Reinstall the wheel/tire


Step 25

Lower vehicle back to the ground and torque lug nuts.


Step 26

Reinstall the center wheel cap.


Repeat on opposite side.
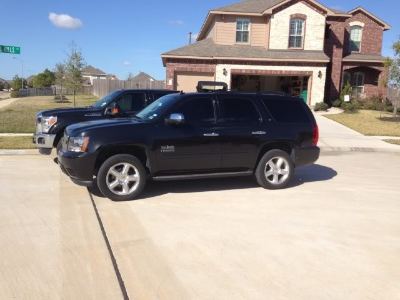


2A6BB2C6-BBA0-441C-AF8D-7A9A3CD87D1F-255-000000193711FEAD_zpscb80f50b.jpg

13605642-49F8-4BE2-9F28-356E13AF4CD5-255-0000001938E2081A_zpsef0204c1.jpg
Thanks again, nice write up
 

Wake

Full Access Member
Joined
Feb 14, 2012
Posts
418
Reaction score
20
Location
Stafford, VA
One thing to add that I didn't see here is that the drive characteristics will change if your vehicle has the active suspension Z55/Z95.

On my Escalade I added the 1.5" spacer and the ride went to crap, very harsh. Going over small dropoffs and the front tires would squeak as they lost contact on the transition from the higher to the lower surfaces. After checking a few items I noticed that the ride control sensor on the front UCAs were extended further than prior to the leveling kit. It makes sense since the suspension is now extended further than stock.

I purchased longer bolts for where the ride control sensor arm bolts to the UCA and a small 1/2" spacer to place underneath it, raising the ride control's sensor arm higher, back to where it was at stock ride height. The ride went back to stock comfort now that the computer didn't see the front suspension over extended. The stock bolts at the sensor are too short to add any spacer under the sensor mount so you'll need new bolts. M6-1.0 x 40 for the bolts and nylon 1/2" spacers and also some lock nuts for the other end, all found at my local Home Depot. About $8 and I had my good ride back.

Before installing one of these leveling kits on an suspension with ride control I suggest taking a picture of the orientation of the ride control sensor arm and measuring what size spacer you'd need to compensate for the further extended suspension. You'll need to duplicate that setting once you get the leveling kit in or you'll lose a lot of ride quality.
 

Cristian_Zamora

TYF Newbie
Joined
Dec 22, 2016
Posts
6
Reaction score
0
One thing to add that I didn't see here is that the drive characteristics will change if your vehicle has the active suspension Z55/Z95.

On my Escalade I added the 1.5" spacer and the ride went to crap, very harsh. Going over small dropoffs and the front tires would squeak as they lost contact on the transition from the higher to the lower surfaces. After checking a few items I noticed that the ride control sensor on the front UCAs were extended further than prior to the leveling kit. It makes sense since the suspension is now extended further than stock.

I purchased longer bolts for where the ride control sensor arm bolts to the UCA and a small 1/2" spacer to place underneath it, raising the ride control's sensor arm higher, back to where it was at stock ride height. The ride went back to stock comfort now that the computer didn't see the front suspension over extended. The stock bolts at the sensor are too short to add any spacer under the sensor mount so you'll need new bolts. M6-1.0 x 40 for the bolts and nylon 1/2" spacers and also some lock nuts for the other end, all found at my local Home Depot. About $8 and I had my good ride back.

Before installing one of these leveling kits on an suspension with ride control I suggest taking a picture of the orientation of the ride control sensor arm and measuring what size spacer you'd need to compensate for the further extended suspension. You'll need to duplicate that setting once you get the leveling kit in or you'll lose a lot of ride quality.

I've got a 2012 Tahoe LTZ that I'll be putting a 2.5" front, 1.5" rear kit on. The ride on this thing is already shit, I mean rough, and I mean rough. But I'm getting into this Tahoe coming out of a Range Rover, so my idea of soft may be slightly unattainable with this Tahoe. Looking at the ride control sensor setup, I don't see where you could add a longer bolt. I can see where removing the original rod and replacing it with a longer piece of threaded rod would work, but a longer bolt? Could you take some pictures of what you did and post them here?

As far as the rear, I was planning on doing the same thing at the rear since I'm also lifting it.
 

D R Bishop

TYF Newbie
Joined
Nov 23, 2016
Posts
9
Reaction score
21
Location
Mill Spring NC
Hi all I just wanted to share my install of the RC 2" level kit on the front of my 09 Yukon Denali XL. With the help of my son all I did was jack the front up and place on stands. I unbolted the two bolts on the bottom of the strut. I then placed a long bar across the top of the tire into the coil housing and had my son push down. It opened the gap rite up and I slid the spacer in with no problems. Job took 15 mins and that was taking my time to secure it on the jack stands. I only had to removed the two nuts and bolts and replace, Done :favorites37:
 

Forum statistics

Threads
129,201
Posts
1,812,019
Members
92,302
Latest member
rjhorst14

Latest posts

Top